I got my craft skills and my maniac need to finish what I start as quickly as possible from my mama. Typically, my mom does big crafts like building a glass block wall in her shower and stenciling entire rooms. A few weekends ago, she bought a new wood coffee table, and decided it needed a little spunk. She made that table over in a night’s time.
She was inspired my desk makeover that we did together a few years ago. If you’ve been reading for awhile, you might remember this sucker. We used stain to create the diamond effect. It happened because we bought the table for super cheap partly because of a ring stain in the lower left hand corner of the table… you can still see it a little:
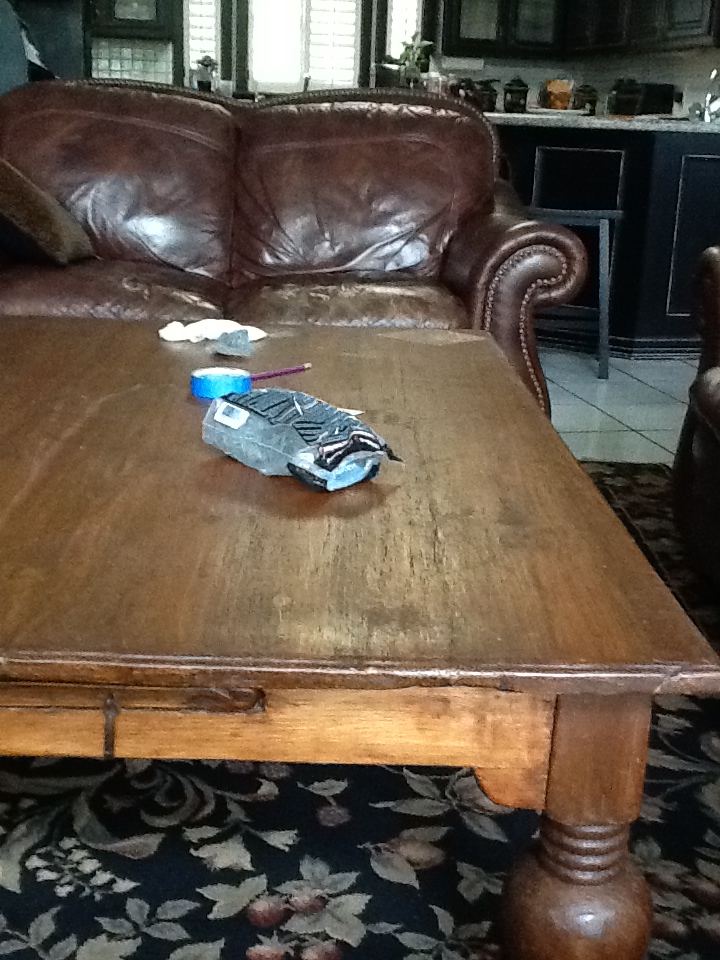
My mom achieved a similar look with a way different process. Here is what she started with:
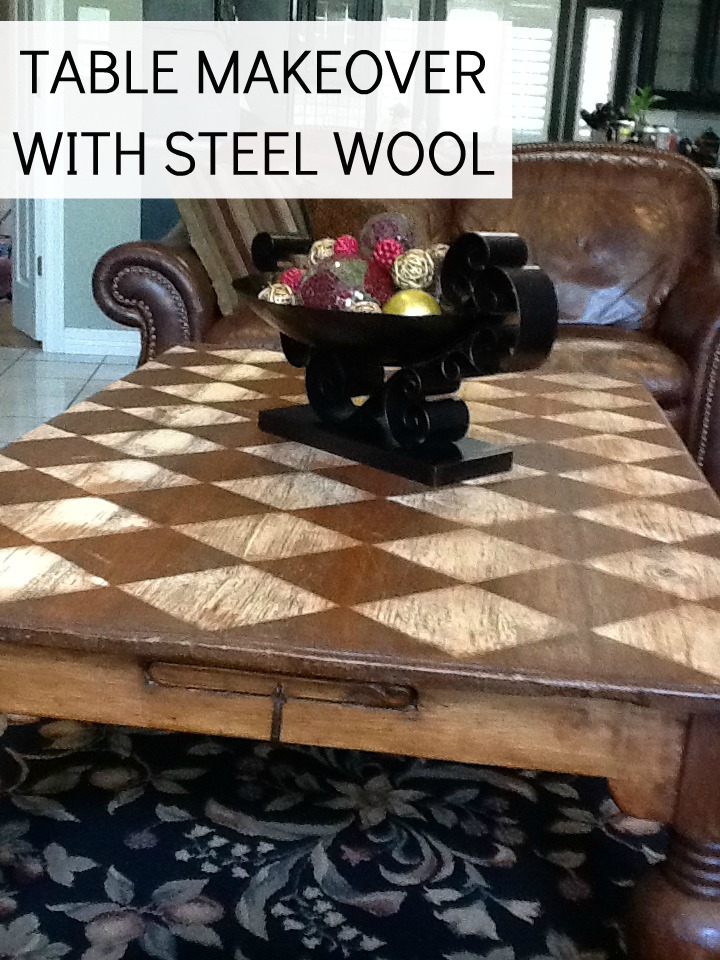
And here is the end product. Pretty awesome, huh? You might remember the minute by minute updates on C.R.A.F.T. facebook. My mom was loving the comments and likes 🙂 I finally got her on facebook! (The Smith family got caller ID 2 years ago, and my parents don’t do cell phones!) Anywho, I asked my mom to put together a tutorial, and here we are!
Here’s what you need to create this look:
- Fine or medium sandpaper
- Steel wool
- Mouse sander
- Cloths
- Vacuum
- Tungsten oil finish
- Blue painters tape
- Ruler
- Yard stick
- Pencil
- Pickled oak stain
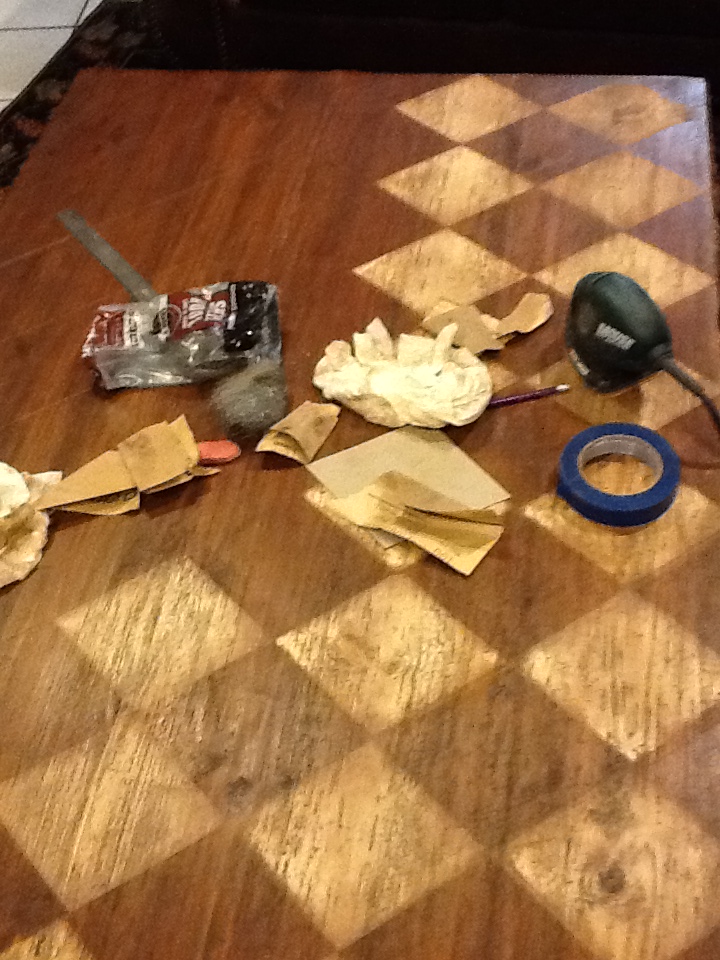
My mom says, “The table needs to have a rough finish with not much sheen. My table was made of pine with a dark finish and lots of distressing. Measure your table and create a diamond that exactly fits. (I goofed up on this.) I thought I had it configured correctly, but I should have laid it all out first. I did this project in my house, but it would have been better to take the mess outside. Not only is TX 100 degrees outside, but I don’t think my neighbors would appreciate power tool rucks in the middle of the night!”
Here are the steps my mom used to give her coffee table the checkerboard look:
1. Create diamond pattern out of thin, stiff cardboard.
2. Use pattern, to lay out your design on the table
3. If you are confident the design will fit, begin in a corner marking lightly with a pencil where the first diamond should go. I marked about 4 diamonds at a time.
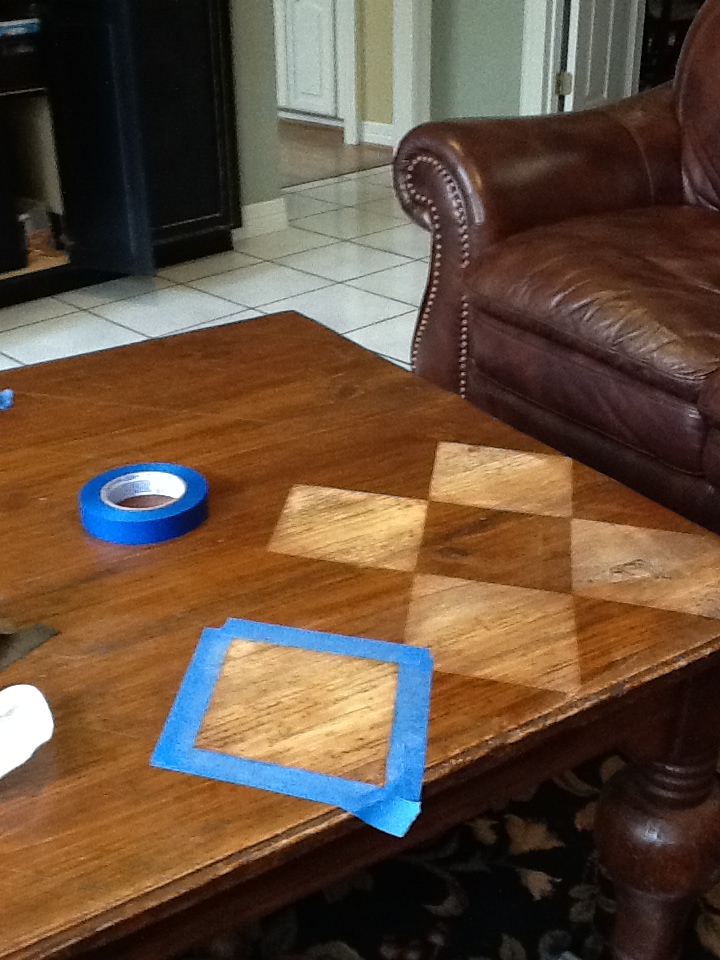
4. Then using the blue painters tape to carefully place the tape on the outside edge of the diamond, overlapping the tape.
5. Now, using the steel wool begin roughing up the finish. Next, use the vacuum to pick up the sanding dust.
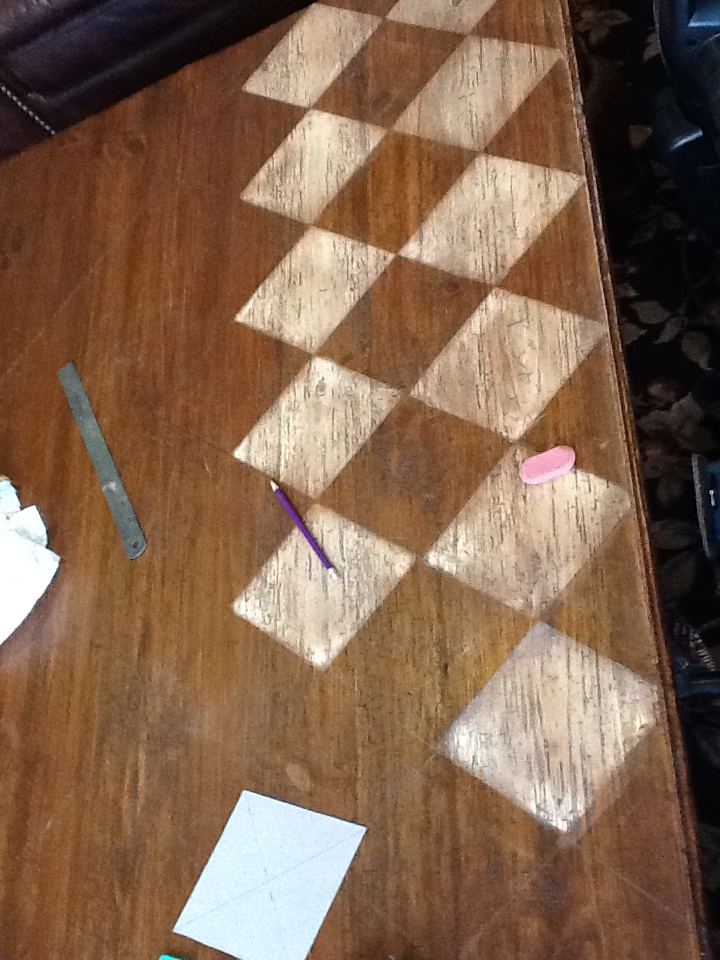
6. Use the mouse sander and be careful to stay within the blue tape marks. Use the vacuum to get rid of dust so you can see what your doing. Once you begin to see raw wood you can quit and move to next diamond. I constantly wiped with a clean cloth and used my vacuum.
7. Continue this until all diamonds are made.
8. Once your pattern is completed, thoroughly clean the top of the table with a damp cloth. Let it dry completely. This could be the end of the process for you. Just add tung oil and admire! This is the table before any stain or oil…
9. I wanted my diamonds to be a little more subdued so I put pickled oak stain on top of the whole table. I applied this with a clean cloth. I first used some old English and totally screwed up a few diamonds. It was way to dark. I had to go back and re- sand a few diamonds. The pickled oak stain worked great. Next, I used the tung oil.
She loves it, and I do too! What do you think, better after?
Have you ever used steel wool to take paint off in a pattern? It’s certainly less expensive than staining and way less smelly!

Comments & Reviews
Thanks for Saying, “I try my best”, to Harley. We’re all doing our best, now more than ever. Sweet idea! It really got my mind thinking of different patterns to use, and I think this pattern used very subtly would be beautiful too. Thank you for sharing your ideas! ❣️
SIMPLY STUNNING!!!!!
I, too LOVE STEEL WOOL!!
Have You ever tried breaking it up and soaking it in Cleaning Vinegar ( Dollar Tree)
the longer it soaks in a lidded container the more the RUST effect is created!!
I redid an End table with it last year and still LOVE IT!!
I have not seen the Harlequin pattern achieved so creatively and budget friendly though.
This transformation was definitely worth the fuss and effort, it looks AMAZING!!
I LOVE outside the box creativity it makes upcycling that much more fun!!
I also found You through HOME TALK and am so pleased I did!!
Blessings from the North,
xo Michelle
Just picked up an end table and will give this method a go!!
If you are going to moderate comments, i.e. post once you’ve reviewed, and then not going to bother to answer questions or respond to comments, you should be considerate of your readers and C L O S E the comments section for a post. It is inconsiderate to leave your readers hanging. I’ve checked back numerous times for a response and have been left wanting. Unfollowing & unpinning.
Hi Harley! I try my best to answer all of the questions in comments, but sometimes they slip through the cracks. I’m sorry about that! What was your question?
I would love to do this but with dark blue and white. I have an oak sofa table just waiting for transformation. Any ideas as to how I might accomplish this? In addition to the harlequin pattern on the table top, I also want to stencil a quote on the edge below the table top.
To do 2 colors, I would just paint the top white and then use painters tape and paint on the blue pattern! Leave a space on one end for the quote you like and use a stencil for that also!
I Love It!!! Thanks for Sharing:-) I hope to eventually do one for myself
You could use any design you like. Fun!