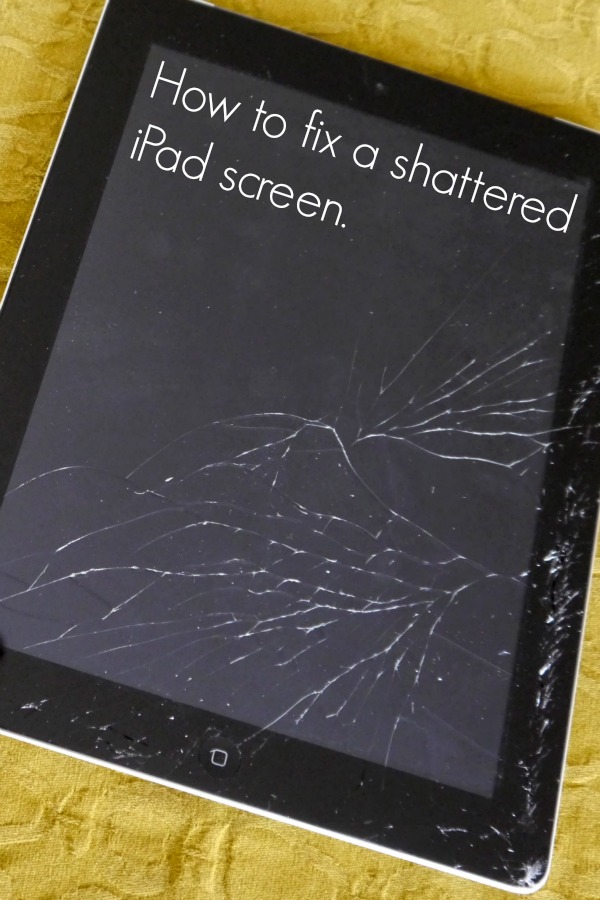
We have a few Apple products here in Casa de Dorobek. And well, we’ve sadly broken most of them at some point or another. Andy has now fixed 5 screens for us with this how to fix a broken iPhone screen tutorial on C.R.A.F.T. Sadly, Andy recently dropped his iPad and shattered that screen too. He figured it was time to learn a new trick and he embarked on the journey to DIY his shattered iPad screen for only $27. We did a quick google search, and found that it could cost up to $200 to have your iPad screen repaired, yikes! So, I’m here to tell you that you can fix your iPad screen yourself and save lots of bacon!
Note: This iPad screen tutorial is for the 2nd generation iPad.
Materials:
- iPad screen kit (most of these come with the tool kit seen below) TIP: The iPads look similar from version to version, but be sure and order the screen that is specific to your iPad model. Also, when purchasing your screen, you want to make sure it comes with the adhesive pre-installed. The kit should cost between $25-$30 bucks. Here
 is the kit Andy bought to fix his iPad screen.
 - hairdryer
- kitchen towel (or work mat)
- vacuum to suck up glass
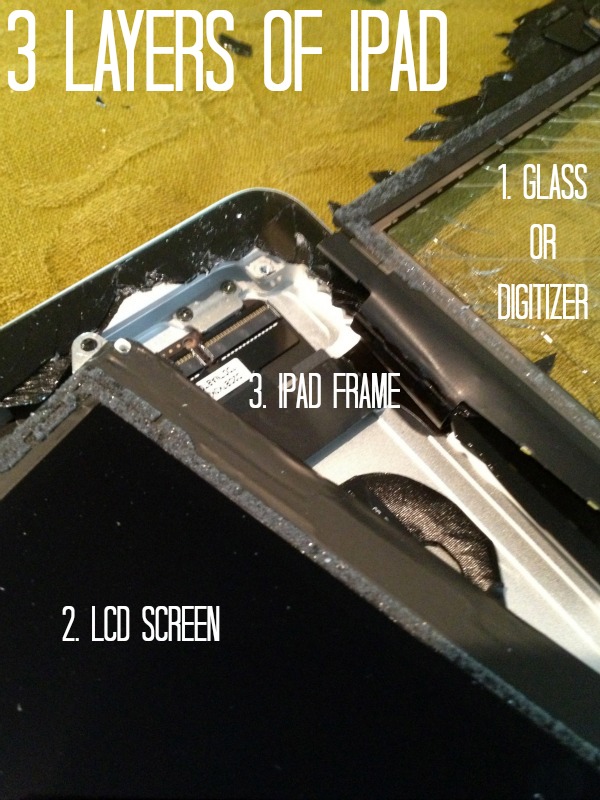
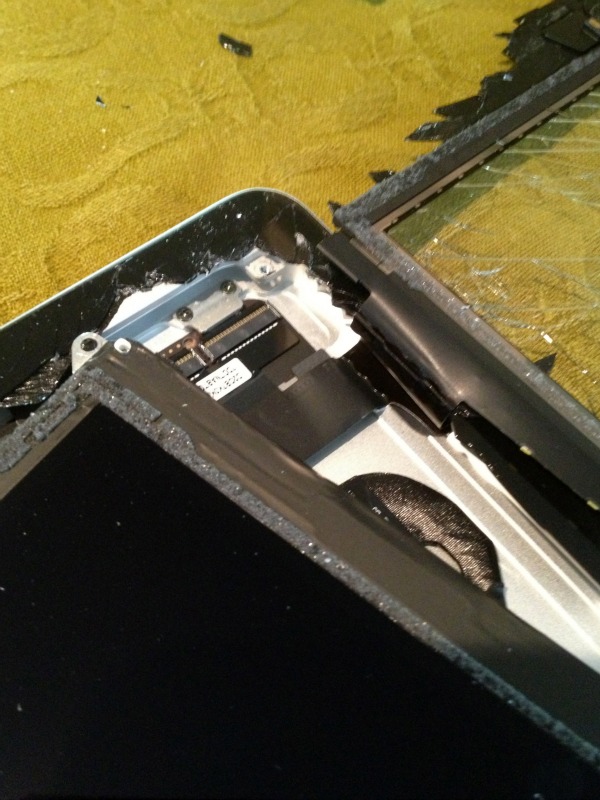
Another thing that is helpful to understand before attempting this iPad fix is that there are 3 layers to an iPad. The layers are:
- Glass (he says digitizer in the video)
- The LCD screen. This is what actually displays the picture.
- The computer parts and the frame of the iPad
Here they are in picture form:
1. First, heat the edge of the iPad with a hairdryer because you need to loosen the glue that holds the glass to the frame of the iPad.

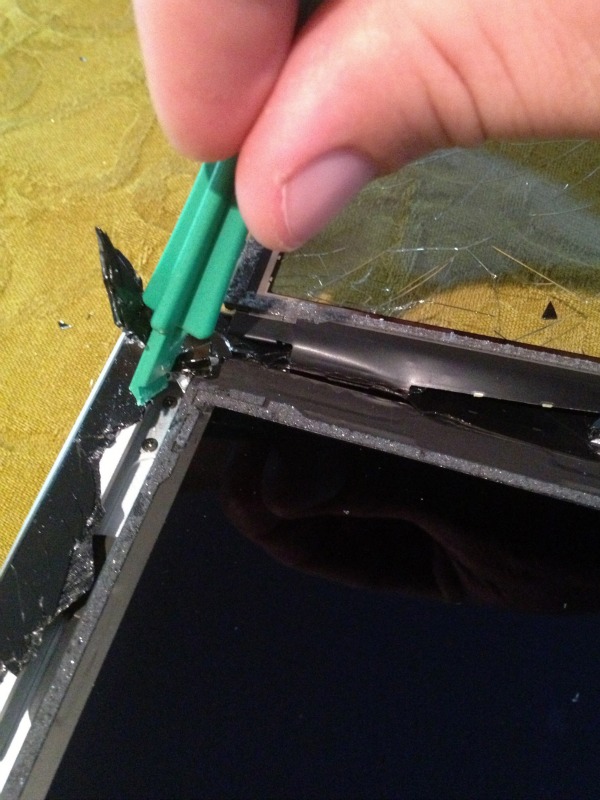
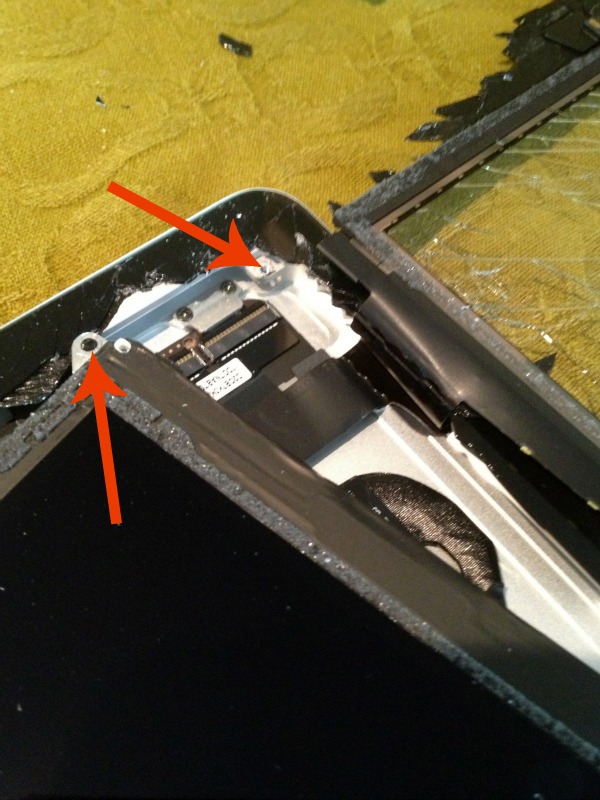
2. Start removing the glass from the iPad with the blue guitar pick looking tool. Andy also used the mini flat head screw driver to do this step. Depending on the severity of your break, this could take anywhere from 10 minutes to 2 hours. Make sure that you remove every piece of glass. Be gentle. Note: The Wi-Fi antenna is also adhered to the body and needs to stay with the body when the glass is separated. Watch the video below at 2:50 to see how to separate the Wi-Fi antenna from the glass.
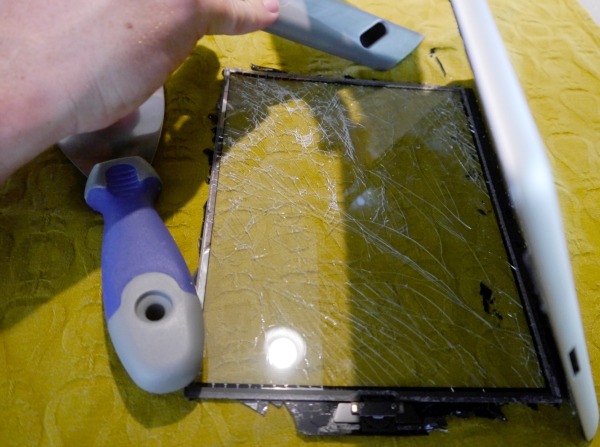
3. Continue removing glass from the screen and body. Andy used the green tool seen below and the mini flat head screw driver. Like I said above, depending on the severity of the break this can take up to 2 hours… Andy spent a good hour and half removing glass. He also used a vacuum cleaner to suck up tiny shards that he could not pick up with his hand.
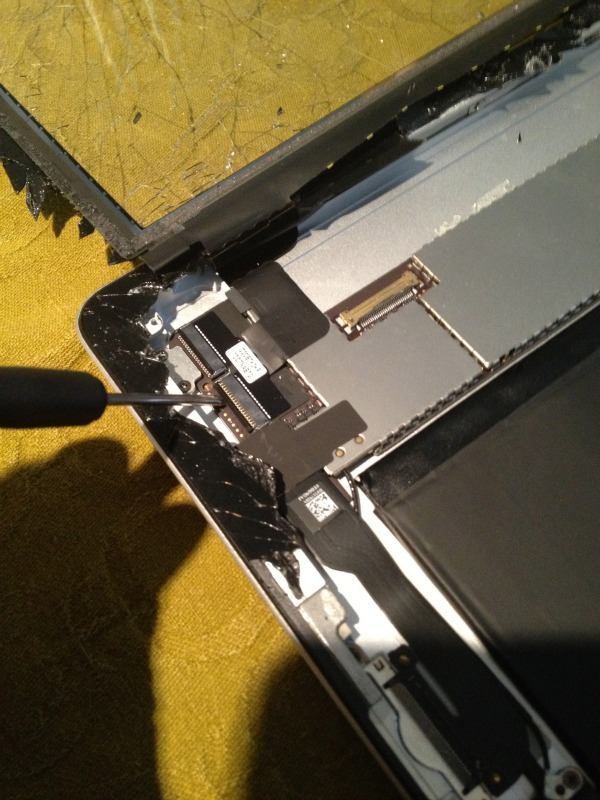
4. After you remove all of the glass (or digitizer as he calls it in the video) you will need to remove the LCD screen by un screwing 4 screws on the corner of the iPad. Watch 3:25 in the video below for more deets on this part. Here is one of the screws and you can also the 3 layers of the iPad in this pic:
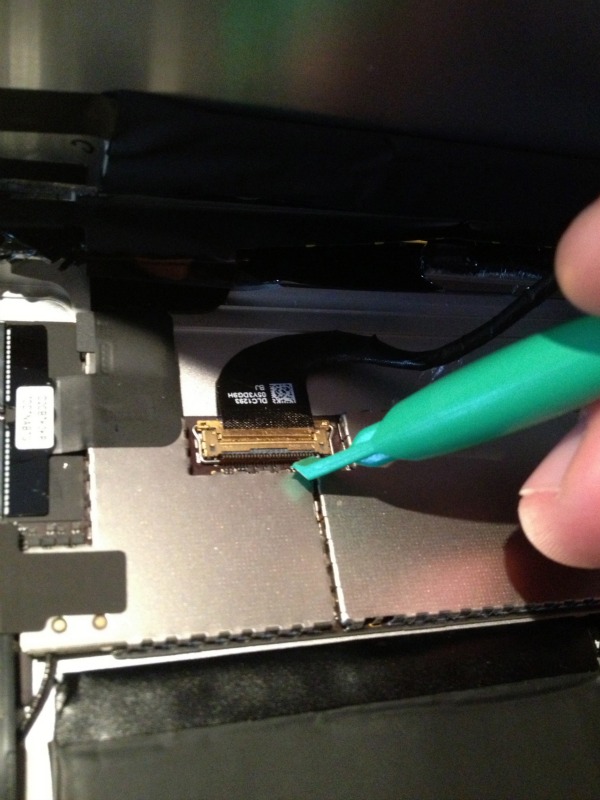
5. Use green tool to disconnect the video connector and disconnect the LCD screen. Watch at 3:37 in the video for more info on this part.
6. Open both digitizer latches carefully with the mini screwdriver. This will completely separate the glass (or digitizer) from the iPad frame.
7. At this point, make sure that there is no remaining glass on the iPad frame. You can try flipping the frame upside down to get remaining shards out.
8. The hard work is over! Now it’s time to attach the new glass! Repeat steps 4,5,6, in reverse order! A few tips:
- Make sure you don’t have any fingerprints on the LCD screen or the inside of the new glass. These will be impossible to remove once you reassemble your iPad.
- Also, once you reconnect the LCD screen, turn on the iPad to make sure that the screen is connected properly.
Here is the video Andy watched to learn how to repair his iPad screen and also the video I referenced a lot above.

Comments & Reviews
My iPad 2 screen just shattered and it is the school’s. Do you think that they have warrantys in place for this kind of thing? Or should I just fix it myself.
I was hiking with some friends, and I dropped my iPhone, which I figure is similar to an iPad, and cracked the screen. Thanks for pointing out that it has three layers: the computer parts and frame, the LCD screen, and the glass. Your article is very thorough, but I just don’t think that I could do it myself, so I’ll have to find someone who could replace it for me.
Do you know how to fix a screen on a iPod???
This is really fantastically a well put together guide. I’m going to buy my wife an iPad for her birthday, so it’s really handy to know what to do if the glass breaks !! THANK YOU !! One thought i had was,if you use the vacuum cleaner for the smaller pieces of glass, is there any danger from the static electric that can be produced (to the hard disk) ?
Kind regards Jonathan Sandberg
You definitely have to be careful with ESD safety and open electronics. Technically this entire process should only be preformed if the person opening the unit is grounded otherwise any electrostatic discharge could cause instant damage to either the board, the hard drive or both. Just be careful of what clothing is worn while completing this, what is around you (plastic bags etc) anything that causes static could be detrimental.
Hey Jamie, great guide for the iPad 2. I actually just finished a similar video guide for the iPad 3. Take a look at it, see what you think. In the next week we will be launching a downloadable step by step version of the video guide you can check out below.
If you like it, share it. Let me know what you think!
http://ipadscreenrepair.com/ipad-3-screen-repair-video/
Thanks for sharing a link to fix the iPad 3!
Hoping that I never need to use this, but pinning it just in case! Thanks for sharing, Jamie! 🙂
Thanks for pinning 🙂 I hope you never need it either!
What a phenomenal idea!
I think it’s also important to let people know that if they do this, they are voiding any kind of warranty that they do have with their iPad/iPhone/iPod. The second you open the hardware of the device at home, any APP or limited warranties are nulled.
Love the idea behind it! But just wanted to give a head’s up!
~Cathy~
Our iPad is super old so that didn’t occur to me! But, very true! Thanks for the reminder!
That’s true and important to inform but I am pretty sure that anyone resorting to DIY, has an expired warranty or non at all.
Yes, you would obviously only DIY it if you don’t have warranty or insurance!