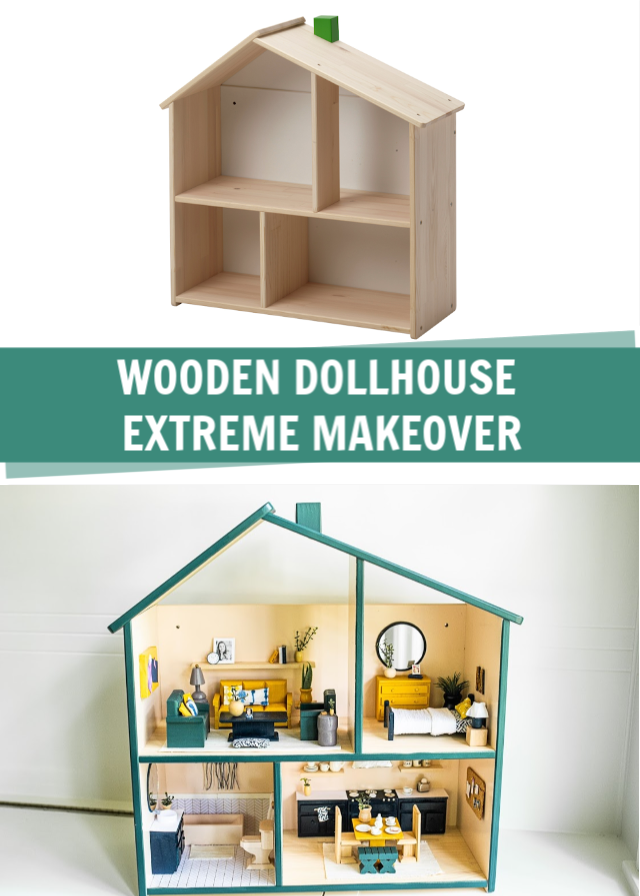
If you’ve never made a dollhouse or dollhouse accessories, you’re in for a treat! Mini things are my new favorite thing to make. My 3 year-old daughter started the obsession, and I couldn’t be happier that she loves it just as much as me. I teamed up with Home Depot and Rust-Oleum to give this simple wooden dollhouse a major makeover.
Supplies to make the DIY dollhouse
The great thing about this DIY doll house build is you don’t need a saw or any tools for that matter! You will need a wooden IKEA doll house. This tutorial is more of a dollhouse renovation or how to turn a super simple wooden shell of a house into an adorable dollhouse!
- A wooden IKEA dollhouse (This one would work great too!)
- 5 cans of Rust-Oleum spray paint:
- Rust-Oleum 2X Satin Deep Forest Green
- Rust-Oleum 2X Gloss Pink Peony
- Rust-Oleum 2X Satin Midnight Blue
- Rust-Oleum Stops Rust Tuscan Sun
- Rust-Oleum 2X Satin Silver Lilac
- Wood dollhouse furniture (This is a great set!)
- Painters tape

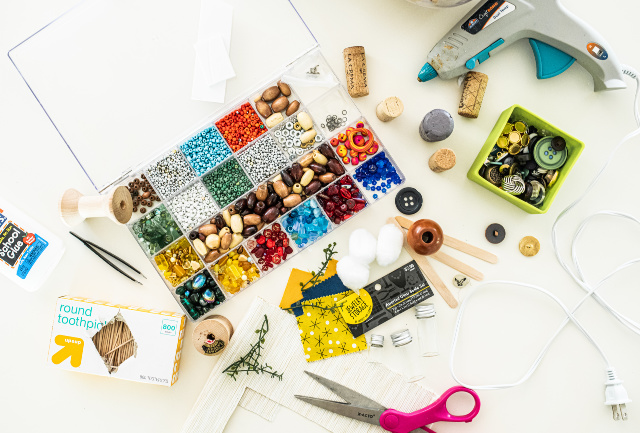
Supplies needed to make DIY dollhouse accessories
It’s helpful to have all of the supplies gathered in one spot. Once you get started, you’ll never look at random lids and boxes the same. For instance, a toothpaste lid can be a lampshade, an empty iPhone box turned into a refrigerator, or who knew a jewelry gift box was the perfect size for a bed!
- Beads- I used wooden beads of varying sizes and small silver beads the most.
- 1 cork coaster
- Toothpicks- These make great kitchen towel racks or mini macrame hangings.
- Buttons- I used these to accessorize the stove and make a clock.
- Fabric scraps- These are perfect for making pillows, towels, rugs, and bedding.
- Cotton balls- Use these for pillow stuffing.
- Small scraps of cardboard or foam board
- Tin foil- I used tin foil and foam board to make an exhaust hood.
- Hot glue gun
- Tweezers
- Rust-Oleum spray paint- I used deep forest, pink peony, midnight blue, tuscan sun, and silver lilac
How to make a DIY dollhouse
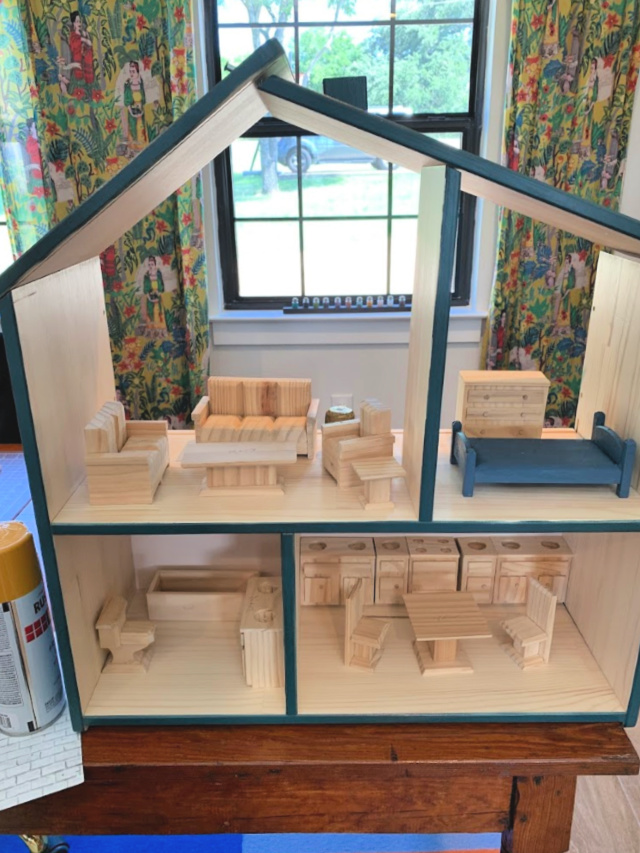
Making a dollhouse is at a 2 step process. First, you need to make and paint the actual house. Then, it’s time to decorate! I used Rust-Oleum spray paint to do both! Here’s the best before picture I have of the dollhouse pre spray painting.
Step 1- Put the dollhouse together
This is an important step so that you know what pieces go where. Label each peice with a pencil. Be sure to label the front, back, and edge of each individual peice. Every edge and side should say either pink, green, or none.
Step 2- Spray paint the dollhouse frame
Painting the dollhouse takes patience, but it is well worth it! Here are a few tips for spray painting the dollhouse frame.
- Spray paint 8 edges with Rust-Oleum 2X Satin Deep Forest Green using the technique in the picture below.
- Place all of the wood pieces together and tape off the ends to ensure the overspray does not disturb the other pieces.
- Use a brick or large rock to lean the stack of wood pieces against and allow the edges to be sprayed.

Step 3- Spray paint the outside frame.
Using the same Deep Forrest spray paint, to spray the outside of the doll house, including the roof.
Step 4- Spray paint the walls pink
Once you are done with the Deep Forrest spray paint, I recommend putting the house together again. You don’t necessarily have to screw it all together, simply lay it out on the floor so that you know what pieces go where. Make sure you did not miss any edges or sides.
Now, it’s time to spray paint the walls of the dollhouse. The dollhouse needs to be back in pieces for this part. There should be 4 one-sided pieces plus the 2 small pieces that divide the dollhouse into rooms. Only the 2, small middle pieces need to be sprayed on both sides. I used Rust-Oleum 2X Gloss Pink Peony to spray paint the inside walls and back of the dollhouse.
Step 5- Assemble the dollhouse
Assemble the dollhouse according to the instructions. If you need to do touch ups use painters tape and paper to cover the part of the house not being sprayed. If you have any access paint on the floors of the dollhouse, use a high grit sandpaper to get the remove access paint. Also, as you can tell from the picture below I decided to leave the top triangle out of my dollhouse.

How to Make Dollhouse Accessories
Now, that the dollhouse shell is completed, it’s time for the real fun to begin! My local friend, Kate, has an incredible Instagram feed called @domestikatethis where she recreates her real life in mini. I spent a morning at her house and she taught me tons of tips and tricks for decorating a dollhouse. She even gave me the wooden dollhouse furniture, fabric samples, tiny wooden pots, and clippings from her faux plant to get me started. Don’t miss this post for tons more on how to make dollhouse accessories!
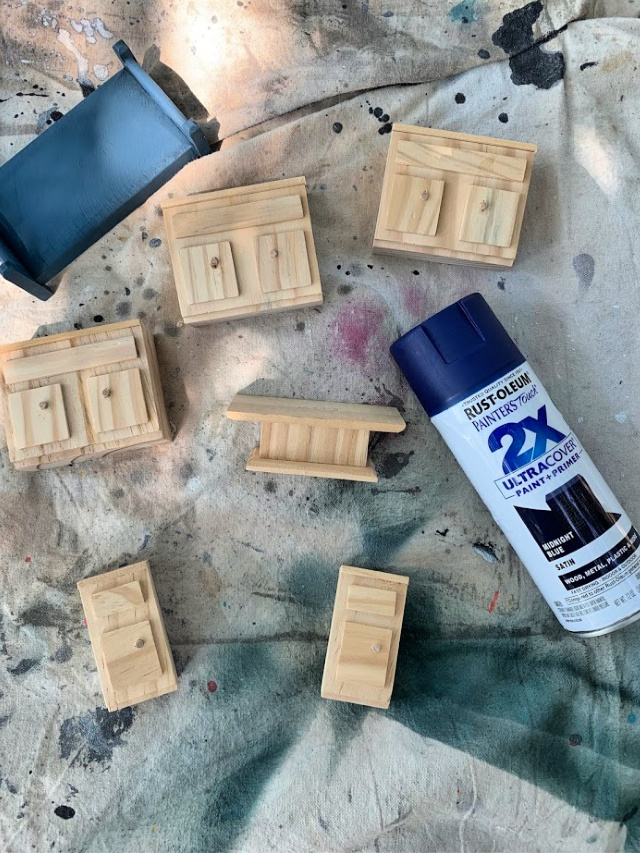
Step 1- Spray paint the dollhouse furniture
Once your dollhouse shell is completed place all of the furniture in the house and decide on the function of each room. Next, use a pencil to write the color each item is to be spray painted. I recommend sticking with a color scheme of 3-5 colors. The Rust-Oleum spray paint covers very well with a single coat. You will need to turn each piece of furniture to get every side.
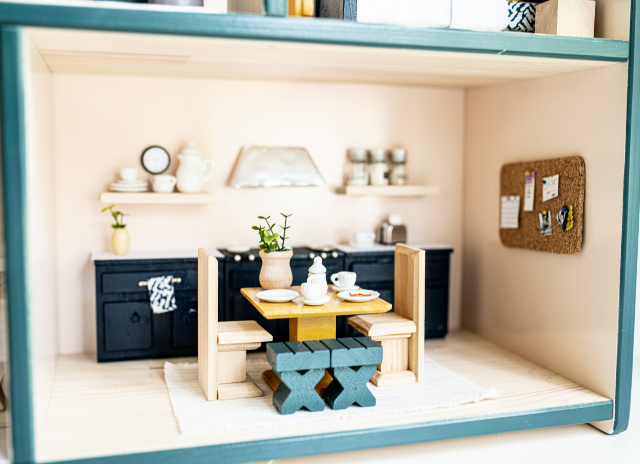
Step 2- Accessorize the dollhouse kitchen
Now, it is time for the fun part- decorate the dollhouse! I wrote an entire blog post about DIY dollhouse accessories, but here a few simple things you can do to spruce up any dollhouse kitchen.
- Dollhouse cork board: I cut a square cork coaster in half and rounded the edges with scissors. I added a tiny calendar, grocery list, picture, child’s art work, and even fabric swatches from the dollhouse living room to the cork board. I cut sewing push pins off to use as a tacks, and then hot glued the entire cork board to the wall.
- Dollhouse vent hood: The vent hood is a trapezoid shaped peice of foam board covered in tin foil and hot glued to the wall. It is really that simple!
- Toothpick towel rack: I cut the pointy ends off of a toothpick and hot glued a tiny silver beads to each end. Next, fold a scrap piece of rectangular cut fabric over the toothpick and hot glued the entire thing to the front of the cabinet.
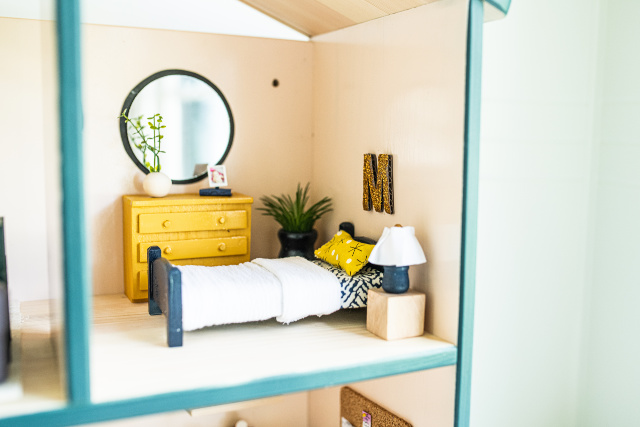
Step 3- Accessorize the dollhouse bedroom
- Monogramed Letter “M”: I cut the letter “M” out of cardboard and used Mod Podge and glitter to give it sparkle.
- Pillows: Cut a small rectangle out of a fabric scrap and hot glue together 3 sides. Stuff it with a cotton ball and hot glue the last side.
- Lamp: To make the lamp, I spray painted a small wooden pot Rust-Oleum Midnight Blue. Then, hot glued a scrap of white, pleated ribbon around a wooden bead and used hot glue to attach the wooden ball to the pot. Lastly, I used hot glue to add a tiny bead to the top of the lamp.
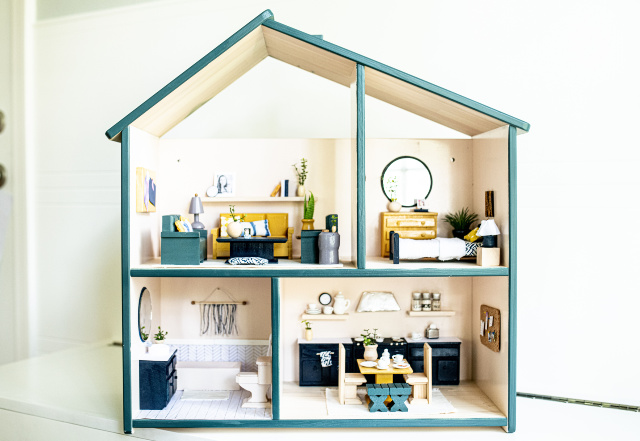
We love how the dollhouse turned out! Here are all of the colors of the dollhouse furniture in one spot:
- The large yellow couch, yellow dresser, and yellow kitchen table are all sprayed Rust-Oleum Tuscan Sun.
- The coffee table, bed, kitchen cabinets, and bathroom vanity are spray painted Rust-Oleum Midnight Blue.
- The love seat and chair in the living room and kitchen bench is painted the same color as the outside of the house, Rust-Oleum Deep Forest.
- The bathtub and toilet are Rust-Oleum Pink Peony, the same color as the walls of the dollhouse
- I used Rust-Oleum Silver Lilac on the lamp and side tables in the living room.
Both my 3 year old daughter and my 5 year old son have been enjoying all things mini in the dollhouse. The best part? Nothing is too delicate or expensive for the kids to enjoy. I love that they love the DIY dollhouse and I’m sure we will continue to add details to it as they see fit.

In the picture above, you can see the kids added tiny unicorns to the house! Have you ever made a dollhouse or dollhouse accessories? I’d love to hear…

Comments & Reviews
This dollhouse makeover came out so nicely. I love how you gave it new life. Your kids will get years of fun out of that!
I really got into miniatures many years ago – built the furniture, covered it, wall papered, made punch rugs and now have a 1/2 built 8 room dollhouse I must finish, soon. Fun stuff,
Wow! That sounds amazing! I definitely did not make everything in our dollhouse!
This is possibly the cutest thing I’ve ever seen!! Every detail is adorable…that cork board!! The M!!! Great work!! Your kids will remember this forever ❤️❤️❤️
Thank you, Sara! It was SO fun to make! I hope my kids love it and USE it for a long time!
I have this house and am making it a dinosaur house for my son, did you need to use a primer before painting the external and internal walls and roof?
It is a beautiful house you have made
The spray paint I used had a built in primer!