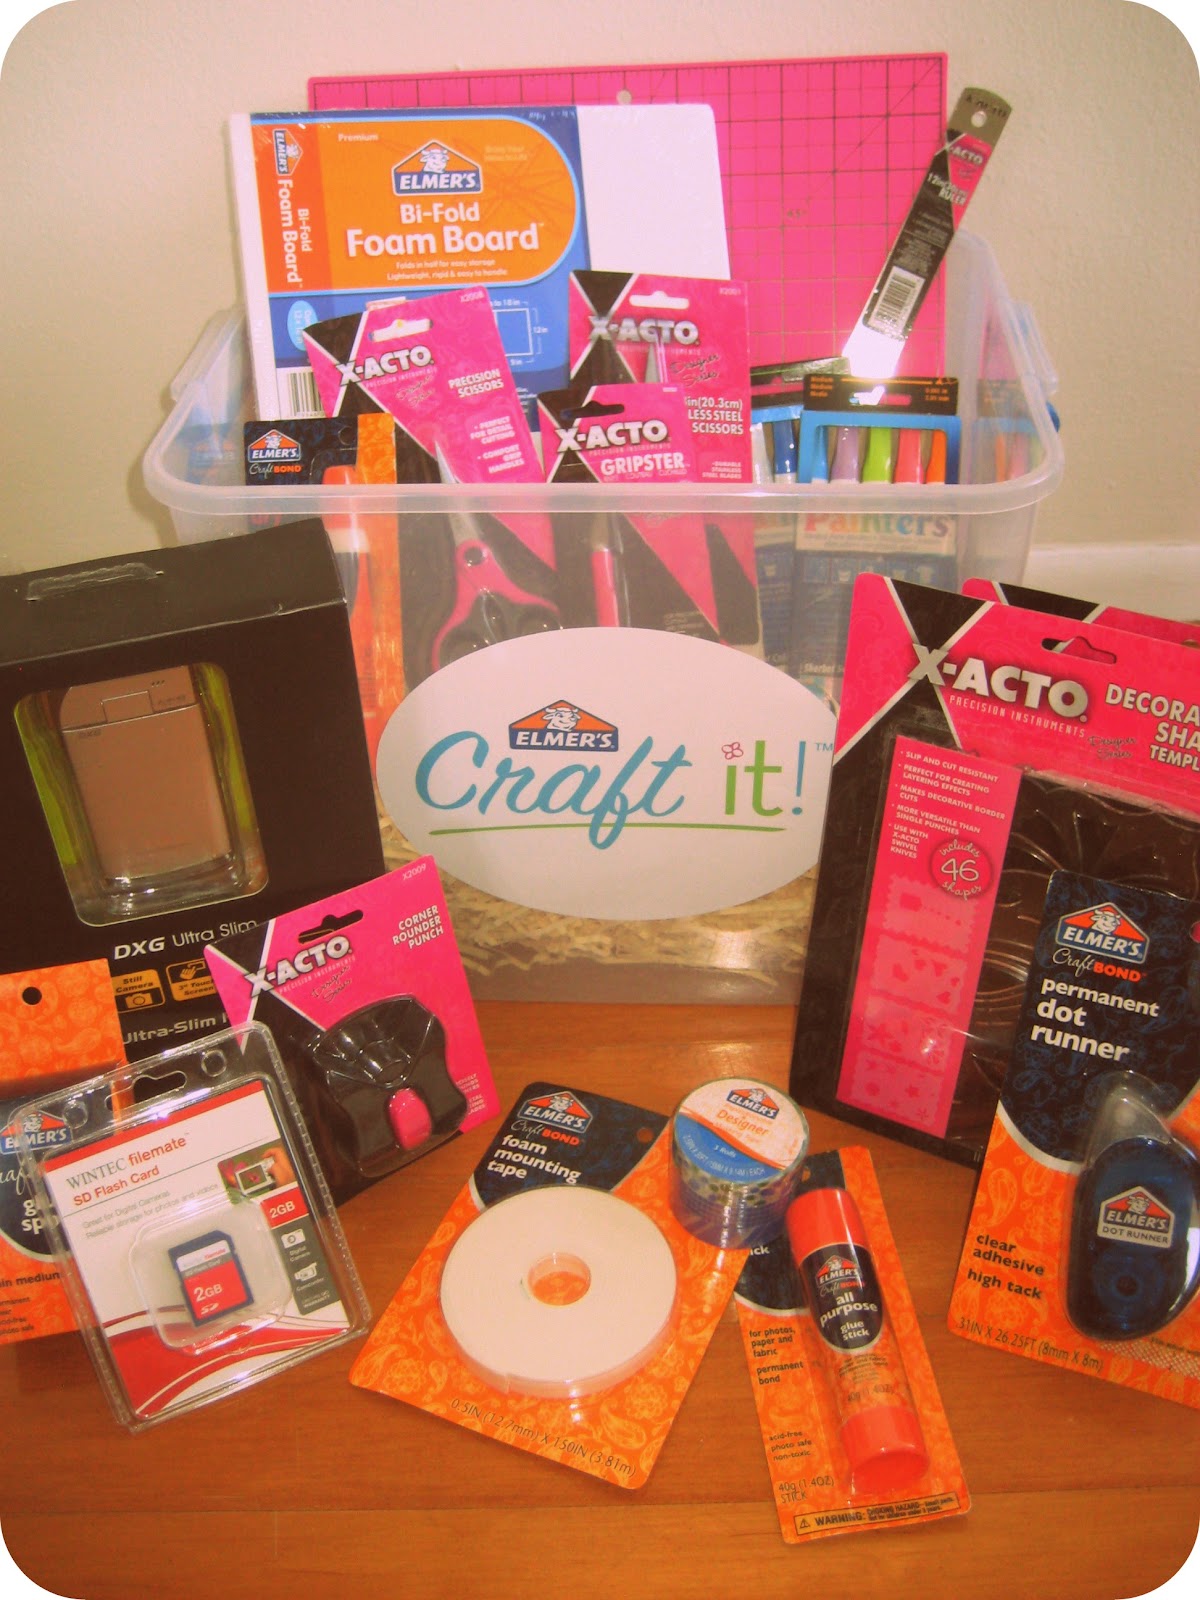
C.R.A.F.T.

Creating Really Awesome Fun Things

  • Home
  • C.R.A.F.T.’s
    • The Book
    • ROUND UPS
  • Costumes
  • TRIPS
  • FREE PRINTABLES
    • 20 Crafts In 20 Days
    • Cultivating Creativity
  • PRIVACY POLICY
  • ABOUT
    • CONTACT
    • AS SEEN ON
    • You’re in!
Home » 1 Hour C.R.A.F.T.'s » Mini polaroid magnets

Mini polaroid magnets

April 17, 2012 By Jamie Dorobek 12 Comments

These cute little magnets have been stuck in my head even BP (Before Pinterest). If something sticks in my head that long, I must really like it!  She made the magnets with Photoshop, but I’m scared of Photoshop. So, when Elmer’s delivered this yummy package to my door complete with foam board and glue dots… tiny Polaroids seemed like they were meant to be!


All you need is:
  • foam board
  • mini pictures (I use Picassa collage tool)
  • an X-ACTO knife
  • glue dots
  • cutting board
  • metal edge ruler
  • magnets, If you used self adhesive sheets you don’t need the glue gun
  • glue gun
This is my Elmer’s goodie pack complete with most of the supplies except the glue gun and magnets. I also made Aztec inspired shoes with my Elmer’s goodies. Be sure and join Elmer’s Craft It on facebook!


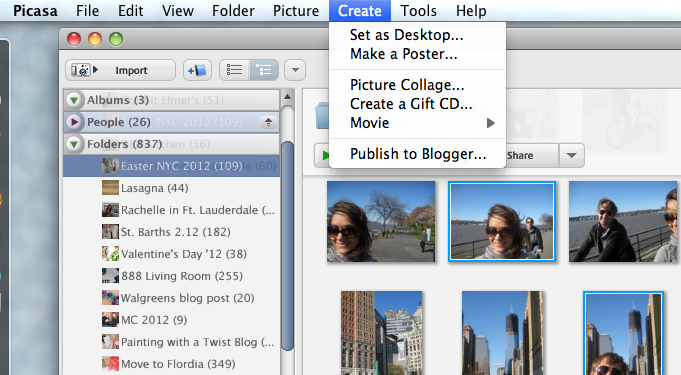
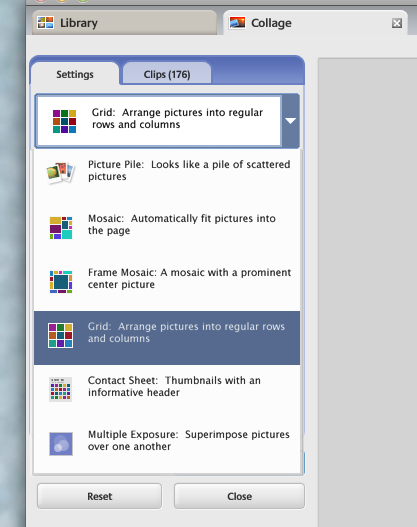
1. Make mini pictures. I use Picassa. You can create a collage with as many pictures as you want and print a 4 x 6 photo at CVS for .26 cents.  I’m sure there are lots of other ways to make mini pictures too.  Download Picassa for free, it’s a google product. Choose 30 pictures to collage, click the “Create” tab, choose “Picture Collage”.

Then choose the “Grid” option so that all of your pictures are the same size. I also add “grid spacing” for easy cutting. Those are the white lines in between each picture.

And here is your collage. I usually print pics at CVS. I like that you can upload them from your computer, and pick them up an hour later in the store.

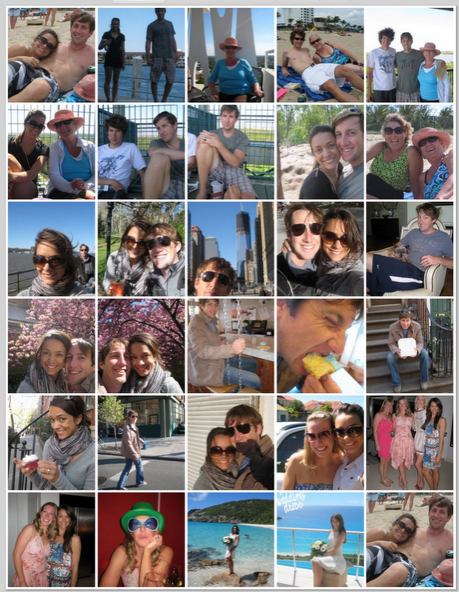
Print out your picture and cut up your minis.

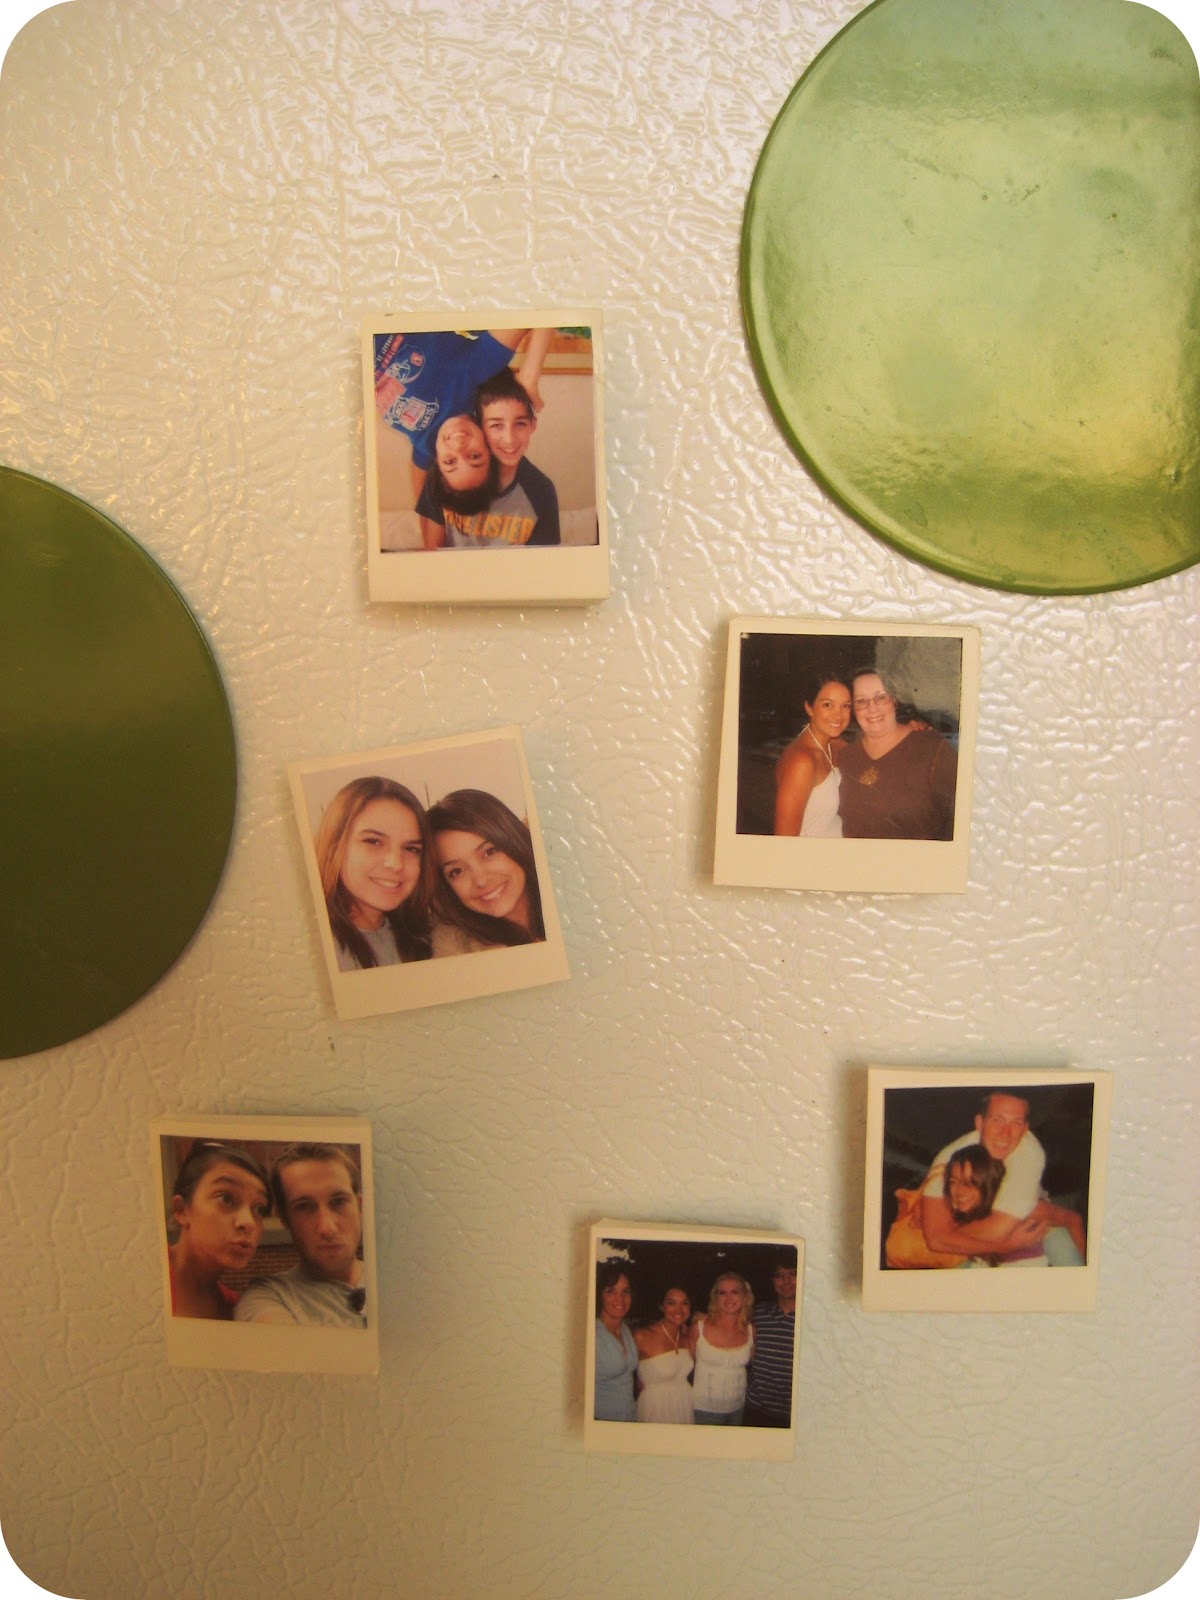
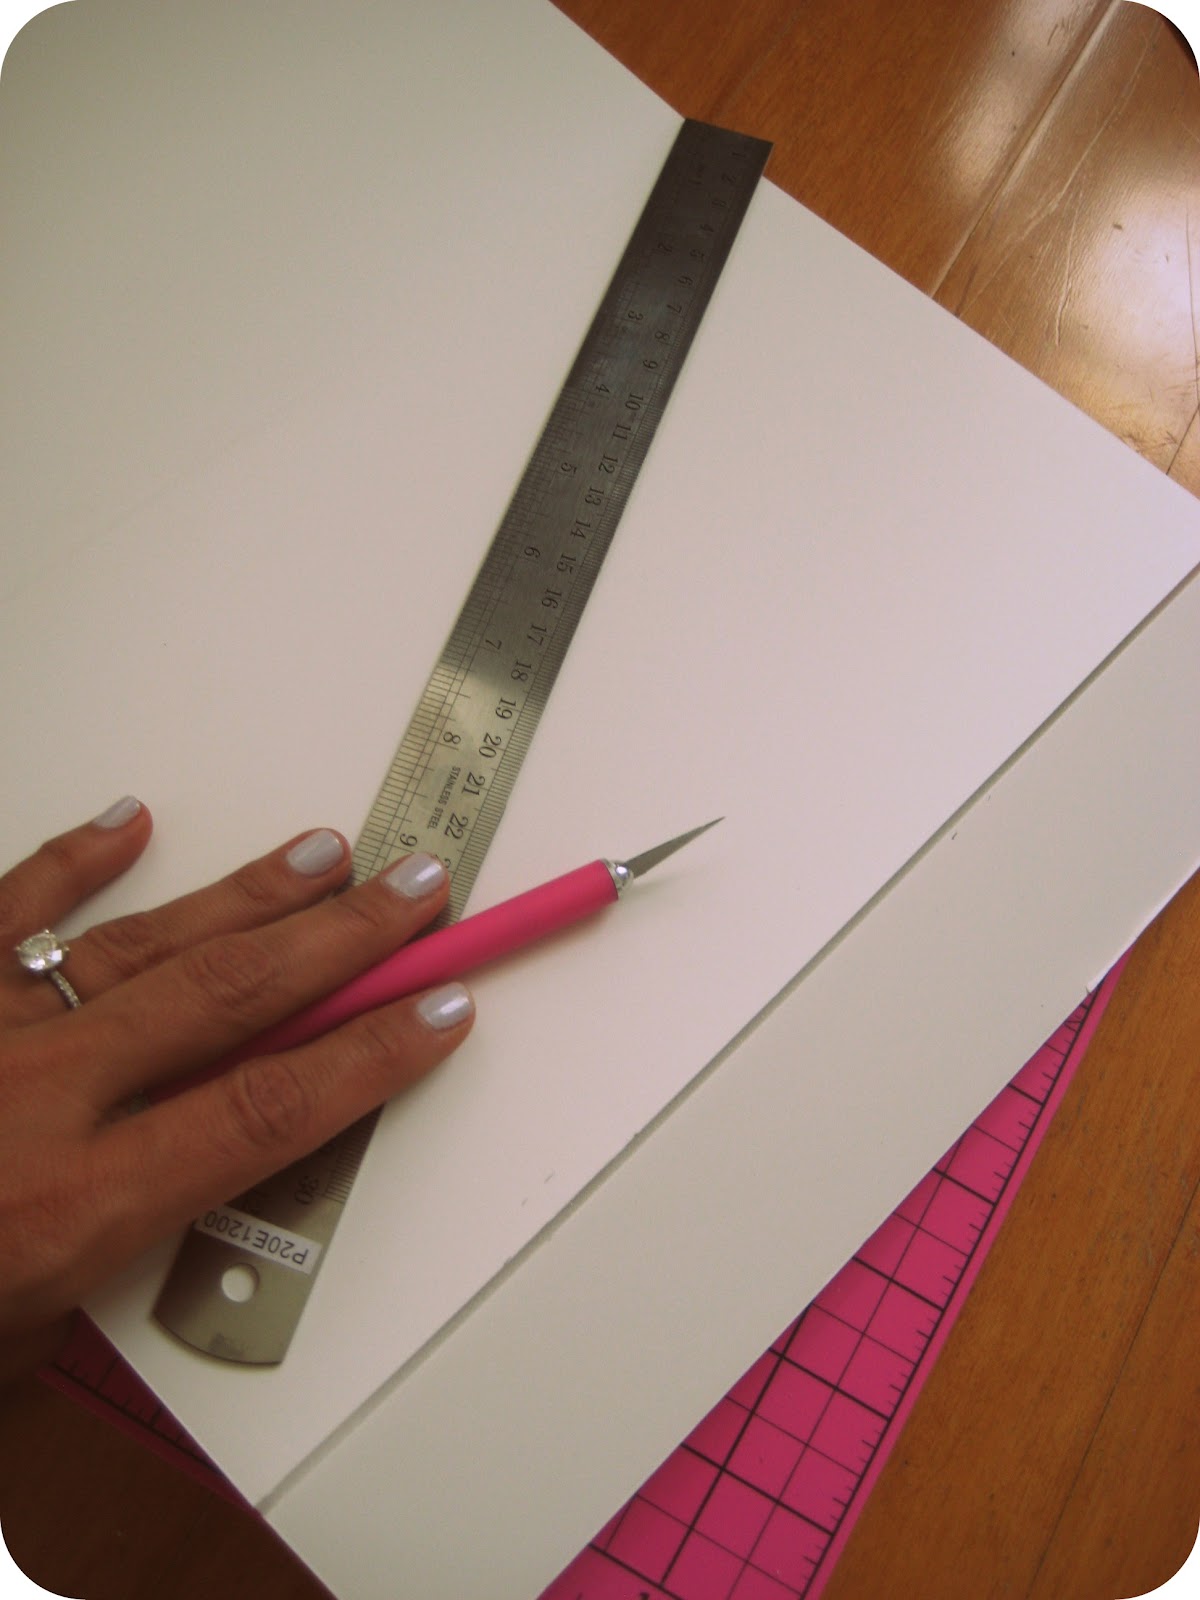
2. Use the metal ruler to cut the foam board. I made my rectangles 3.5 cm x 3cm to resemble Polaroids.

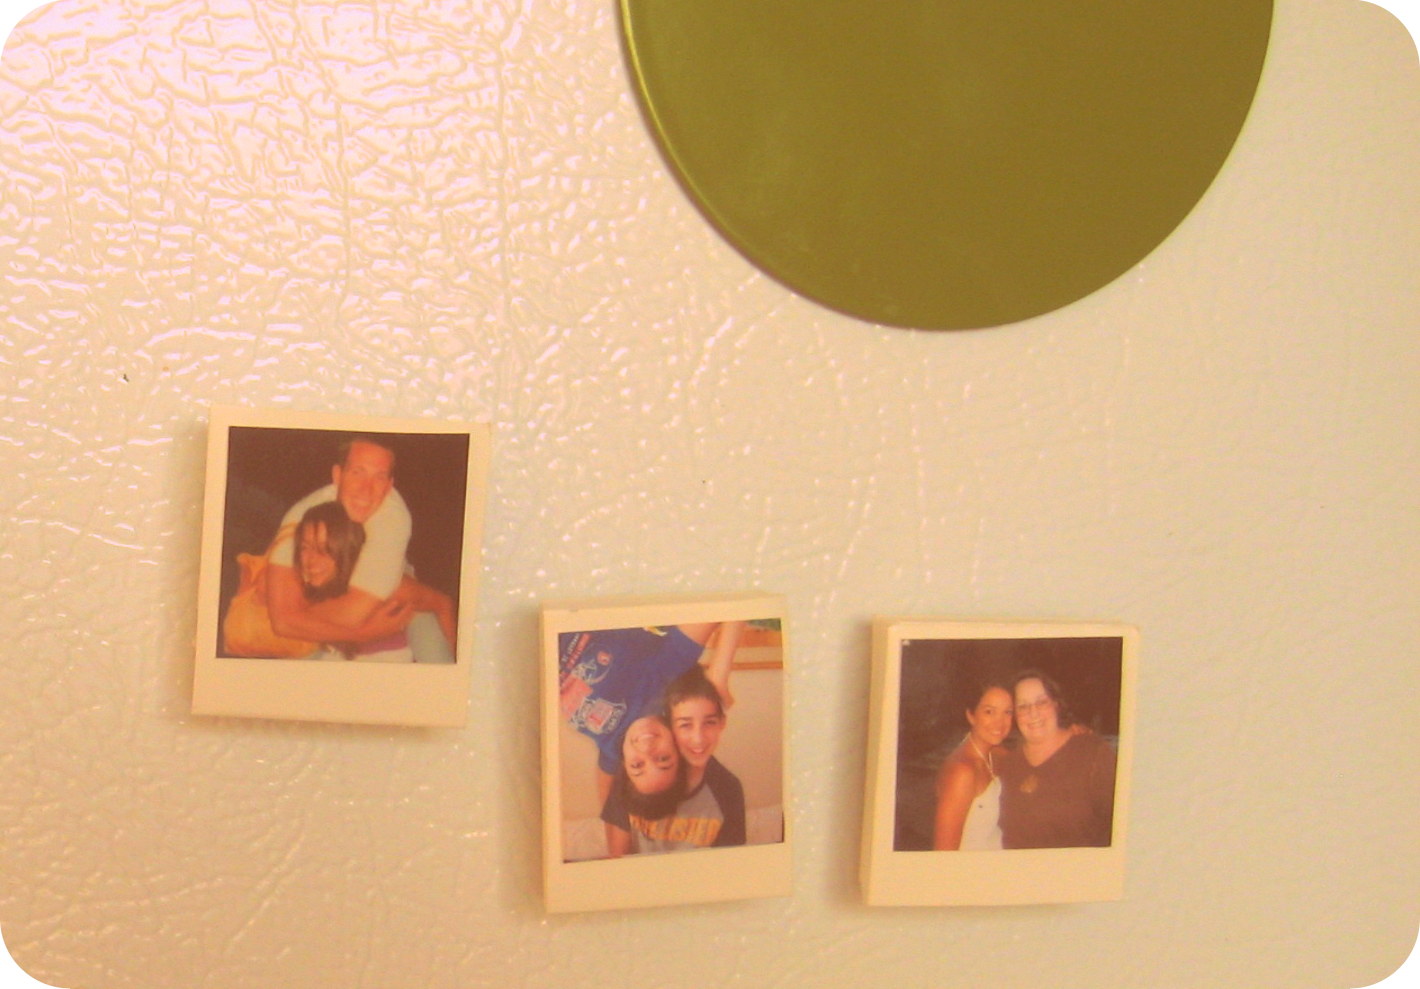
3. I used 2 glue dots to secure the mini photo to the foam board.

4. Heat up that hot glue gun and glue the magnet to the back of the foam board. You could also use the adhesive magnetic sheets instead of the big round magnets.

And here is my attempt at a little vlogging to hopefully clear up any questions about the process.

Elmer’s has lots of fun products. My favorite product at the moment is the Painters… remember my Aztec inspired shoes. What photo program do you use? How would you collage pictures? I’d love to hear…

Filed Under: 1 Hour C.R.A.F.T.'s Tagged With: kid craft

« DIY aztec inspired shoes
The best cupcake in downtown Manhattan is… »

Comments

  1. Emily says

    September 25, 2012 at 11:15 pm

    So cute! I love your easy to follow tutorial! You did a better job explaining things and giving info than another tutorial I saw for this. Thank you!! 🙂

    Reply
  2. Kelly says

    July 16, 2012 at 9:20 am

    These are really cute. If your blog guests aren’t into DIY, check out this site that sells them (very nicely done) for cheap! http://minipolaroids.com. It’s the official place to get them!

    Reply
  3. Craftdrawer says

    June 4, 2012 at 11:16 pm

    What a great idea for photos!

    Reply
  4. Jamie Dorobek says

    April 19, 2012 at 8:30 am

    Thank you, Allison! Thank you for hosting an awesome linky party 🙂

    Reply
  5. Alison @ Oopsey Daisy says

    April 19, 2012 at 2:56 am

    Jamie, these are SO cute!! I love how you made your collage. Making polaroid magnets is just plain smart! Thanks for sharing at oopsey daisy!

    Reply
  6. Neo Anderson says

    April 18, 2012 at 2:38 am

    Great Thing. These crafts can decorate our walls very beautifully.

    Mobile Personal Training Perth

    Reply
  7. jamie smith says

    April 17, 2012 at 9:45 am

    Me too 🙂

    Reply
  8. Maury Kilgo says

    April 17, 2012 at 9:09 am

    These are so cute! I love when fridge photos match. It makes it seem so much less cluttered.

    Reply
  9. Kelley @ TheGrantLife.com says

    April 17, 2012 at 8:31 am

    🙂 How cute are these little guys! And so simple! These would make a great shower gift.. thanks for a fun new craft Jamie!

    Reply
  10. Mammy Made says

    April 17, 2012 at 9:33 am

    Cute! I love these!

    – Adele @ Mammy Made

    Reply
  11. Desiree @ Mano y Metal says

    April 17, 2012 at 9:12 am

    omfg so freakn' adorable! 😀
    Love the idea! 🙂

    xoxo.
    Des.

    Reply
  12. Katie says

    April 17, 2012 at 8:01 am

    LOVE this idea! So adorable!!!

    Reply

Leave a Reply Cancel reply

Your email address will not be published. Required fields are marked *

Hi, I'm Jamie!
I Create Really Awesome Free Things for your home, wardrobe, kitchen, and kids in Austin, TX with the sometimes help of Andy!
About>   Contact>
  • Email
  • Facebook
  • Instagram
  • LinkedIn
  • Pinterest
  • Twitter

Best DIY Costumes

DIY Costumes for kids
Easy Adult Halloween Costumes
DIY Baby Bob Ross costume
DIY baby costumes

Popular Posts

  • Easy Adult Halloween Costumes 39 Best DIY Adult Halloween Costumes
  • Healthy Valentines snacks 50 Valentines Day Sayings
  • Creative ways to give money as a gift 23 Creative Ways to Give Money
  • Cricut Maker tips 10 Things I Wish I Knew About My Cri...
  • DIY flamingo costume 37 Homemade Animal Costumes
  • Gender reveal piñata 25 Gender Reveal Party Ideas

© Copyright 2019 · All Rights Reserved · Privacy Policy