If you can sew a straight line, you can make this quilt! This a great way to save those old, treasured t-shirts from that vacation to Keystone or your high school state gymnastics meet. Let me warn you, I am not a huge fan of rulers. I like to “eyeball” things! This project appears to be tricky, but I promise I am NOT an expert or even a good quilter…in fact I just do the quilt top piecing and then pay for someone else to quilt it nicely! You could use yarn ties, (here is good a link on how to do that to any quilt) and that would make this project price significantly less expensive. Other then paying to get it quilted, this project costs about $10 or less.
First, pick out the t-shirts you want to use. Check out the shirts to see if they will all work vertically or if you need to incorporate horizontal designs into your quilt.

Next, I had a large coffee table book, and I placed the book on the t-shirt and traced around the design that I wanted to use. I used 10 vertical t-shirt designs and 5 horizontal t-shirt designs. I simple cut out the rectangles with fabric scissors. If you own a rotary cutter that would make it much easier and it would also help your edges to be straighter :)I just used scissors. Either way, you can make it work.
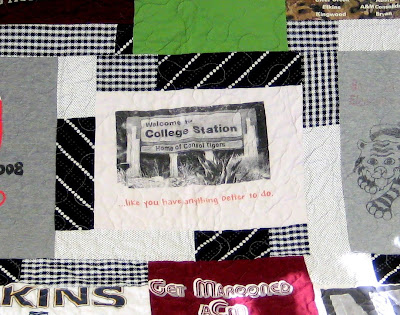
Then, after all of your t-shirts are cut out in rectangles…you must iron interfacing to the back of each t-shirt rectangle. This will make sewing them together much easier since some t-shirts have stretch in them! Now, you should have all of your rectangles interfaced. This is when it gets FUN. Lay your rectangles out on the floor and decide how to best fit them together or just use my design! I used 3 different black and white patterned fabrics to make the rectangles fit together.
Each of the horizontal rectangles have 2 inches of fabric on the top and bottom, so that they were even to the height of the vertical t-shirt designs. The center horizontal rectangle has a 2 in. fabric border around the entire rectangle. I had to use extra fabric on the left side of the quilt to make the quilt be square. If you measure correctly, that shouldn’t be a problem! Like I said, I’m not into rulers! Now, all you need to do is sew the fabric scraps into lines. Then sew the lines of fabric onto your horizontal t-shirt rectangles. I ended up with 15 rectangle blocks. Just sew your rectangles together. Please remember, nothing in sewing is permanent... use a handy little seam ripper whenever necessary! Once you get all 15 rectangles sewn together, you have a quilt top. Now, you just need to make a back for your quilt. I used a black and white hounds tooth, but using a solid color would be much easier. Using a pattern means you will have to make sure that your pattern matches up, and you will most likely have to waste some fabric.
Make sure your quilt back is about 1 in. bigger all the way around your quilt top. Next, take your awesome quilt top and back to the nearest quilting store and ask them to quilt it. You can pick from TONS of patterns. I used what they call a meander pattern. Or like I said, you can use yarn ties to keep the quilt top and back together. When is comes back from the quilt shop, all you have to do is bind it. Buy double folded binding tape at any wal mart, craft store, hobby lobby and sew it around the edges!

Comments & Reviews
I love this! I blogged about it and linked a pic of your quilt back to this tutorial. I have been looking for an easy way to turn all my daughter's camp shirts into a quilt…and now I have one! Thanks for posting all these great ideas.
Sarah
colorfulconjecturesofacraftymom.blogspot.com
Love it! I've been wanting to make these…just as soon as I have free time 🙂
i lov ehow your quilt looks! perfect or not its awesome. when i think about making a tshirt quilt, i immediate look for a jersey sheet set and use the flat sheet as a back. that way it feels just like the tshirt side, but is all one piece so i dont have to worry about how it feels or having to make a big backing, thanks for sharing yours!
on the tshirt i made for my dad, i did not use interfacing, it turned out fine, but thats because i dont care about a little stretching. the quilt is for camping anyways lol so it wont matter. but im going to use interfacing for my sons memory clothes quilt. THAT will be a project for real. i have about 6 or so boxes of his baby=toddler clothes for a quilt. lots of cutting my precious baby's clothes up in my future. ah but its for a good purpose!
My husband and I have been saving band tshirts for a while know but im terrified to mess it up! Im awful at a sewing machine. Ive also seen one with baby clothes Id like to do for my boys but again, the fear is messing something up i cant fix!
Yours came out awesome!
visiting from friday fun finds
becky
mrsbettierocker.blogspot.com
What a graphic fun tshirt quilt-thanks for sharing.
Come see my antique quilt entries
http://utahquiltappraiser.blogspot.com
http://starleyquilts.blogspot.com
Fun quilt to create! I have kept so many of our three children's tshirts over the years from their sports and other activities…And have planned on doing this…but I have so many unfinished quilts! Thanks for sharing!
Blessings & Aloha!
(I finally have some free time so am trying to get to more amazing Quilt Festival posts!… so happy to see yours. I would love to have you pop over to my place. And if you get a chance, please let me know by leaving a comment. :o)
i think that's a fabulous idea! and it looks so great. one of my favourite things is recycling so I may just try this new-fangled idea of yours out! beauty quilting too, btw.
Great way to recycle and create a "memory quilt"!
Randi
http://DivaBuzz.Designing-diva.com
Okay! I've got to get the t-shirts out of a box and start a t-shirt quilt! great inspiration.
OK so that is coolest quilt I have seen so far today – totally original. I nowhave to click follow.
That is a great keepsake. I have some of my son's old t-shirts and someday I'll do one of these too:)
That is awesome!!!
What a fun idea!! Thanks for linking @Creative Itch's "Sew Cute Tuesday"!
This is super cool! So creative and clever! My husband has a ton of tshirts he can not part with –I think this may be the soltuion! Thanks for the inspiration! Great job. Thanks so much for stopping by and joining the Sunday Showcase Party! I greatly appreciate it! Hope you have a great week! ~ Stephanie Lynn
That is awesome!!
Visiting from chic on a shoestring decorating…I love it! I've actually made a couple of these before but definitely not as cute as yours. It's fun to be able to get tips from others. Oh and I just yarn tie and still think they're pretty cute for anyone else reading this!
I need to keep old T's! It's such a great idea! My mommy made me one when I graduated High School out of all my Track and Cross Country T's! Thanks for sharing! Good times!
🙂 I'm glad you like it! That is a great idea to save his too small shirts for a fun quilt…I would love to see it when you are done!
look at you – this is awesome – I'm totally gonna start of stash of good t-shirts to do a similar version….I'm thinking my sons t-shirts he's outgrowing would look so cool for a little quilt for his room & take him down memory lane! thanks for sharing!