Cricut Joy is made for people like me- crafters who love to make quick, easy, functional things and don’t have dedicated space to do it! (Find about more about the Cricut Joy.) The Cricut Design Space App has been available for a few years, but I haven’t used it until now. Now that Cricut Joy is small enough to sit out on my side table next to my favorite chair, I’m all about crafting in comfort with the Design Space App!
What is the Cricut Design Space App?
The Cricut Design Space app allows you to wirelessly design and cut with your Cricut Explore, Maker, and Joy! You can choose from over 50,000 images, fonts, and projects in the Cricut Image Library—or use your own images and fonts for free. The app is available for iOS and Andriod devices. Here are the minimum system requirements for Design Space app.
Cricut Design Space App Setup
Once you download the app from the app store and complete the new machine set up, you’re almost ready to craft from your couch! Here are a few things to make sure you have set up before you start your first Cricut project on the Design Space app.
- Make sure the bluetooth setting on your phone is turned on.
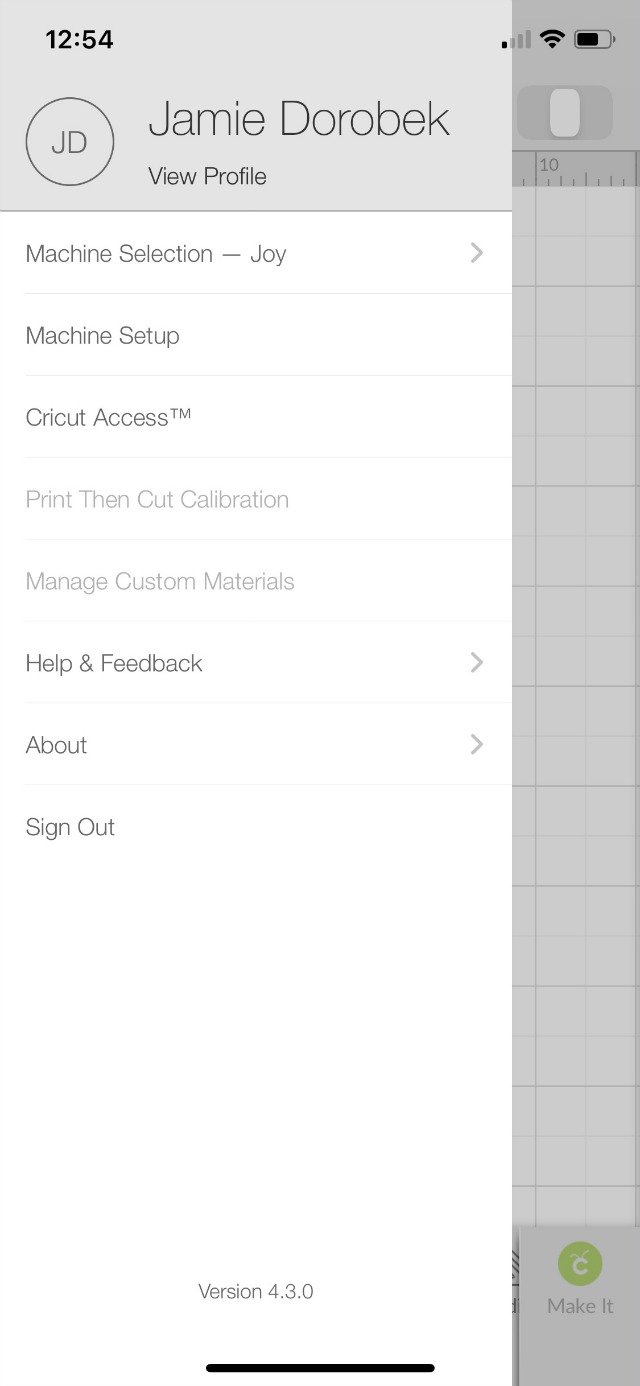
- Make sure the correct machine is selected in the app. To do this, tap the circle with your initials (or profile picture) in the upper left hand corner. Then, click “Machine Selection”. You can see in the image below I have the “Joy” selected.
- You’ll notice that the the options available are determined by the machine you have selected. For instance, I have the Joy selected so “Print Then Cut Calibration” and “Manage Custom Materials” are not available.
How to make vinyl labels with Cricut Design Space App
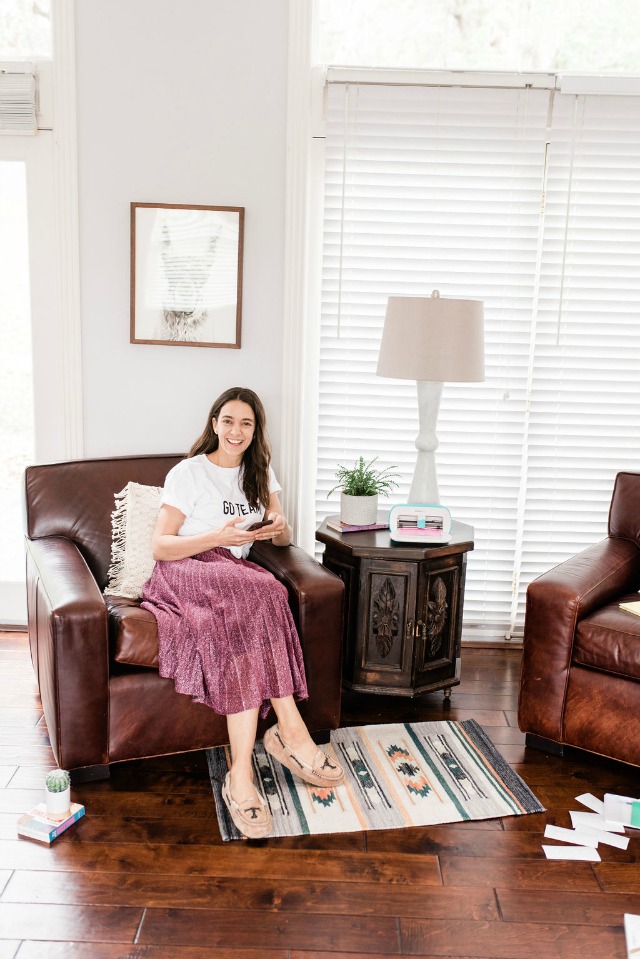
Grab the vinyl you want to use to make labels and get comfy on your favorite chair, it’s time to craft! (Sparkly skirts and slippers are recommended!)
Step 1- Open up Cricut Design Space app
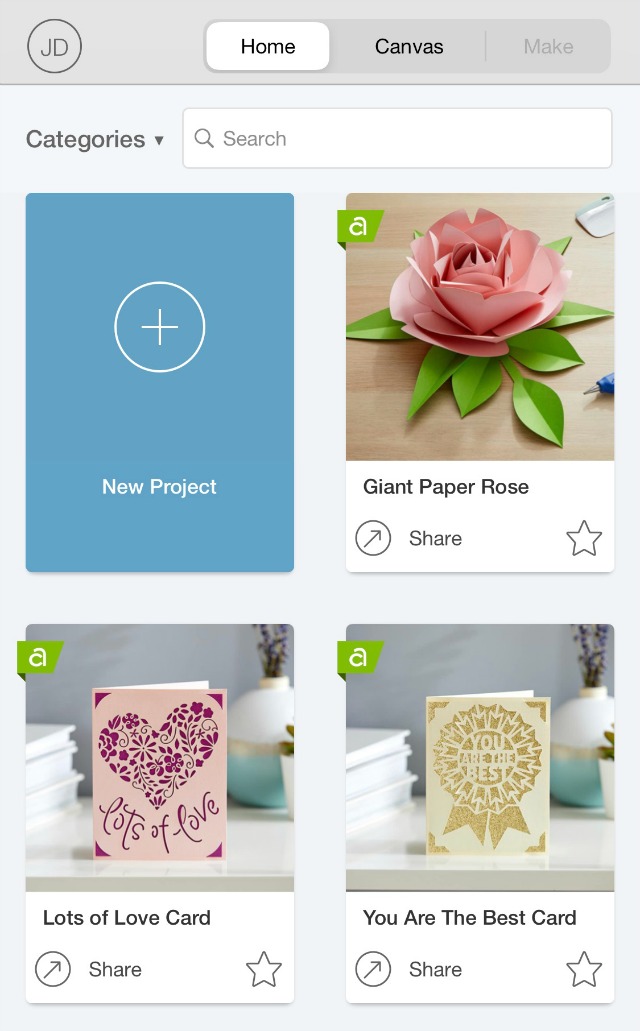
Once you have the Cricut Joy set up on the Cricut Design Space app, simply tap the blue “New Project” rectangle in the top left corner of the screen.
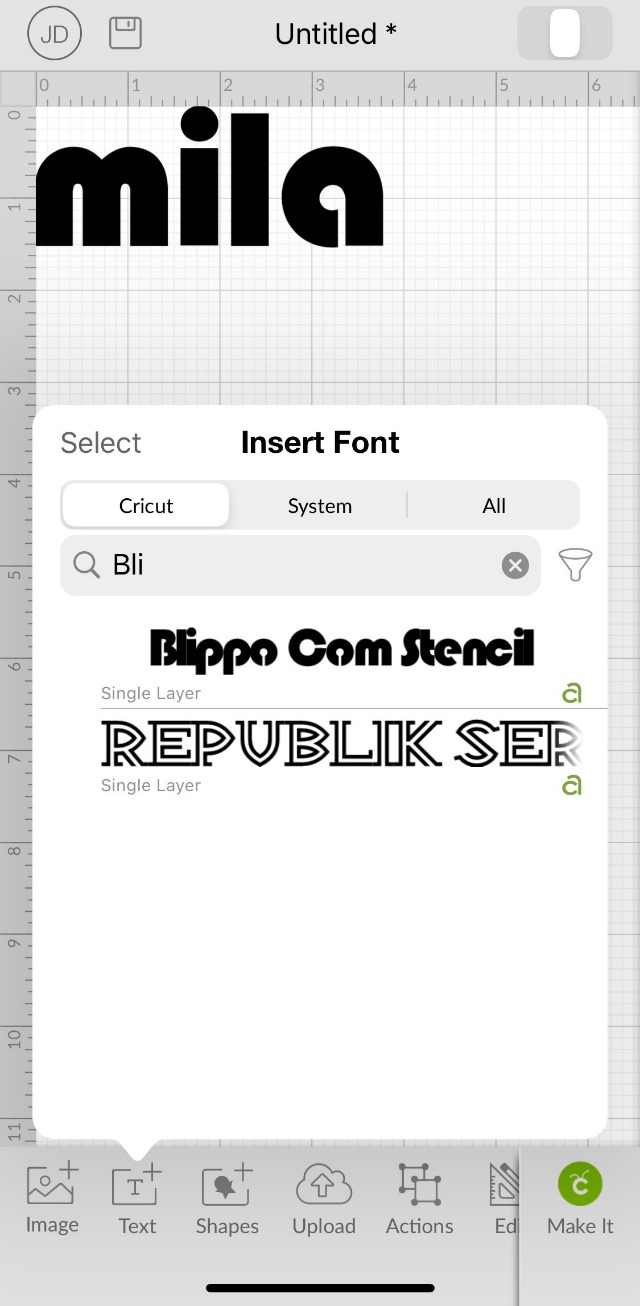
Step 2- Tap text
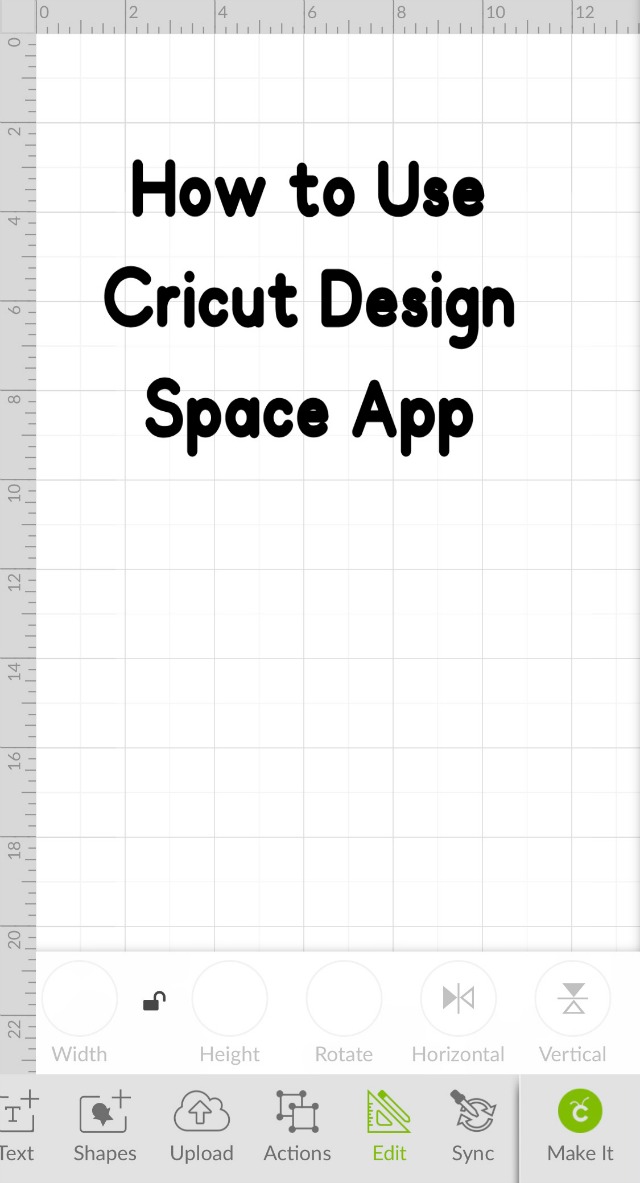
At the bottom of the screen you will see a “Text” icon, tap it. The “Insert Font” box allows you to choose the font you want to use for your project. It’s easiest if you already know the name of the font and then simply search it in the search box. In the image below you can see that I searched “Bli” because I knew I wanted to use the “Blippo Com Stencil” font for the kids water bottle labels. You can also easily scroll through all of the fonts and choose the one you like the best.
Step 3- Type Text and Size
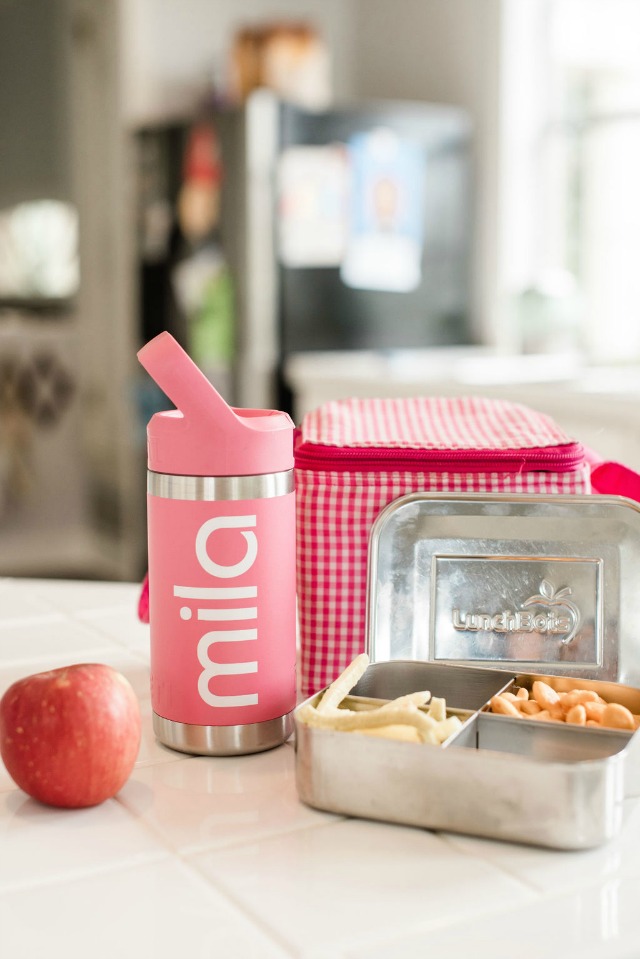
Type the name you want to cut out of vinyl. Then, size it to fit the water bottle you are labeling. I made mine 3.75 inches long to fit my daughter’s water bottle.
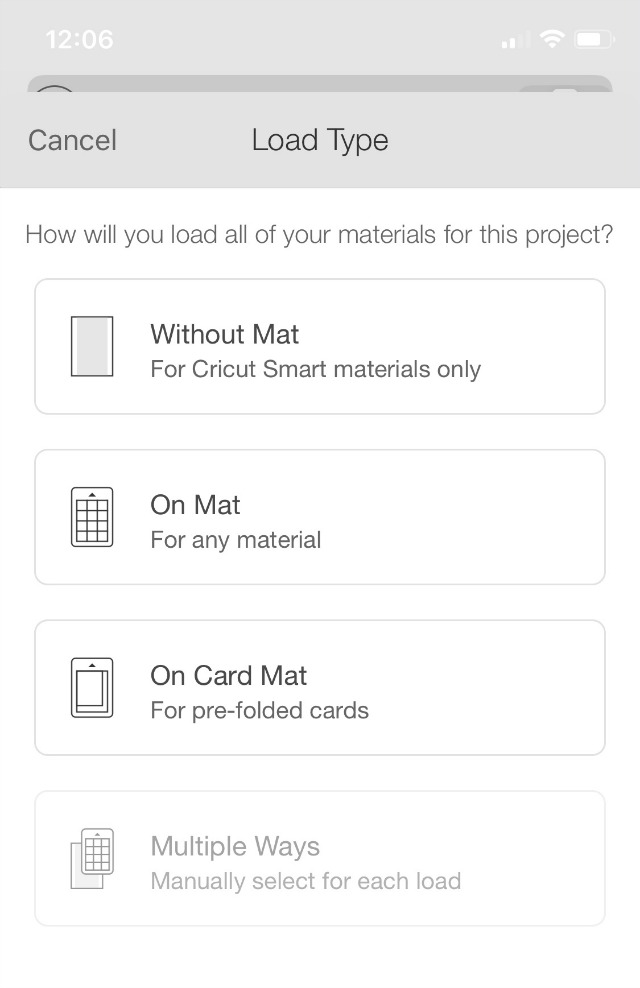
Step 4- Make it
Tap the “Make It” button in the bottom right hand corner and the “Load Type” screen will appear. If you are using a Cricut Joy Smart Vinyl, tap “Without Mat”.
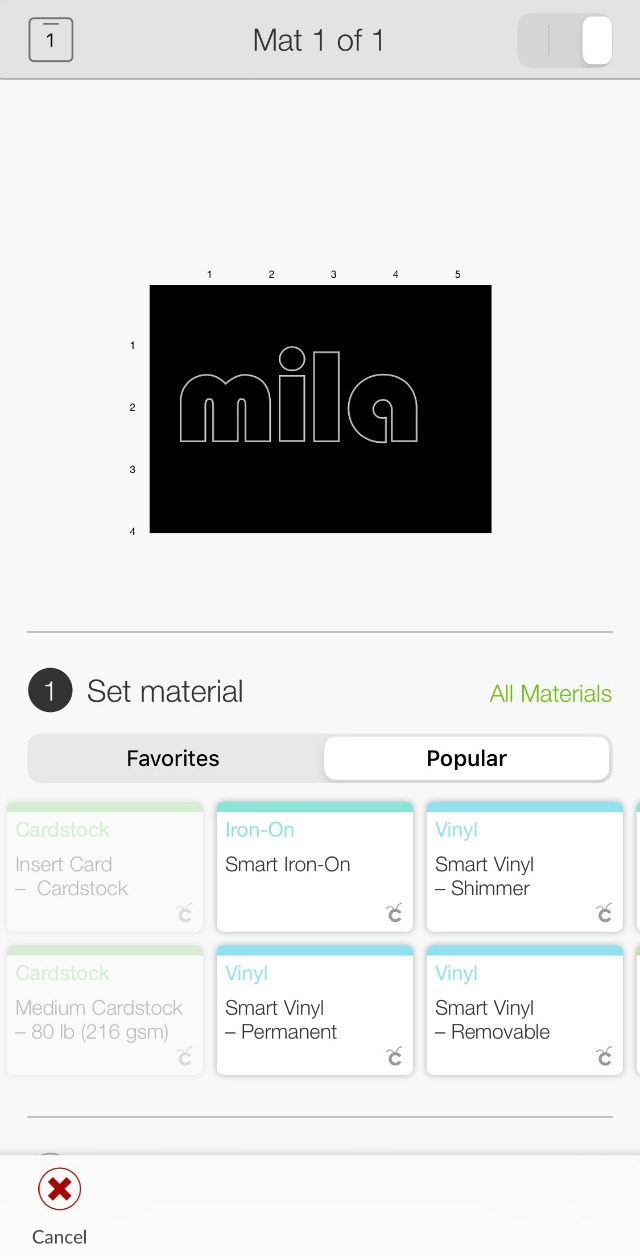
Step 5- Select Accessory
The next screen you will see is the “Mat 1 of 1″ screen. This screen lets you know that you need 3” of vinyl for this cut and also tells you that mirror is turned off. You only want to mirror the image if you are using iron on vinyl.

Step 6- Set & Load Material
The next screen allows you to “Set material”. For the project, I am using “Smart Vinyl- removable” and it pops right up in the popular materials list. Now, it’s time to “Load Tools and material”. Does anyone one else fret about what side of the vinyl goes down on Cricut? No one wants to waste vinyl! Here’s the deal:
- With adhesive vinyl, you want to place the grid side down, vinyl side facing up.
- With iron on vinyl, place the shiniest side down. The shiny side is the side with the carrier sheet. The carrier sheet is the clear peice of plastic that allows you to transfer the cut image to the final project. If both sides are shiny, you will place the carrier side down. Typically, the carrier sheet side will show the color of the vinyl through the clear sheet.
Hopefully, that clears up what side of the vinyl goes down on Cricut. The Cricut Joy will have a blinking light on top and you simply place the vinyl under the guides and the machine will rill it in and measure to make sure you have enough material to make the cut.
Step 7- Tap Go
The App will say “Preparing” and then “Cutting”. It will show you how much time is left for the cut. Lastly, tap the unload button and you’re vinyl label is cut!
Step 8- Trim, Weed, Adhere Label
First, trim around the label with scissors. Next, weed the label or remove access vinyl from around the label. Likely, a tool is not necessary and you can do this quickly with your fingers. If it is a more intricate or smaller label, a weeding hook or tweezers would be useful. Next, cut a peice of transfer tape the same size as your label and use a scraper tool (or credit card) to transfer the label to the transfer sheet. Finally, adhere that gorgeous label to the water bottle and admire!
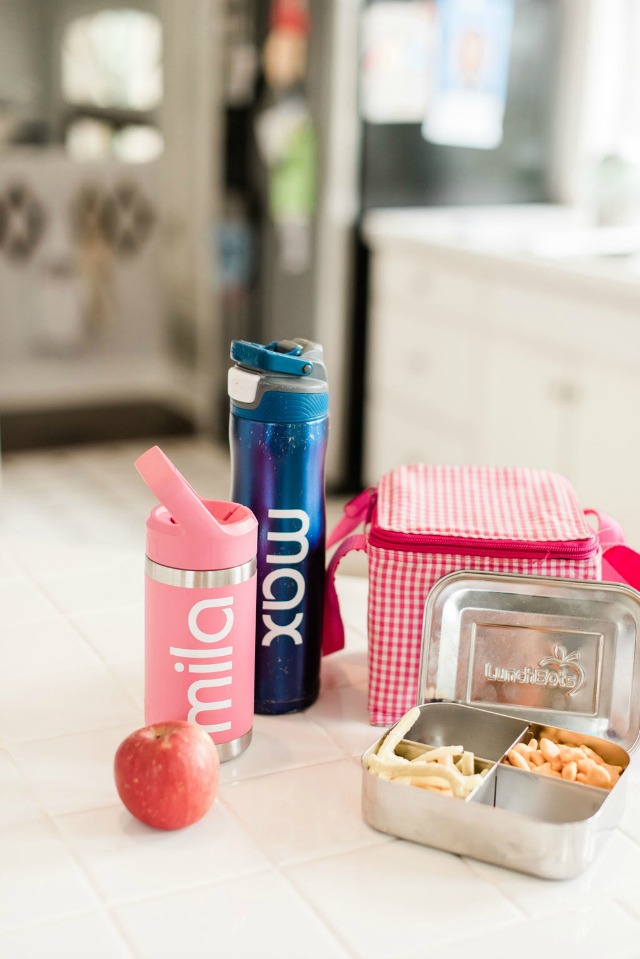
Now, my daughter can easily tell which pink water bottle is hers at school! What are you going to label first?

Comments & Reviews
I am new to this. I just ordered my cricut joy machine. I’m still waiting for it. I have no idea what I will be doing since I have never done this before. I am not very good with technology. In fact I’m very bad at it. My family gets upset with me because I have to asked them often how to do things with either my phone or tablet. I’m hoping that I can actually do this. I’m hoping to learn some technics from you. I want to thank you in advance for teaching people like me.
Can you recommend a book that helps one to design their own projects in Design for cricut joy?
Hello. I am desperately looking for help setting up my Cricut Joy.
I did not have Bluetooth capabilities on my laptop, so I purchased a dongle and now I do have Bluetooth. When I click on the Bluetooth icon, I see my JOY machine listed.
The word JOY also shows up in the upper right corner of my Design Space, but when I make a project, I get, “no device found”. I contacted the help/ support group on the Cricut home page. Was in queue/on hold 2 1/2 hours yesterday and 1h, 10 min today and no one ever came to the line.
I’ve had the machine close to a month and haven’t been able to use it.
Can you help me?
Irma Arbini
Hi Irma! Cricut has an incredible customer support team! I would reach out M-F: 9 a.m. to 8 p.m. ET to 877 727 4288 and talk to a Cricut team member. I know they can solve your problem!