Note: This post is brought to you by The Home Depot.
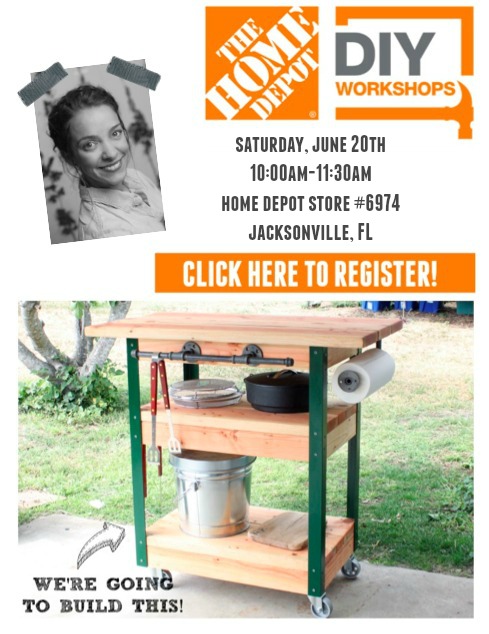
Remember my super awesome 6 box vertical planter that I built for a Home Depot workshop back in April? Well, it’s DIY workshop time again, y’all! On Saturday, June 20th at big orange box’s across the country you can attend a free workshop and learn how to build this DIY grill cart just in time for Father’s Day. Better yet, make it a Dad date and learn how to build the rolling grill cart together. I’ll be hosting the workshop in Jacksonville Beach, FL.

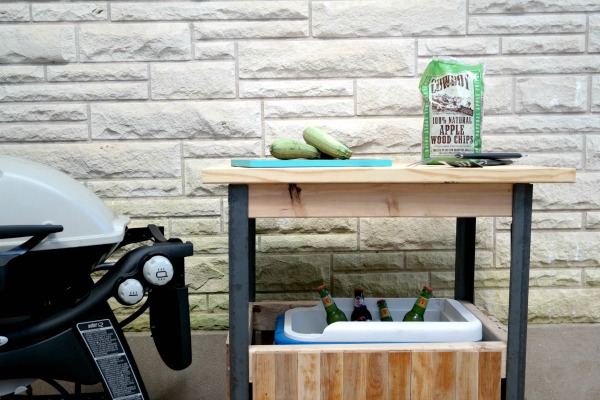
In preparation for this workshop, I built a similar version of the rolling grill for our backyard. We already have an outdoor table very near the grill so work space is not an issue, but the one thing we really needed was a place for a the grilling beverages to stay chilly all summer long! We needed a place to serve drinks that was cuter than a blue cooler and more functional than those galvanized beverage tubs. Shade helps too. It was a high of 93 degrees this week, yikes.
How to build a DIY grill cart
Here are the plans for the DIY grill cart that I will be teaching at the DIY Workshop. I’m sharing this because my version is very similar, minus the middle shelf. Instead of adding the (2) 2×8 and (1) 2×4 as a second shelf, I used that as a frame to attach my wood floor pieces too and cover the sides of the cooler!
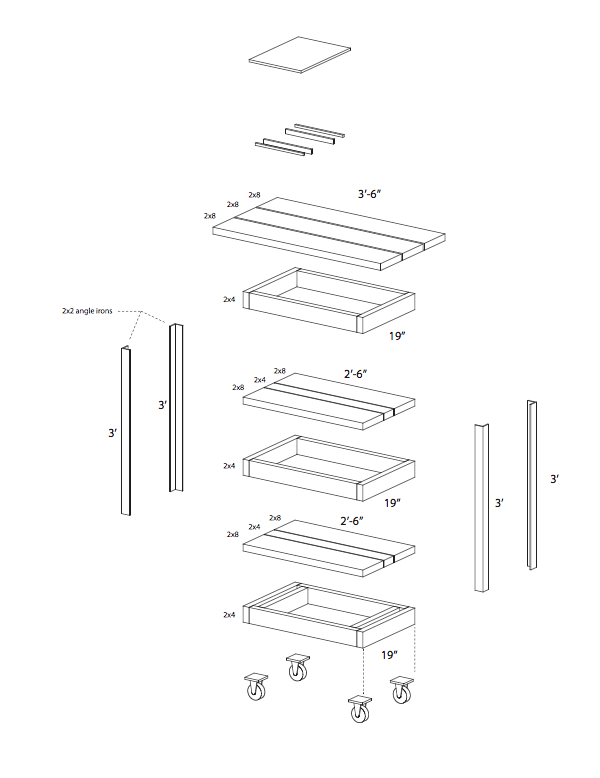
Step 1- Cut the wood pieces
These are the wood pieces you will need to build my version of the DIY grill cart.
- Six 19 inch 2×4
- Six 2 foot x 3 inch 2×4
- Two 16 inch 2×4
- Two 2 foot x 6 inch 2×8
- One 2 foot x six inch 2×4
- Three 3 foot x six inch 2×8
- Four casters (Fancy word for wheels!)
- Four 3 food long 2×2 angle irons
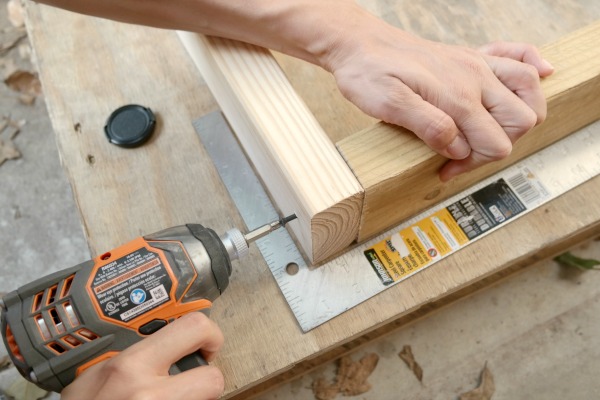
Step 2- Build
We started by building the bottom shelf frame. Use a metal square to ensure that all of your angles are square when screwing them together.
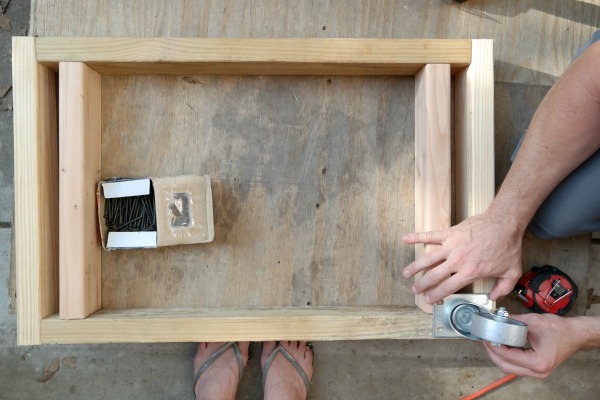
Step 3- Attach casters
Here is the bottom shelf frame built and ready for casters! Unless you plan out where you screw your wood frame together, screwing the casters in can be a little tricky. It’s not a huge deal, but we were not able to screw the wheels in at all 4 points.
Step 4- Build shelf frames
Next, we built the other two shelf frames. These are pretty straight forward and simple to build since it is the same as the bottom one without the two shorter pieces inside of the frame.
Step 5- Attach the metal sides
Now, it’s time to attach the metal sides to the shelves. Here are a few tips for drilling screws into the metal posts.
- For the love, use an impact driver.
- You need a metal drill bit.
- Make sure you have the exact right size drill bit. We are using a 9/32 drill bit with quarter inch stainless steel lag screws. Our drill bit is just 1/32 bigger than the screws.
- Alignment of the screws: Don’t let the lag screws cross each other. One needs to go high and one needs to go low.
- Alignment of the screws: Watch out for your wood screws that were used to secure your shelf. You don’t want the screws hitting each other.
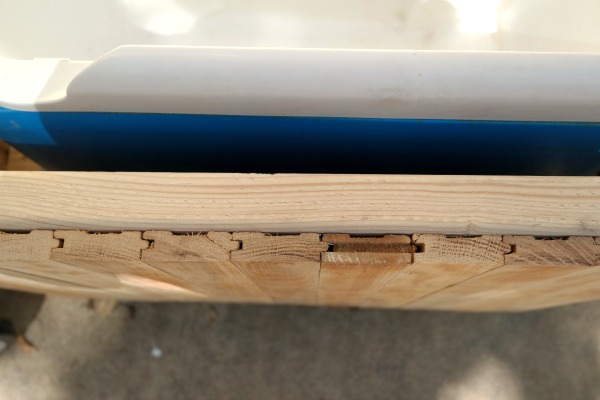
Step 6- Enclose the cooler shelf
Once the metal sides are attached the three wood shelf frames, it is time to enclose the cooler shelf. We up-cycled wood floors for this part! We cut long wood floor pieces into 19 inch segments, and sanded the heck out of them. Then, we attached them with a nail gun to the lower and middle shelf frame.
Step 7- Add the top
Now, it is time to add the top of your grill cart. The trick here is to screw the boards in from underneath so that your table top is screw hole free. This requires 4 and a half inch long screws so that the screw can go through the 2×4 frame and into the table top.
Step 8- Add hooks
Oh and last but not least, we added hooks for grill necessities like scrubbers and flippers!

Don’t forget to register to attend this DIY Workshop and learn how to build a vertical planter. Jacksonville Beach, FL, I’m coming for ya!
Where: 3790 Third Street South, Jacksonville Beach, FL32250
When: Saturday, June 20th
Time: 10:00am – 11:30am
Cost: FREE!
High five to building things and meeting YOU in person!
Do you need a grill cart in your life?

Comments & Reviews
How can I download this plan?
I attempted to follow this tutorial. The pic at the top is amazing! The pic in the middle is NOT the cart for the instructions. The measurements were hard to translate the sizes.
I successfully installed at home our DIY grill cart.. It’s simple yet very effective. I was about to post the image here but its not working. Sorry!
This a spectacular perfect summer grill cart project! I found it too late for this summer, but you can bet your bottom dollar I am bookmarking this for next summer. Thank you
Please let me know if you are ever down near Ft Lauderdale as I would love to attend one of your free demonstrations/classes.
This is a fantastic idea! I wish I was better with tools so I could make this on my own, instead I’m going to enlist the help of my husband cause my yard needs this. I featured your post this week at #FoodieFriDIY – thank you so much for participating!
This looks like such a fun project! I so want to make one and can’t because I’ll be on my way to Haven at the same time:( Thanks for sharing this wonderful project with the DIY Sunday Showcase:)
That turned out beautifully! Thanks so much for taking the time to link up with us over at the #HomeMattersParty – we hope to see you again tomorrow!
I love this cart – we so need one for our grilling area. Thank you for sharing your tutorial with Share It One More Time. Cathy
This looks so amazing! Pinned and tweeted! Thanks for being a part of our party. I hope to see you, tonight at 7 pm. Lou Lou Girls
LOVING this, it’s so cool and having that cooler down there is genius! It’s the perfect girl cart indeed! Pinning this to keep it handy!
XOXO
Found you on the Summer Scraps link up! I love this idea! We are moving next week and this will be a perfect summer project for our new backyard. Thanks for sharing!
Falon! So happy you found me 🙂 You and your new backyard will love this grill cart!
I love how you took their project and really made it your own! I love the upgrades. Thanks for sharing on Snickerdoodle Sunday!
Love your grilling cart Jamie and great tutorial too! We’ve been talking about building a small bar cart for our deck this summer. I think hubby needs to see this one!