I was in a shady contest… As in a lamp shade contest, ha! And I’m back today with the DIY lampshade tutorial.
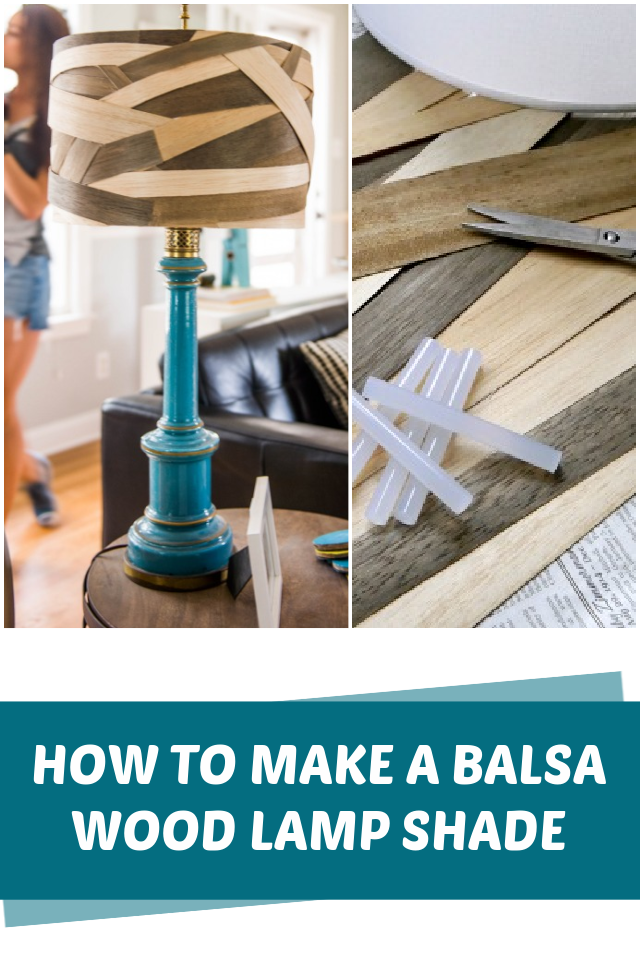
Let’s start with the inspiration shade from Pomp and Circumstance. It’s awesome and made out of balsa wood. 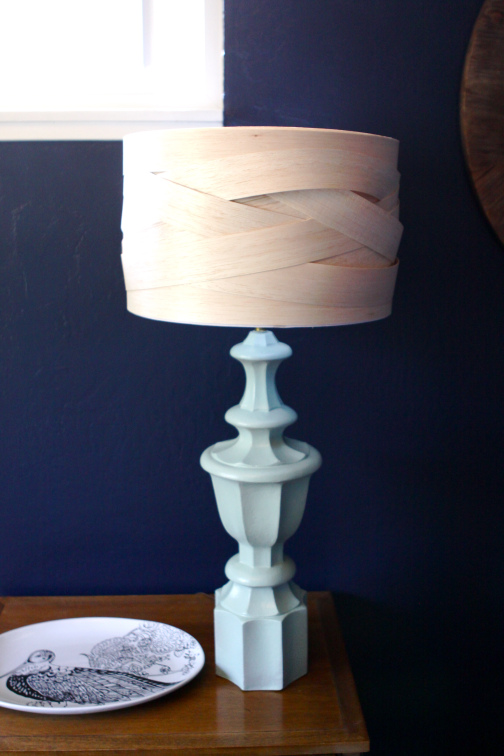 Of course, I wanted to make the shade my own, and I’ve been really into mixed woods lately. I made a jewelry organizer out of leftover floor samples last year and decided to go for the same multi wood shade look with the lamp shade.
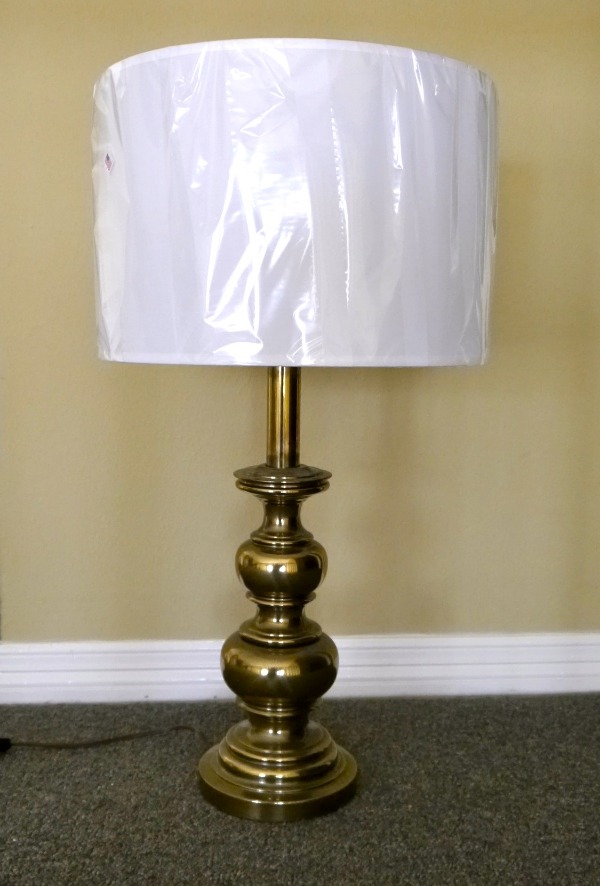
For the contest, lamps.com gave each of us this free shade for the contest:

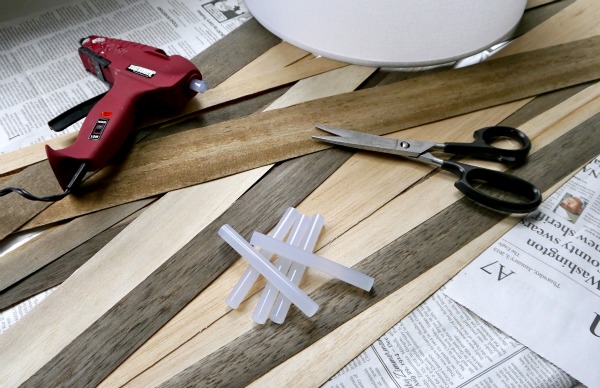
Here’s what you need to make a DIY lampshade
- 7 strips of as wide and thin balsa wood that you can find (I got mine from Hobby Lobby. 7 strips cost me $17)
- brown acrylic paint and water
- bowl
- scissors
- hot glue gun
First, I painted my strips of balsa wood with acrylic paint. I painted a few strips a darker color, then watered down the paint, and painted a few more strips, etc…
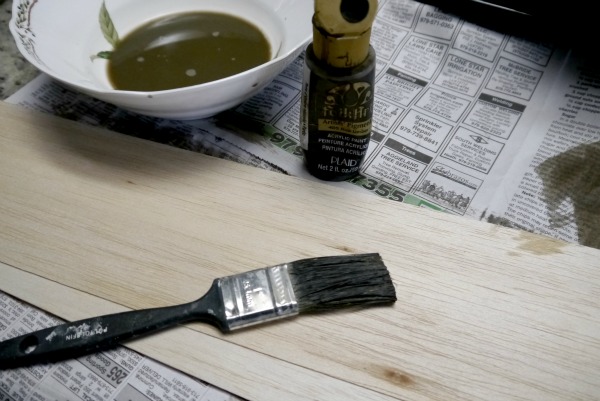
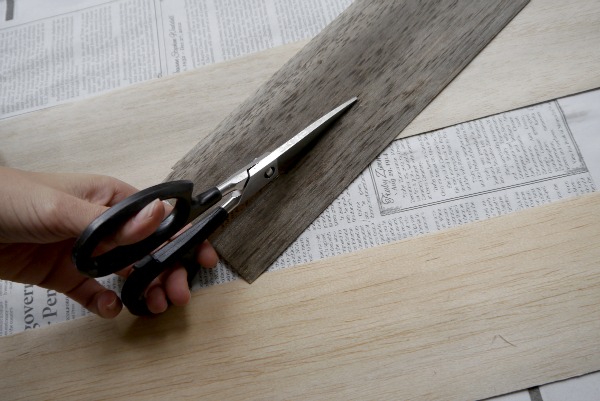
Here are my painted and dried balsa wood strips ready to be cut.
I used scissors to cut each wide strip into multiple pieces. This saved money! I made my strips all different sizes. The thin balsa wood can easily be cut with scissors!
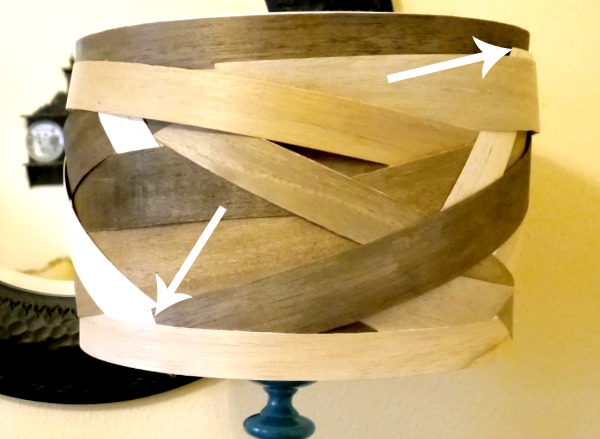
Now it’s time for assembly. Be patient, it will get frustrating. First, hot glue one piece of wood around the top and bottom of the shade. If you have a large shade, like me, one piece will not fit… cut up another one and do a little patch, like so…

I only glued the edges of the balsa wood down. You need to be able to tuck the ends into each other. Also, only the first few strips can be put on all in one piece. After that I started cutting the strips to fit specific spots and go under/ over certain pieces. I tried to keep the pieces as tight to the shade as possible.

The weaving process takes time and patience! My mom helped me a lot… I was getting frustrated! Many of the pieces in the pic below are only a few inches long. It’s not going to be perfect… it has issues… and that yellow wall was not helping the color in this picture either : /
Here she is full view, and you can’t really see the issues. I’m love her. She’s pretty. I’m hoping one day she might be a pendant light! We’ll see…
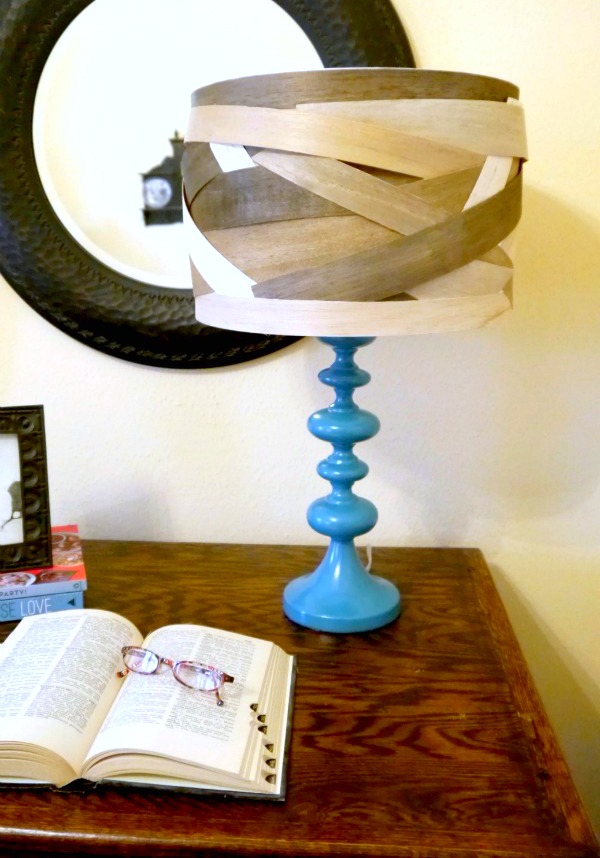
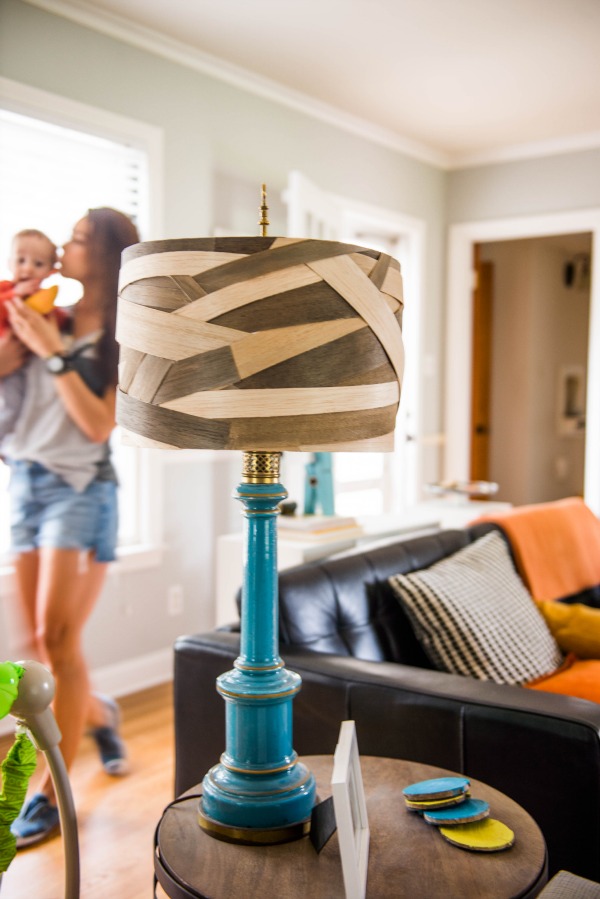
Once upon a time I was in another lamp contest… this was to win the ugly lamp award, ha! I also recently did a lamp makeover with paint and water and gave it a giant yellow shade. Anyhow, what do you think about my balsa wood beauty queen? I smitten with my new shade, and I hope you are too. Oh and if you liked this lampshade makeover, check out 22 more really awesome lampshade makeover ideas!

Comments & Reviews
I loved this so much, I featured it at the Pretty Pintastic Party this week! It’s beautiful, I’m copying this and I hope you’ll come back and link up again!
Loving this project Jamie! Thanks for sharing it at the Inspiration Spotlight party. Pinned & shared.
I absolutely love this idea – I think this would be fantastic to rework old lampshades. When my kids were teens it seemed like my lamps were always getting knocked about and I can’t tell you how many shades I had to replace. I think this would be great with ribbon, too. The jewelry hanger is gorge, too!
Thanks for linking up to us on Throwback Thursday, and I’m looking forward to seeing what you’ll bring next week! 🙂
Mollie
What a neat lamp! Such a creative idea, and I love the color you chose for the stand!
What a fun and unique idea! Thanks for sharing it at The Pretty Pintastic Party! We enjoyed it so much we are featuring it at this weekend’s party. Stop by, grab a featured badge, and link up some more awesome posts!
Beautiful lamp shade! I love all of the different colors and the texture of the wood. I think I’m going to have to try to make something with balsa wood strips. Thanks for the inspiration. Pinning it!
What a brilliant idea!
Love this idea, so creative and looks beautiful! Thank you for sharing with OMHG Wonderful Wednesday Link Party.. Have a great day, co-host Evija @Fromevijawithlove x
Great job, and yes it would look amazing as a pendant! thanks so much for sharing on craft schooling Sunday, great to reconnect in 2016!
I love this project! I’m gathering materials to try this myself, but could you be more specific about a few things?
1. What were the dimensions of the shade you used?
2. How did you estimate the amount of balsa wood needed? (Double or triple the surface area of the shade to be covered?)
3. How wide & thick were your balsa wood strips/sheets before you cut them down?
4. Did you have any issues with the strips snapping or breaking as you bent them around the shade?
5. Was it necessary to heat or steam the strips to make them more pliable?
Thank you for sharing your creativity & time, I look forward to hearing from you!
Looks great! New follower from the Monday Fun Party.
Love this shade! Thanks for linking up to All Things Pretty. New follower on Twitter and Pinterest.
LOVE the blue for the lamp! I really need to make a jewelry organizer and I really like yours.
Jewelry organizer is a super easy project, way easier than the shade! Do it, do it!
Very cool! I have a love affair with lampshades.
So unique! Love it.
I LOVE this lamp! I’m pinning this to my lamp shade board! This is so creative and unique! Wow!
Navy Wifey Peters @ Submarine Sunday Link Party
http://usscrafty.blogspot.com/2013/01/submarine-sunday-16.html
Glad you like it 🙂 Thanks for pinning!
very talented! this lamp looks awesome!
This is so beautiful! Love the look of the mixed woods!
Thank you, Steph! I’m lovin’ the mixed wood thing too!
Wow, that’s so neat! Love the look.
Glad you like it, Jenna! It’s time consuming, but so worth it!
I have already voted for you, my fingers are crossed for you 🙂 have a wonderful day!
Thanks for voting 🙂