Puzzles and games have always been a big deal in our house. Canasta, DIY puzzles out of cereal boxes, Scrabble, words with friends, Cranium, Tripoli, Cribbage, and Pictionary are a few of our faves.
Here’s what you need to make a 3D puzzle cube
- Wood glue
- Lots of q-tips
- 4 colors of paint
- Paint brushes
- 27 unfinished wooden cubes
- Sanding block
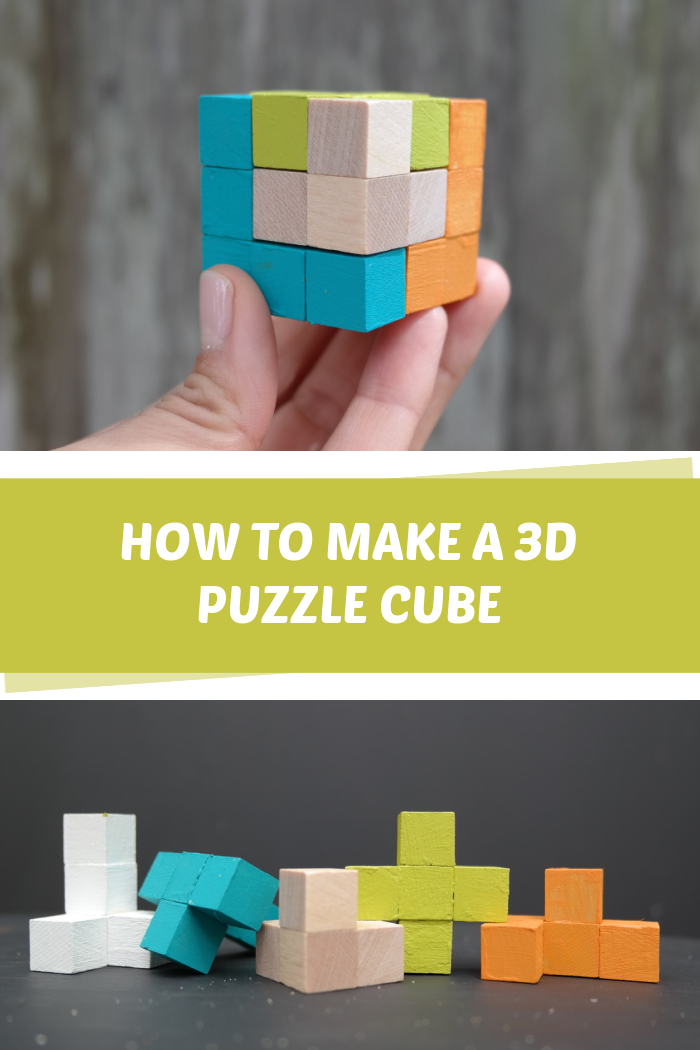
How to make a 3D puzzle cube
This DIY wooden puzzle cube was inspired my youngest brother, Steven, who loves the Rubrics cube. This would be a fun gift for kids to give to Mom or Dad on Father’s Day or Mother’s Day.
Step 1- Buy the supplies
If you only plan to make 1 puzzle cube, this pack of 36 wooden cubes is the best deal. If you want to make multiple wooden puzzles, this pack of 200 wooden cubes is a great deal. (A pack of 200 wooden cubes would make 7 complete wooden cube puzzles!)
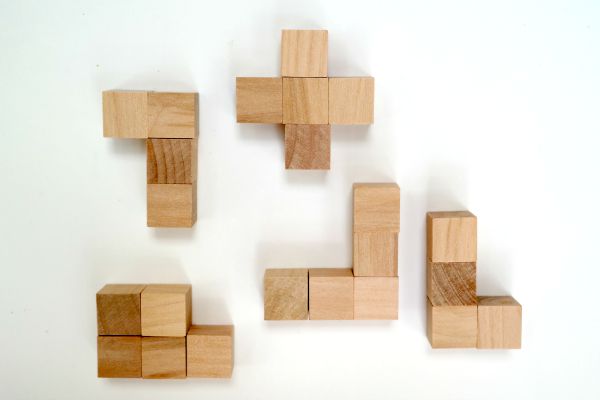
Step 2- Create shapes
First, take 23 cubes and arrange them into these 5 single layer shapes below.
Step 3- Glue the shapes together
Next, dip a q-tip into the wood glue and carefully glue the shapes together making sure that they are square and as lined up as possible. The glue does not dry super quick so you do have a little wiggle room with each piece. Use a flat surface to make sure you are getting the blocks as straight as possible. It’s also fair to note, that you do not have to make the puzzle cube in the same pieces as mine.
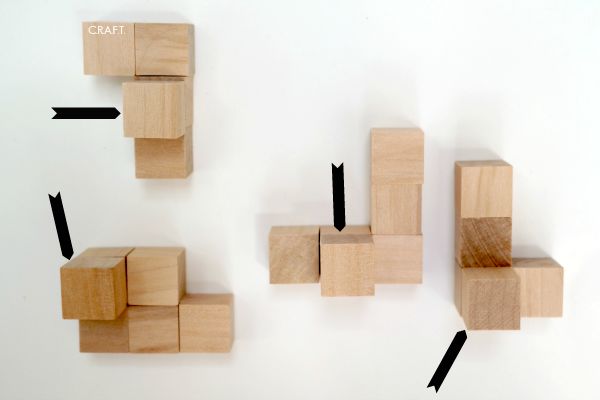
Step 4- Glue 4 more blocks
Now, set the criss cross shaped piece to the side, that one is complete! For the other 4 pieces you will need to glue one of the 4 remaining cubes to each piece. Follow the arrows!
Step 5- Allow drying time
Give the wooden pieces a few hours to completely dry before moving on to step 6.
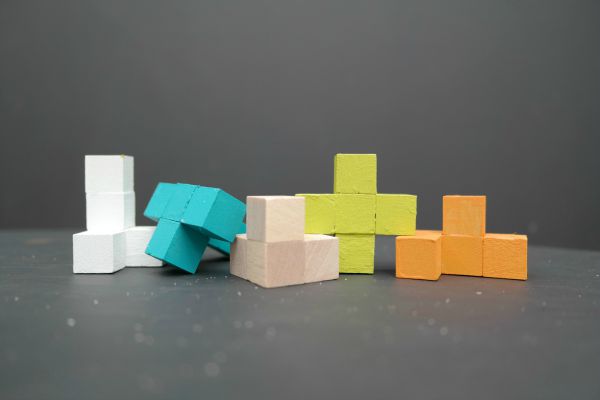
Step 6- Paint
Use a paintbrush to paint each section of the puzzle cube. I left one of my sections wood and painted the other 4 sections. Allow each peice to dry over night.
Step 7- Sand rough edges
I used sand paper after the cubes dried because a few pieces had a little dried glue.

Another fun idea is to give someone all the materials to make this little craft! Are you a puzzle person? Do you think someone in your life would enjoy this toy?

Comments & Reviews
What a neat gift idea for anyone who loves puzzles.Thanks for linking up on #HomeMattersParty. Hope to see you again next weekend.
I absolutely love this! Thanks for sharing it with us. Pinned and tweeted. I hope to see you tonight at 7 pm. We can’t wait to party with you! Lou Lou Girls
Great idea and I loved the step by step how to! Thank you for partying with us at the Thursday Favorite Things Blog Hop!
This is very complex yet crafty! Good idea!
Thanks for sharing at #SmallVictoriesSundayLinkup ! I pinned your post to the group board Small Victories Sunday.
So fascinating! Those puzzle cubes are one of those things I could never work out, but seeing how you can make your own is pretty cool!
Love this idea, would be a great gift for someone who loves puzzles.
cool idea! cheers!
Thank you! I’m getting ready to make four of these later today, thanks to this post. But the cubes were more expensive at my Hobby Lobby; they don’t seem to carry larger bags like you got. Not a complaint — just putting it out there for anyone else considering it, so they can plan properly. I think mine were closer to $4 each. But still worth it (and would’ve been cheaper if I’d made them far enough in advance to wait for the wood stuff to go on sale!)
I think this is brilliant! This keeps those kids thinking. Thank you.
This is such a great gift idea! I’ll be featuring it on The Crafty Crow!
Here is my mini tutorial on how to make your own cubes out of 3 strips of paper. It is a wonderful thing to know! I have made these puzzle cubes out of paper cubes. I should also make tutorials for other forms that you can make: A larger cube puzzle with holes through the middles. A ‘flip’ cube that folds and unfolds. Gotta do that!
Lynette, I would have never gotten it back together if I hadn't of taken so many pics! You could always let the gift recepeient paint it 🙂
ok I just did it! It took me longer to figure out how to put it together after I finished than it did to make it! Thanks for the pictures, or I would have never gotten it together right! 🙂 I was going to paint mine, but I may leave unfinished in the interest of time.
That looks so fun and the price cannot be beat! You are right, it is the perfect stocking stuffer. I am new FB follower visiting from Sugar Bee Crafts. Vicky from Mess For Less
Really cool!
My husband would love this! I am pinning it, and maybe if I'm lucky I could make this before Christmas. 🙂
My Grandparents used to have one of these and it was the "favorite toy" I will definitly be making some of these soon!
great idea
This is such a great idea!! My grandma had something similar made out of plastic and I would play with it for hours…I think one of these might end up in my husband's Christmas stocking. 🙂
It was called SOMA. I had the same puzzle. I would keep the pieces all the the same color, like the original.
That's really cool! I taught myself the Rubix cube 2 years ago (via YouTube lessons too)…I figured if my 14 year old students could do it than I could too.
And I agree, Tetris is awesome!
We made these in our middle school technology class (wrongfully named because we only made things out of wood. lol)
Felicia, pictures would be cute! Also, to make it easier, you could put dots or X's on all of the outside squares…!
I think it would be cute to do pictures on each side too! Very cute, will have to keep an eye out for blocks!
Mandanya Rafa, I would like to tell you I'm just a genius 🙂 But all of my crafts are inspired by something… a student I teach at school has one of these…and I thought, "hey, I could make that!"and so I tried! and Nancy, it so reminds me of tetris too… LOVE that game!
So very cool! What a fantastic idea!
I wonder how you always come up with those wonderful ideas…
this one if ridiculously easy, but genius nonetheless..
This is such a great idea. With the different colors it makes me think of a game I love…Tetris! This will be going in my son's stocking!
Ok thats way cool! I love puzzles and I already have these little blocks on hand! I thought they would make a cool project, just hadnt figured out what that project would be.. well until now! 🙂
This is a great idea! Thank you for sharing the how-to!!!