If you’re new here, I’m pregnant with my first kiddo! And we’re in the process of decorating a fun little room for baby Dorobek. Here’s the DIY nursery plan, painting the igloo, bambino gets a crib, rug debacle, and Graham the glider. Oh and we’re having a boy, here are the gender reveal party deets.
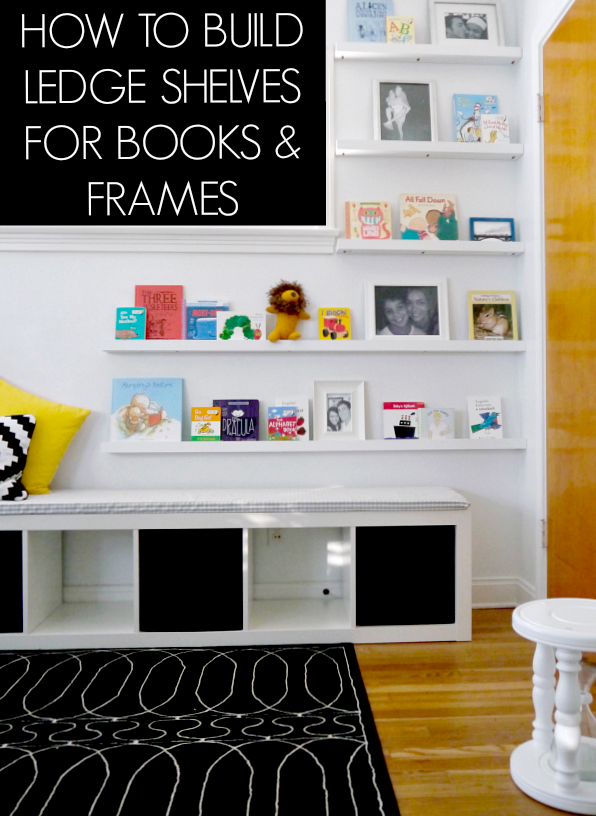
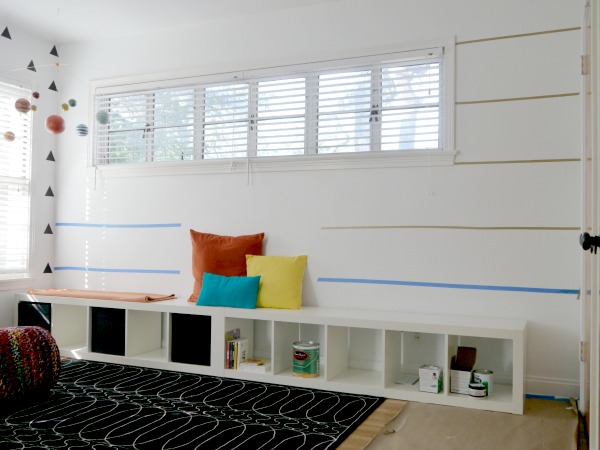
Now that you’re all caught up, here’s the low down on our DIY version of the Pottery Barn Holman ledge shelves that one hold our kiddos book collection. I got a ton of fun baby books at the B is for Baby, book, brunch shower back in December! Mom and I turned the IKEA EXPEDIT shelves into one long storage bench. And Andy crafted up 7 picture ledge shelves, based on my awesome tape lines you see below to hang above the storage benches.
We thought about just buying the picture ledge shelves from Pottery Barn, but the largest size they carry is 4 feet long. We needed 2 shelves that were 62 inches long. Not to mention, the 4 foot long shelf from Pottery Barn is $59. We made all 7 shelves for $65 bucks! I see lots more picture ledge shelves in our future.
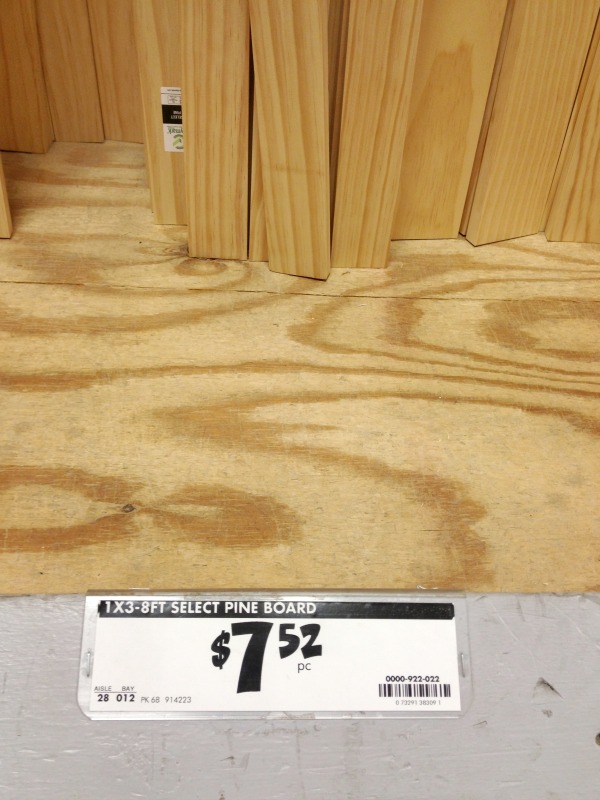
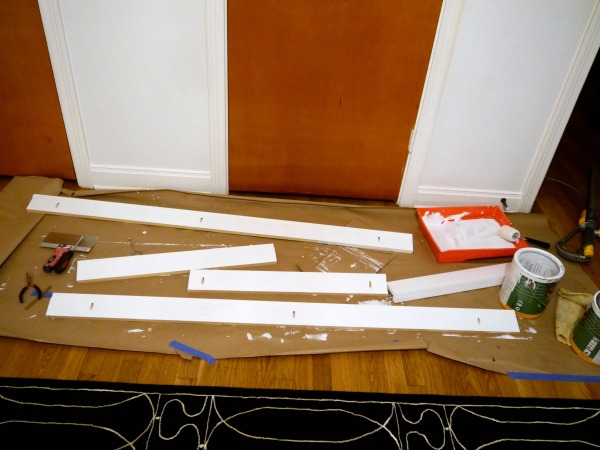
We thought about doing gutter bookshelves, but ended up deciding on a sturdier option for the nursery. I feel like this room might get some good use since it is going to be the playroom and bedroom for the bambino. We took a little trip to Home Depot to decide on the best option for wood. We ended up choosing these 1 x 2 8ft pieces of pine. Obviously you need 2 pieces of wood per shelf. So we ended up buying 8 pieces of 8 ft pine to make our 7 shelves. Here were our final cuts:
- 4 pieces 48 inches long (2 8 foot boards)
- 4 pieces 62 inches long (4 8 foot boards)
- 6 pieces 28 inches long (2 8 foot boards)
We made the left side shelves a tad shorter than originally planned when we found we could buy the boards in 8 foot sections. The goal was to waste as little wood as possible. When buying your wood, pay attention to the trueness of the board. AKA: make sure your board is straight and not warped. A simple test for this is to lay your board on a flat piece of ground and if you can flip your board on all 4 sides and it does not teeter totter or have any gaps between the wood and floor then it’s a keeper. If there are gaps, put her up and test out another piece.
Other than pine boards, we did not have to buy anything else. We had all of the other supplies on hand.
Here’s what else you need to make the ledge shelves
- Kreg Jig
 (This is an essential tool for the job!)
 - Screws
- Clamps
- Paint
- Saw
- Sander (We use the Dremel Multi Max tool for small jobs like this.)
- Paint brush (This is my very favorite paint brush!)
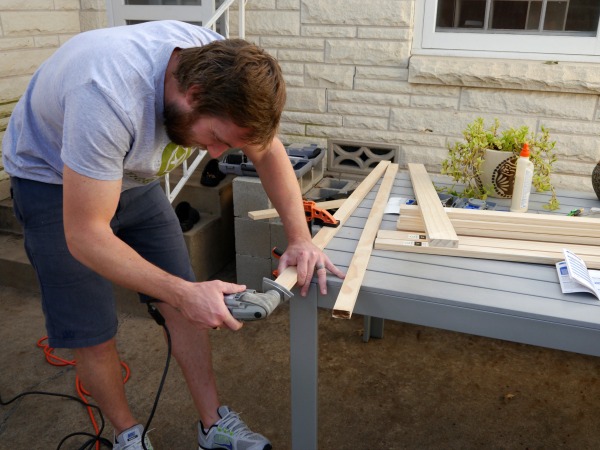
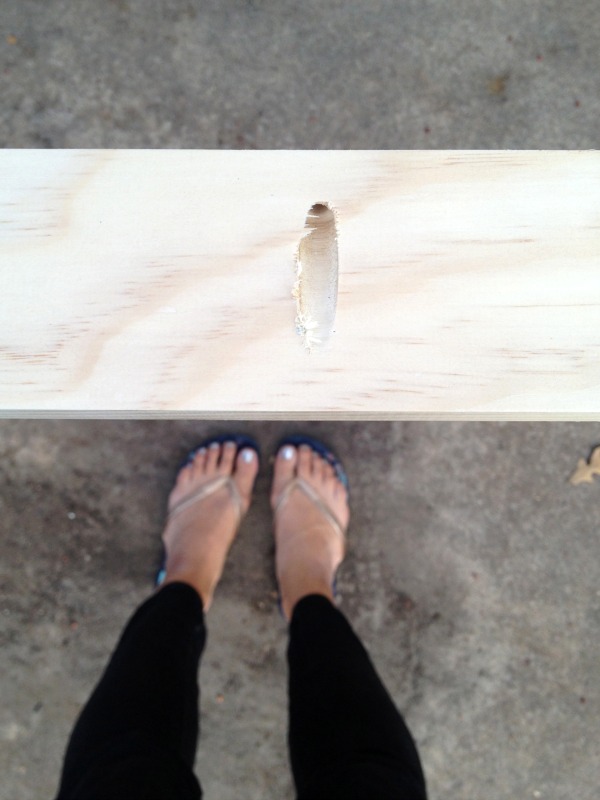
Andy used a saw to cut the pieces of wood down to size and he sanded the edge of the wood with our handy dandy Dremel multi max tool![]() . Here’s an action shot of Andy sanding the cut.
. Here’s an action shot of Andy sanding the cut.
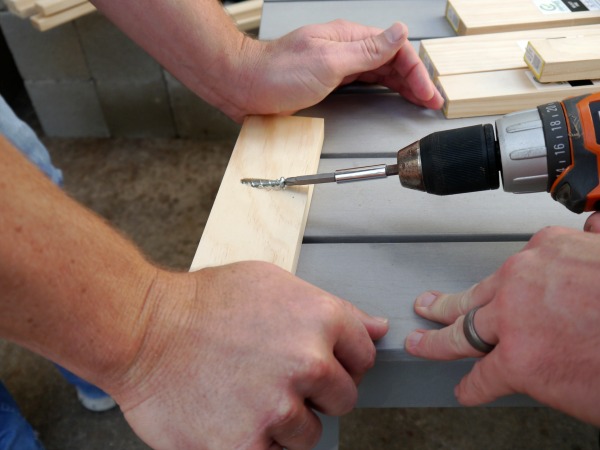
After you make make all of the cuts, it’s time to make the shelf. Andy used the Kreg Jig to conceal the screws that attach the the 2 pieces of wood that make one ledge shelf. The Kreg Jig is super simple to use. Follow the table in the Kreg Jig instructions to determine the adjustments you should make on the Kreg Jig. Then just clamp it into place and drill.

As you can see the Kreg Jig allows you to drill a very steep angle into the wood. This will allow you to join your two peices of wood and conceal the screw for a very clean finish.
Here’s an action shot of a screw being set into a Kreg Jig hole…
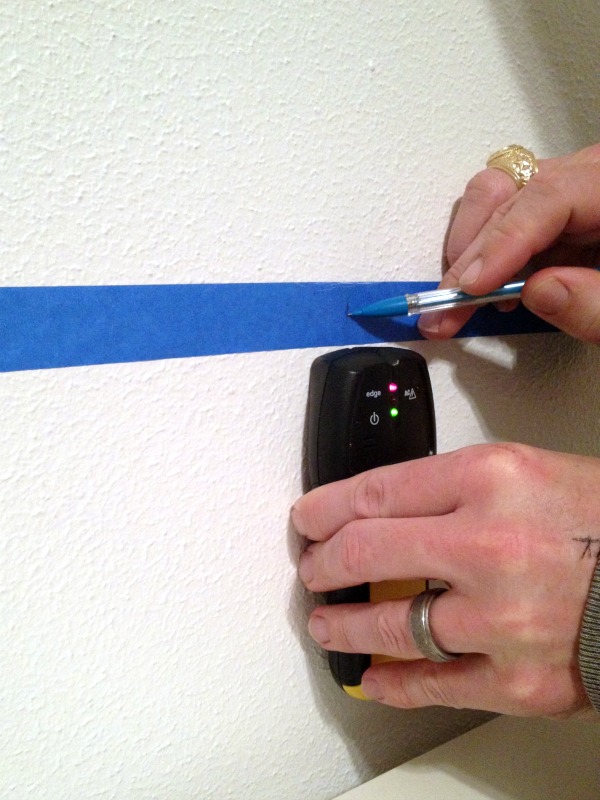
We joined the pieces of wood with 2-3 screws, based on the length of the shelf. As for hanging the shelves, Andy found the studs in the wall with a handy dandy stud finder:
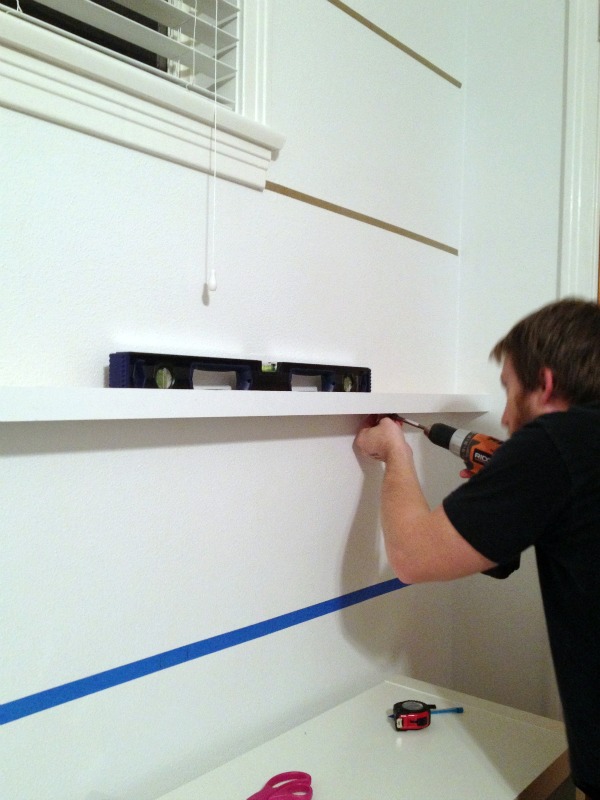
After he found the studs in the wall, we marked where the studs would fall on the actual shelf to drill a hole into the shelf to attach it to the wall. After you get those holes drilled, the shelves are ready for hanging. I held the shelf on the wall and leveled it with a level, and Andy drilled them into place.
As for painting the shelves, I tried it 2 ways. I painted 2 shelves after they were already hung on the wall. It took awhile. I gave the other 5 one coat of paint before they made it to the wall, and then a quick second coat on the wall. The second method seemed a lot easier and less messy.
I love how the shelves turned out! The hope is that this kiddo will be able to grab and put away his books by himself! Gotta get this kid cleaning up after himself ASAP, ha! Here are a few more pictures of the fun DIY shelves and IKEA bench. Oh and check out those cushions… mama helped me make those. Tutorial coming soon!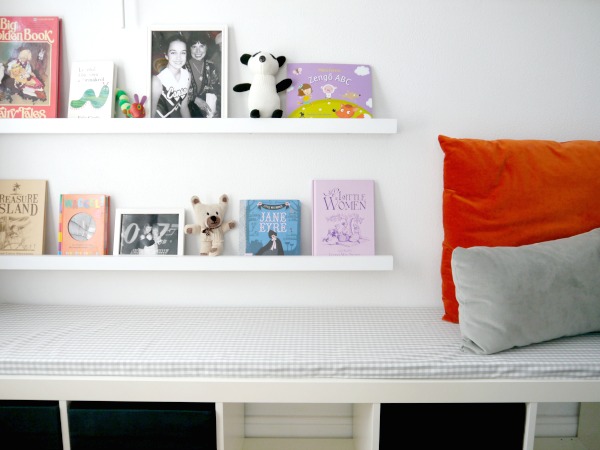
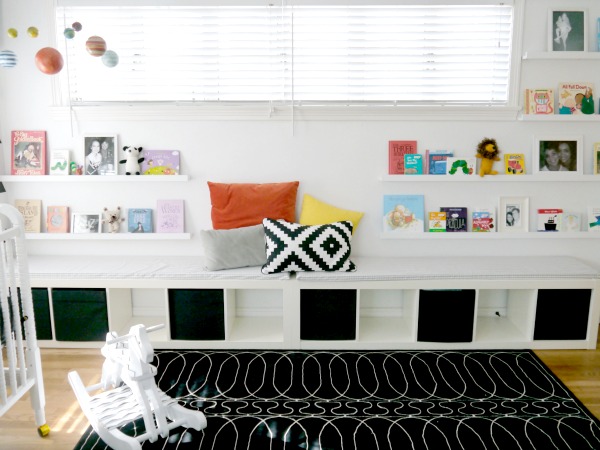
And here’s one with all 7 shelves:
What do you think? Do you need some ledge shelves too! I need more! They’re so handy and they really aren’t that hard to DIY!

Comments & Reviews
Looks like exactly what I’m looking for. I’m not SUPER experienced, though . . . so I’d love to see a section showing how the two pieces of lumber meet to form the shelf. Is it a T connection? Or an L? you know what I mean? I couldn’t see, in your directions, how the two pieces connect. Did I miss something? THANKS!
Thanks for linking up over at Family Fun Friday. This will be one of the featured posts I’ve chosen for this week.
A big CONGRATS to you! Your kiddo-to-be is going to love these (I know I do, lol!)
I do not see the need for “select” pine board. A careful inspection of common pine boards offered should provide needed material, at a cost savings. After final sanding, paint primer & two coats of semi-gloss paint, no one could tell the difference. The result would be perfectly acceptable, even to the baby’s high standards.
Hi, awesome work! How did you convert the IKEA bookshelf into a single row?
Looks GREAT!! Darn wish I saw this before I ordered from PB just yesterday! Grrrrr!
They look fantastic!
Thank you, Chelsea! I want more shelves 🙂 They’re so cute and easy!
Looks great Jamie! Your little one is so lucky to have such a room!
Looks awesome! 🙂