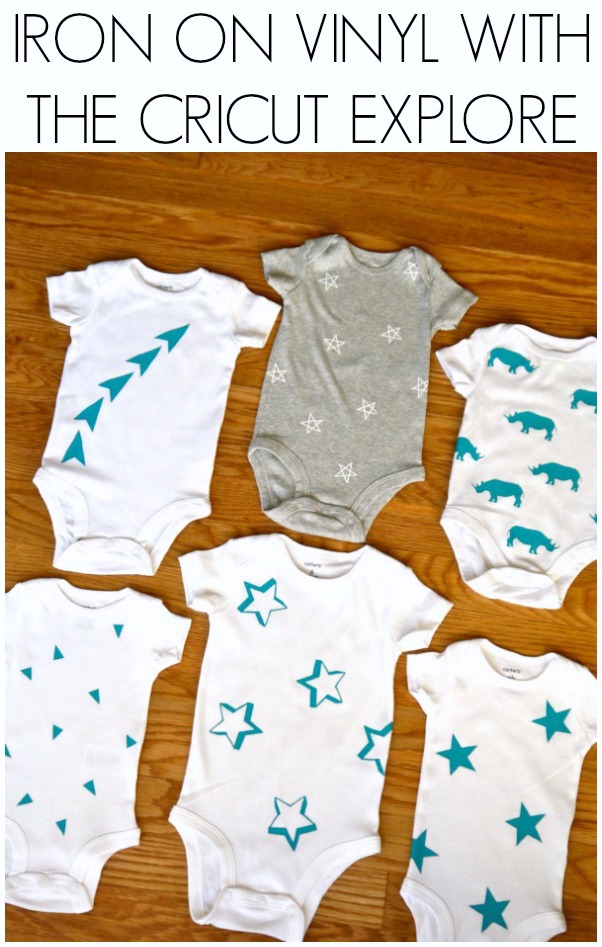
Solid color onesies better hide in my house if they don’t want to get awesome! The Cricut Explore and I are on a roll with iron on vinyl.
Here’s what you need to make fun onesies:
- Cricut Explore
- Iron on Vinyl
- Iron
- Dish towel
So, first thing is first… You need to know how to upload your own image to Cricut Design Space! You can buy images from Cricut Design Space. They have tons of cute ones. They also have about 50 free ones, including the rhinos! But, you can also upload your own images fo’ free. Which is the route I took! I’m going to show you how I did it with the star on the grey onesie in the pic above. These directions correspond with the numbered image below!
1: Go to picmonkey.com and upload a white square. Add the doodle star. The exact star on the grey onesie is part of the pic monkey royal package, which I pay for. But, you can use one of the free stars too! Then save the image to your computer.
2: Go to the Cricut Explore Design Space and click on upload image. Then hit basic upload.
3: This screen pops up. You’ll see the 3 simple steps: Select, clean, save.
4. Hit Continue to Step 1, and browse to find the image you saved from pic monkey to your computer. Then hit the simple image button and press continue. (I’m assuming you are doing a simple image, like a star!)
5: It takes you to the second step: Clean. This is where you literally just press all of the areas that you want to be cut out.
6: Then name and save your image to your desktop, and press insert image! Voila!

7. That will take you back to your canvas with your star inserted.
8. Now, click on set canvas, on the left hand side of the scree.
9. Pick baby clothes and click done. Or whatever item you are going to make! This is just to help you get the size right.
10. I decided to make my star smaller. And then hit duplicate at the bottom of the layers pop up. (You can not see the duplicate button in my picture.)
11. Once you have all of your stars duplicated, it’s cutting time! Hit the green “C” go button at the top of the screen and the screen in #11 will pop up and show you that your stars are all arranged and ready to be cut.

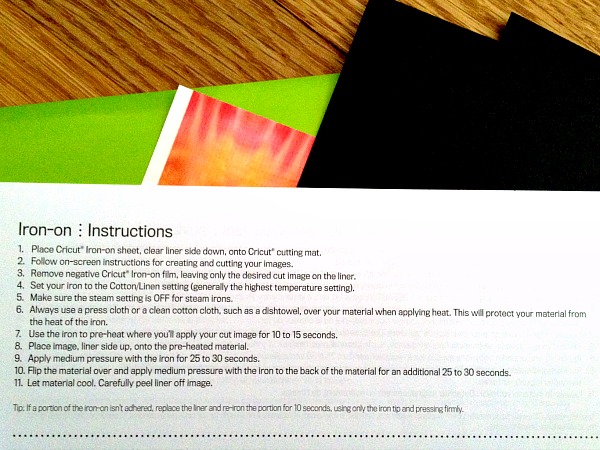
So, now you’re ready to cut your iron vinyl with your Cricut Explore! It’s pretty straight forward… I used the directions that came in the Cricut Explore project materials folder. Here they are:
Some tips and tricks I learned along the way:
- Make sure that when you place the vinyl on the cutting mat it is shiny/ liner side facing down! Don’t wanna waste your precious vinyl!
- If you are using text, you must click the mirror image button once you get to the Mat Preview page.
- I cut each of my stars into individual squares first. And then pulled the access vinyl off of each square piece. No vinyl wasting over here.
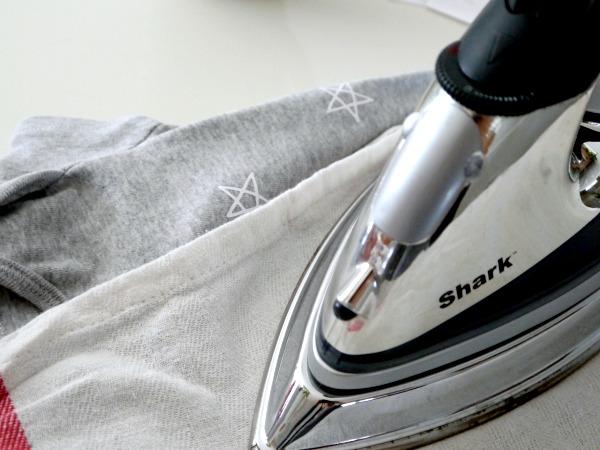
- You will ruin your vinyl if you do not use a dish towel over your vinyl image when applying heat.
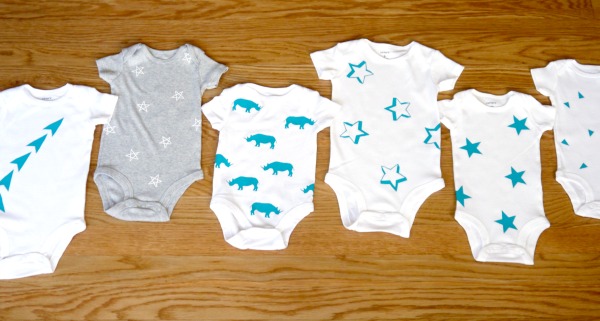
It seems complicated, but I promise once you do it once, you’ll be a pro! Plus, how cute are these little things?!
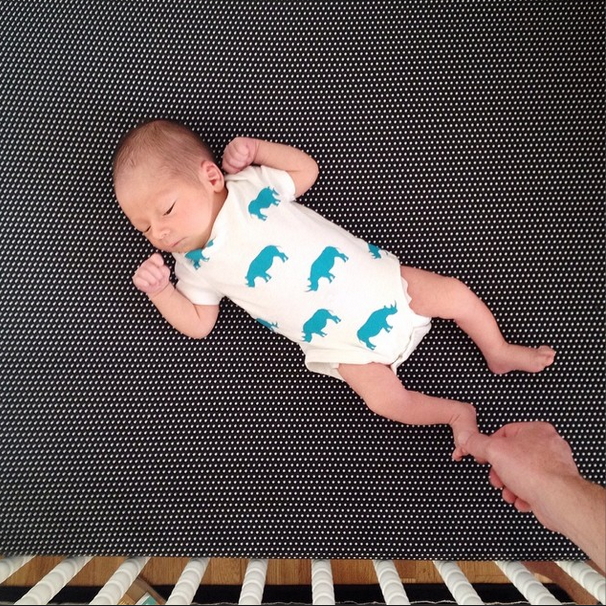
Oh and here’s Maxwell sporting his fave onsie:
Have you ever use iron on vinyl? Do you have a cutting machine? If not, you need one! If you’re interested, here’s my post with lots more deets about the Cricut Explore and what it can do! Do you have a think for sprucing up plain white onesies? I’d love to hear…

Comments & Reviews
I don’t have a machine yet. I’m thinking about getting one.
I’ve seen designs online that I like. Is there a way to copy them?
Really love your site & these onesie designs — I’m going to try a similar project in a few weeks with printable HTV, when I post my tutorial I’ll definitely link back here in case people want to try with iron-on vinyl instead.
Thanks for posting this, so glad I found it!
Hi! 🙂 How good does the vinyl hold in the wash?
Thank you!
Hi there.. i was wondering the same as Kristi.. how to use own image without having to print it on paper first??
I don’t understand? You can use any image from the internet. And you don’t have to print it.
So why is it when I load my image, I have to print it before I can cut it? I want to cut to window cling vinyl. I can’t print on that first. I tried laying the printed paper image over the vinyl before cutting but that is a real pain. Any suggestions, or am I doing something wrong?
Check the icon next to your image on the right side. If it is set on print, just click on it and change it to cut (scissors)
It’s because your image was saved as a print then cut image, vs a cut image. Go upload it again and save as a ‘cut image’.
Hi! First time using iron on vinyl with my Cricut Mini. Im very excited. Using design space I attempted to download some images for my project. hey uploaded, but when they saved it was just a black square. Any ideas what I could have done wrong?
It’s because when you uploaded it, you have to click the areas that you want deselected.