Note: The Home Depot partnered with bloggers such as me for their Building Better Baths program. As part of this program, I received compensation for my time. They did not tell me what to purchase or what to say about any product mentioned in these posts. The Home Depot believes that consumers and bloggers are free to form their own opinions and share them in their own words. The Home Depot’s policies align with WOMMA Ethics Code, FTC guidelines and social media engagement recommendations.
Let’s get right to the good stuff, here’s a picture view of the bathroom remodel progress so far.
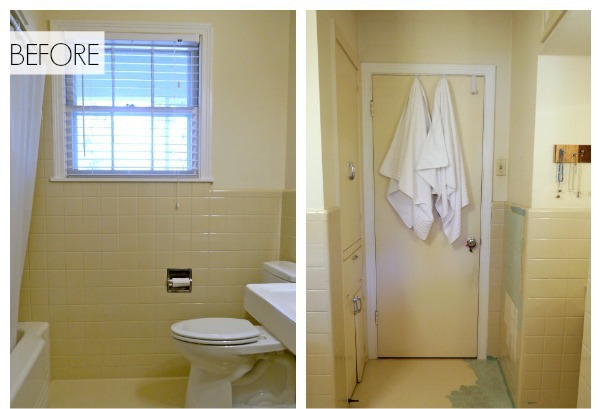
Part 1: The beautiful befores
Part 2: Picking our fixtures and tiles
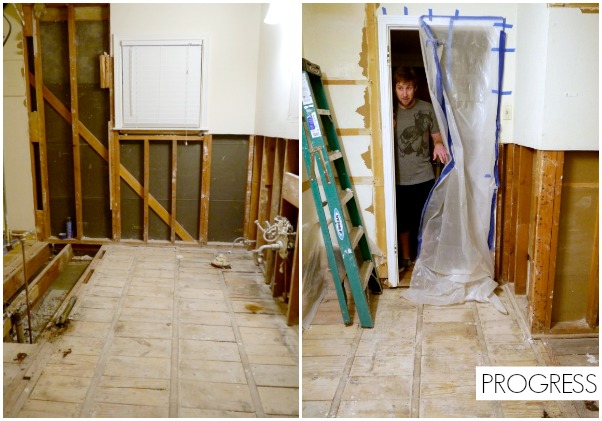 Part 3: Demolition tips and tricks
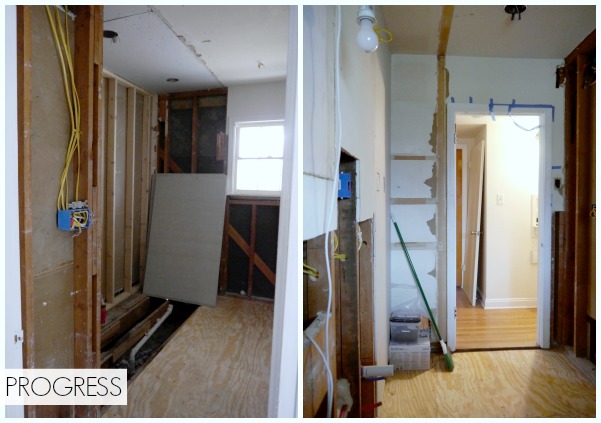 Part 4: Change of plans (installing stand alone shower and moving closet wall back 6 in.)
 And moving on to Part 5, tiling! This is the fun part where things really start to come together, and your bathroom starts to look like a bathroom again. So, in Part 2, I shared about choosing tile and fixtures. Well, what do you know… I changed my mind about the floor tile! It really just ended up being a financial decision, I guess when we were still in the looking phase, money was no object and then I had to put down the plastic and quickly changed my mind, ha! We still got hexagons and I really wanted small scale (small scale tile = more grout and tends to make the floor less slippery). I’m so, so happy we changed our mind. And so is our bank account. We ended up buying the Daltile matte white ceramic octagon dot mosaic. And don’t worry, I still got my grey on the floor! You’ll see…
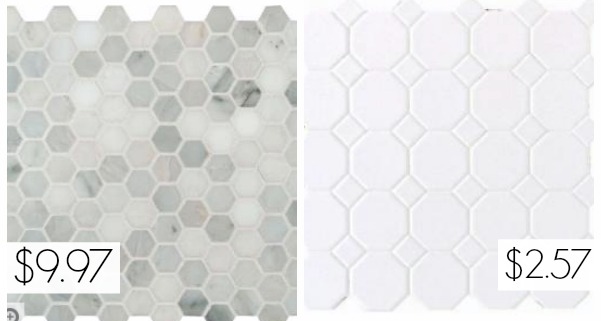
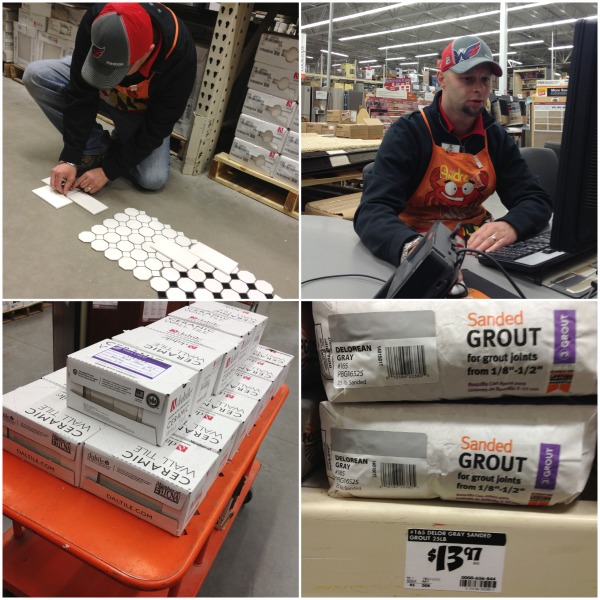
Before we get into nitty gritty how to tile deets, I must introduce you to Andre, the patient, knowledgable, and super helpful Home Depot employee that made our tile dilemma and purchase painless. I wish y’all could all shop at my Home Depot and have Andre help you with your tile purchase. I’m serious. Andy and I went to buy the pretty grey hexagons and realized to buy what we needed for our floor was going to cost $900+ doll hairs. You’re very pretty grey tile, but not that pretty! So, we had 45 minutes until the store closed to pick out new tile… the tiling project was starting Saturday AM. Like I said above, I wasn’t willing to give up hexagons and small scale, so that led me to the 2 choices in the picture below. Andre (who has a fun crab on his apron, not because he is crabby, but because it was a parting gift from the Home Depot he worked at in Maryland) sat on the floor with me while I debated and debated, took pictures, called my mom, and asked a bazillion questions about grout and spacing until finally deciding on the all white hexagons. He helped us pick a grout color, Delorean gray, check us out in the back, loaded all of the tile, and even walked us out of the store to help Andy load our 17 boxes of subway tiles and 8 boxes of floor tiles into the back of the truck! Thank you, Andre!
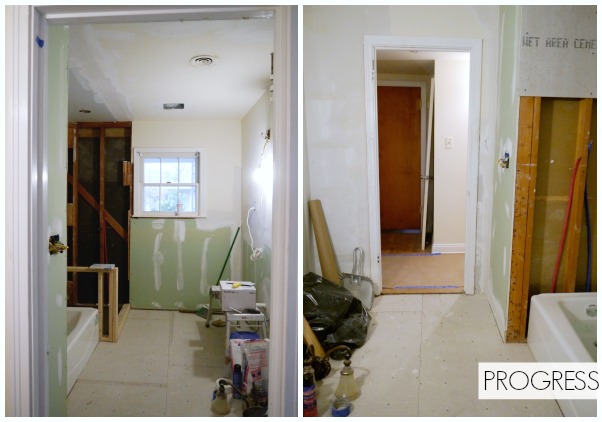
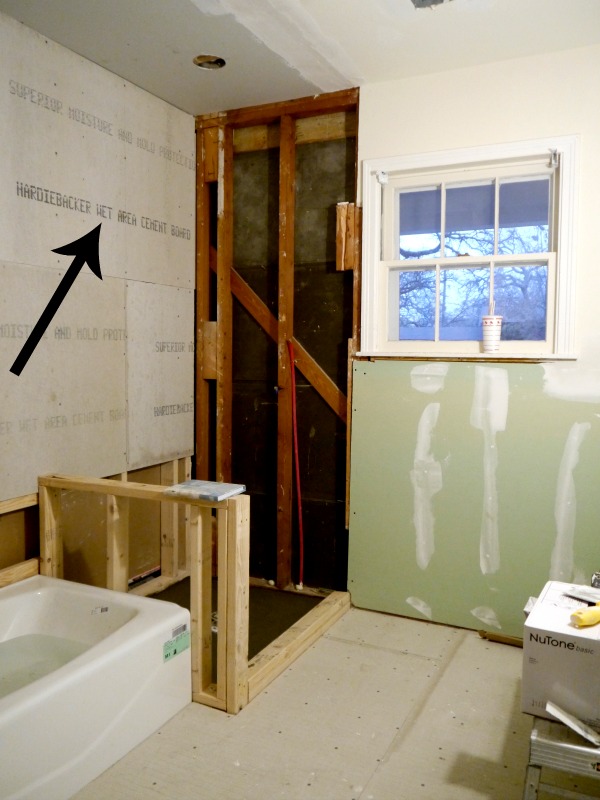
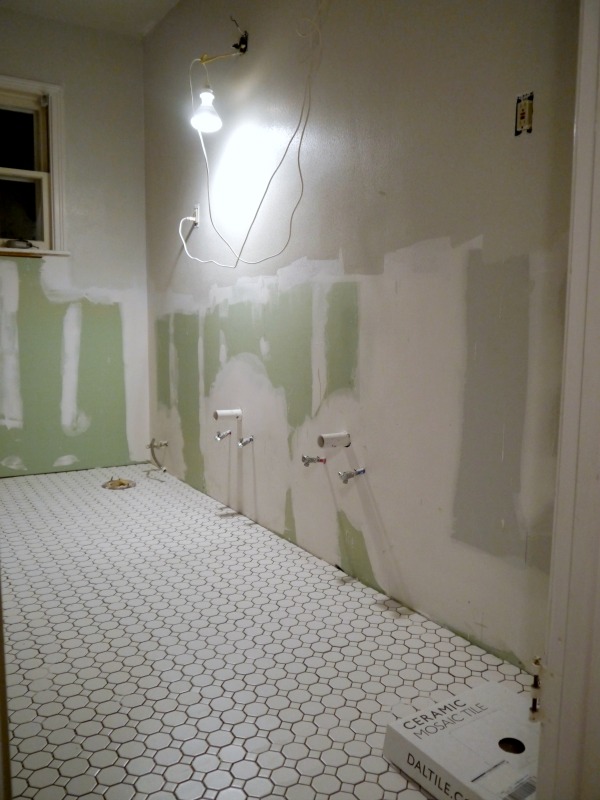
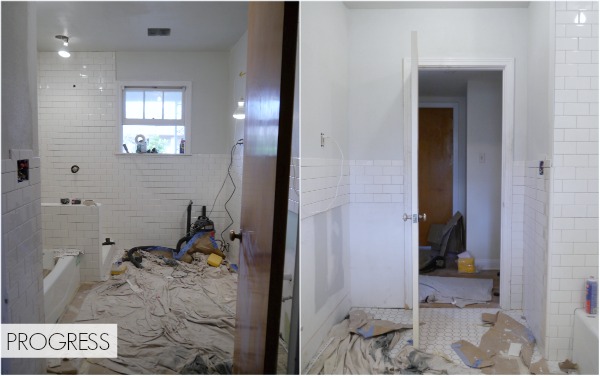
So, I talked about installing cement backer board in part 4. All of the valves and fixtures have to be installed before you put up the backer board. In this picture, we had not gotten the valve and shower fixture installed yet. But, you can see the backer board on the wall. It’s the stuff that says “hardiebacker wet area cement board” on the wall.
Once the fixtures are in place, and cement board is installed it’s time to tile! Well, almost. You also have to seal the seams of your backer board. We used Red Guard from Home Depot. It’s $46 a gallon, but absolutely a necessity. It creates a waterproof barrier in all of the nooks and crannies of your wet area. Pretty, huh?
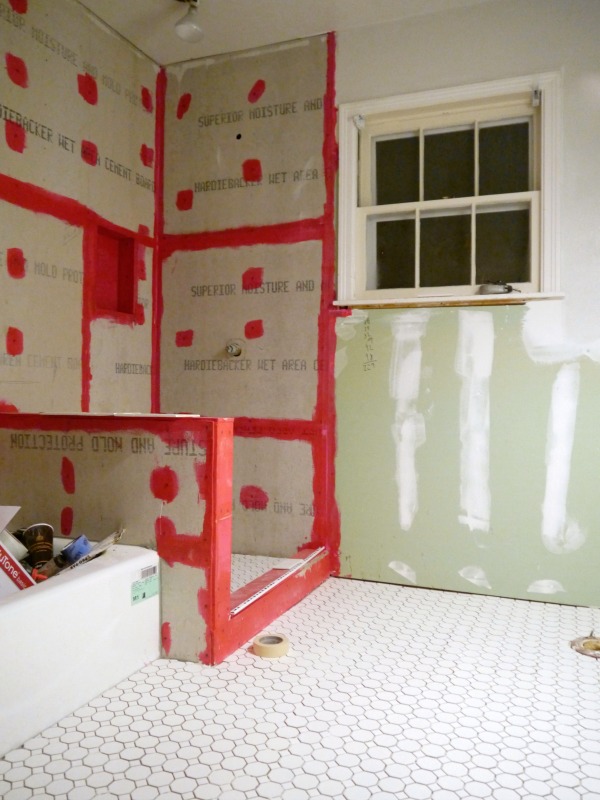
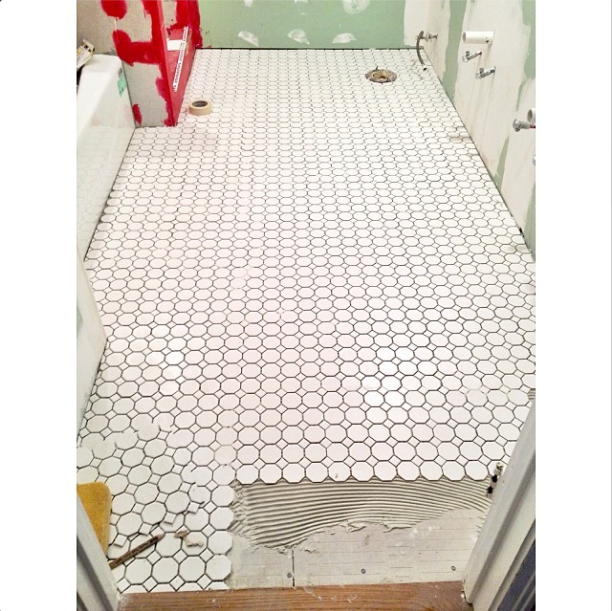
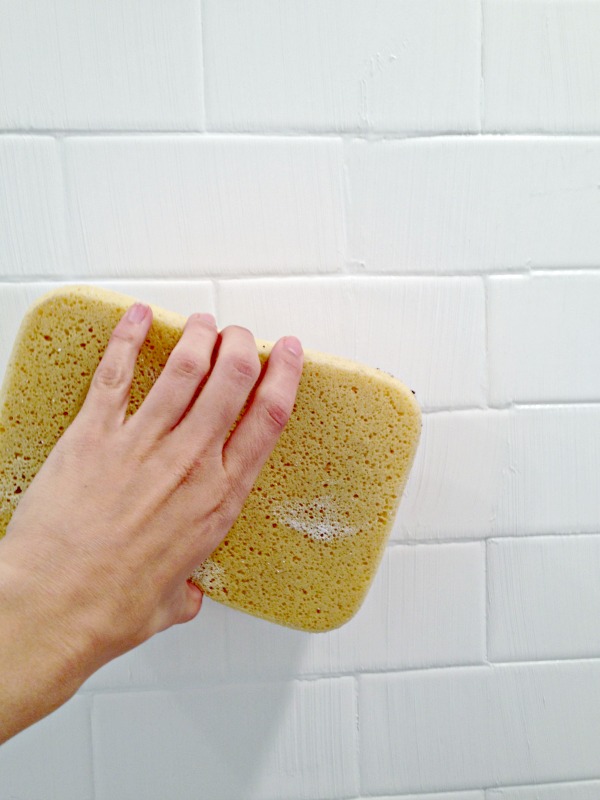
As you can see above, we tiled the floor first. Our floor tile came in 12×12- inch mesh sheets of mosaic tile and each sheet is laid like a single tile, making the process way faster than laying each individual hexagon and square! We used chalk lines to give us perfectly straight and square lines to layout the sheets of tile. Then it is just a matter of spreading mortar on the floor and pressing the sheets of tile into place. Oh and there is some tile cutting involved too! Some mortar will squeeze up between the tiles, no worries, just wipe it off with a wet sponge. A slightly wet sponge is your BFF when tiling.
Probably one of the most important things is to maintain equal spacing between the sheets of tile. You can make sure that the sheets are spaced equally with tile spacers. Here’s an instagram installing the last sheets of tile on the floor! Whahoo!
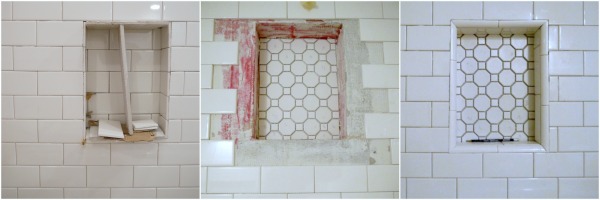
Oh and on the recommendation of our tile teacher, we used Rapid Set Cement for the mortar. You just mix with water, and it sets in 15 minutes! So, after we tiled the floor and let it set overnight (even though it only needed an hour!), we went to work on the walls. The walls are trickier for sure. You have to mess with corners and shower shelves and all kinds of goodies. We covered the newly tiled floor in brown paper and went to work on the walls using the same basic method as the floor. Now, remember I told you that we hired a tile pro to give us a lesson in tiling! So, he was a major help with the cutting (we borrowed his tile saw) and how to do the finishing edges, like around the shower and bath shelves. We had a few little issues with the tiling around the shelf… we ended up prying the tiles off and redoing this portion! I’m happy we did because after the first tile removal, I decided it would be fun to use the flooring as the background of the shelves!
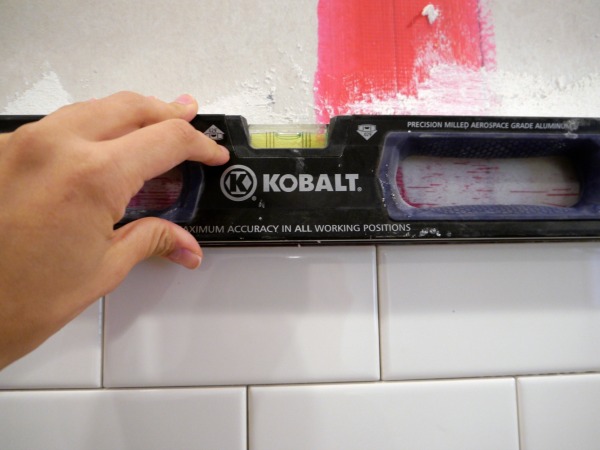
Not only did we hire an expert to give us tiling lessons, we’d been doing lots of reading about tiling online. I collected all of my resources on my bathroom remodel Pinterest board, if you are interested. The level is your friend and please don’t trust your bathtub (or your ceiling) to be straight! Thanks to a discussion with Andre at Home Depot, we decided not to use spacers and allow the natural 1/16 space that the subway tile provides thanks to the beveled edge on the tile. This saves a ton of time too.
After the tile was all in place, it was time to grout which for the record, I think is the most fun part! It’s like icing the cake and knowing you are almost done and get to eat it or uhh.. use your new bathroom! Here is a great one minute video we used to learn how to apply grout. We decided to use grey grout on the floor and white grout on the walls. Grouting makes a big difference. Check this out: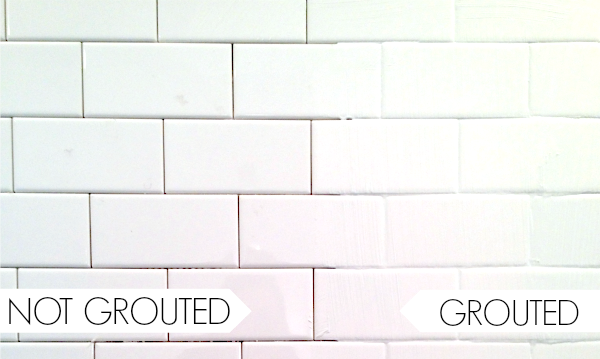
Again, the wet sponge is your BFF.
And after a long weekend of tiling, here’s the bathroom in her tiled, but messy glory:
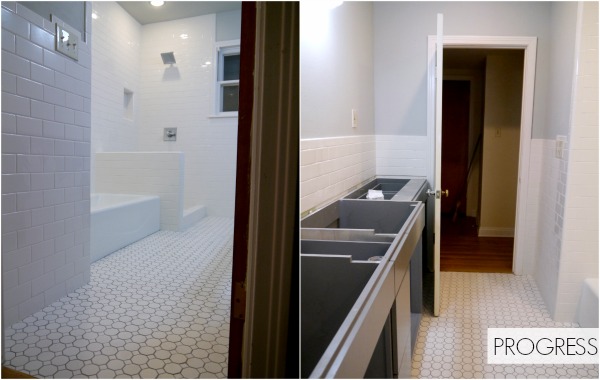
And here she is all cleaned up and with the cabinet (that we did not build ourselves) in place! We also used leftover paint from the living room to paint the walls and ceiling.
The bathroom is officially complete as of now, I will share the finished before and afters very soon along with the source list and name of colors and what not! Anyone else tiling lately? Tips? Tricks? Things you wish you would have known before you started? Spill the beans…

Comments & Reviews
Wow you did a beautiful job!
Wow! Great job! I like it very much… 🙂