I am thrilled (and also shocked!) that a business actually paid $10,000 for this peice of string art that me and 100+ kids made together! The money raised benefited the Child Life Art and Music Therapies Endowments at Dell Children’s Medical Center. How awesome is that? To see lost more about the collaborative art pieces we made, check out his post!
The challenge was thinking up an art project that could be made with 100+ kids, and be worthy of hanging in a fancy office building! This string art project is definitely worthy of a fancy office building! Ready to learn how to make string art?!

What you need to make string art
- 3/4 inch plywood (Home Depot to cut a board down to size for free)
- 4 boxes of Linoleum nails
- Drill with a 1/16th drill bit
- Template (BlogPosters.com)
- Triple Thick Polyurethane
- Hammer
- Yard stick
- Embroidery floss
- Sharpie
- Tape
- Paper plate or card stock (to make a string holder: only necessary if you are working with kids so that the floss doesn’t get so tangled)
How to make string art
String art is so fun and easy project to do with younger children as well as adults!
Step 1- Prepare wood
First, you need a board. We used a scrap piece of 3/4 inch plywood we had leftover from another project and cut it down to a 3 feet by 3 feet square. Andy sanded it to make it nice and smooth. Depending on the quality of your plywood, you may or may not need to sand it first. I used Triple Thick Polyurethane![]() Rustoleum product to clear coat the board. Literally one coat and it looked like 3 coats, thus the name, Triple Thick. It worked really well.
Rustoleum product to clear coat the board. Literally one coat and it looked like 3 coats, thus the name, Triple Thick. It worked really well.
Step 2- Create a template
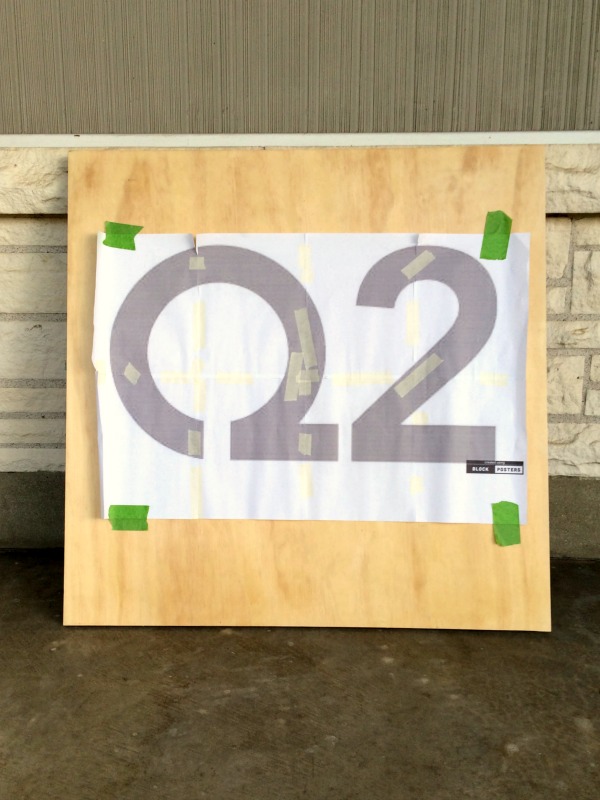
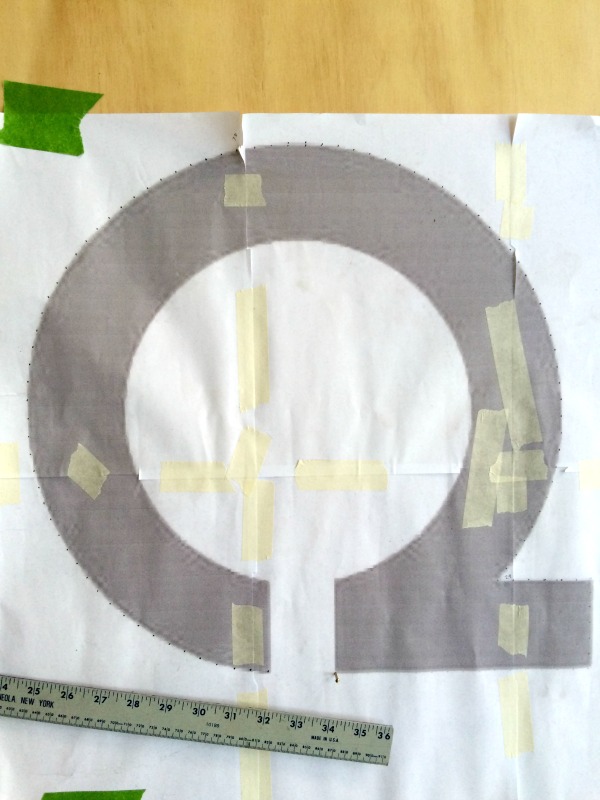
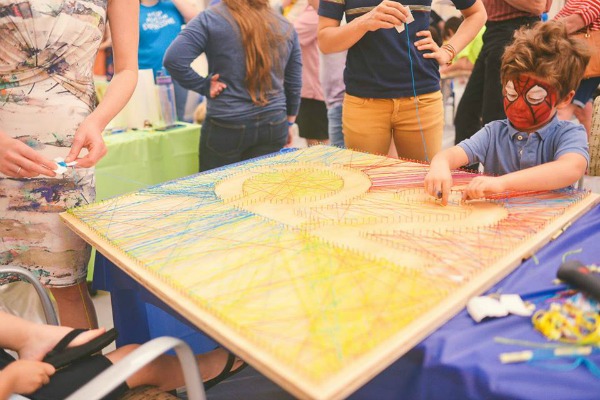
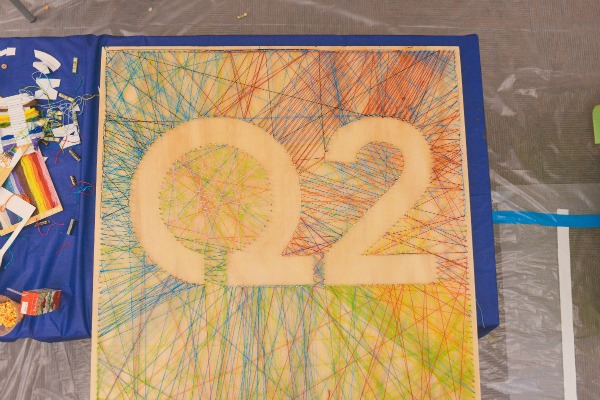
Now that your board is prepped, you need to decide what to string. In my opinion, simple is better and easier. If this is your first string art project, start with a simple shape like a heart or a single letter. We did “Q2” because that is name of the company that was sponsoring my art piece. Next, make a paper pattern. BlockPosters.com is a free site that allows you to enlarge any image. I entered the Q2 logo and it created a template to my specifications. Once all 8 pages were printed and taped together, I centered and taped them to the plywood board to start the outline.
Step 3- Attach nails
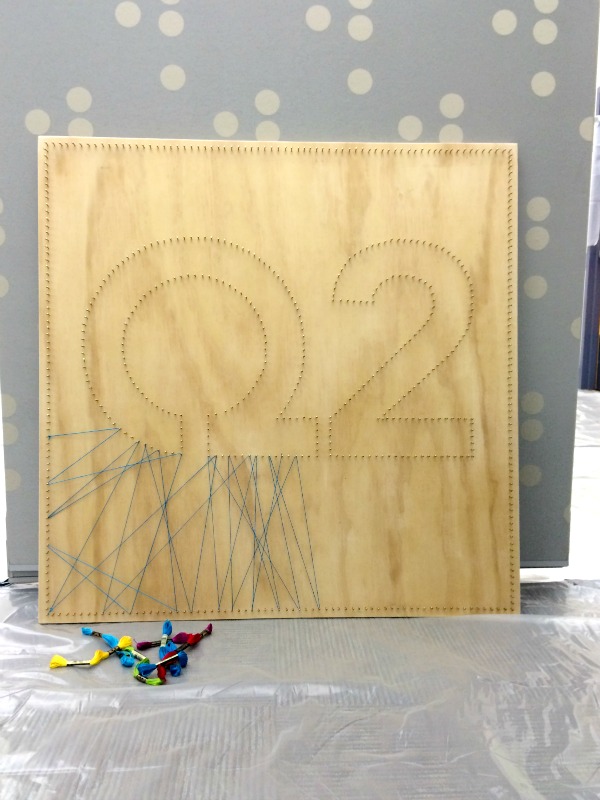
Now, it’s time to put in the nails to the board. I measured and made a dot every half of an inch. I decided on half an inch because I wanted to make sure the curve of the “Q” and “2” were well defined. If your are planning on stringing something less curvy, you can space the nails out more. While I was measuring, Andy used a 1/16th drill bit and pre drilled holes for the linoleum nails. Then, we used a hammer and nailed each nail into the pre drilled hole. We ran out of nails mid “2”, and…
… I left to go to Snap, a creative blogger conference. My mom came to town to watch Max for the night and I woke up super early to hop on a plane to Salt Lake City. Andy and Mom to the rescue! They finished up the nails on the outside border so that it would be ready to go when I got home Friday night. The kiddos were showing up to craft at the Art of Giving on Saturday morning at 10am! A note about the border of nails, I did what is called reverse string art. So the string is in the negative space, and the “Q2” stays wood. I decided to do this so that there was more space for kids to string! Right before the kids starting pouring in, I decoded to string a strand of floss as an example.
 Step 4- Make string organizers
 Step 4- Make string organizers
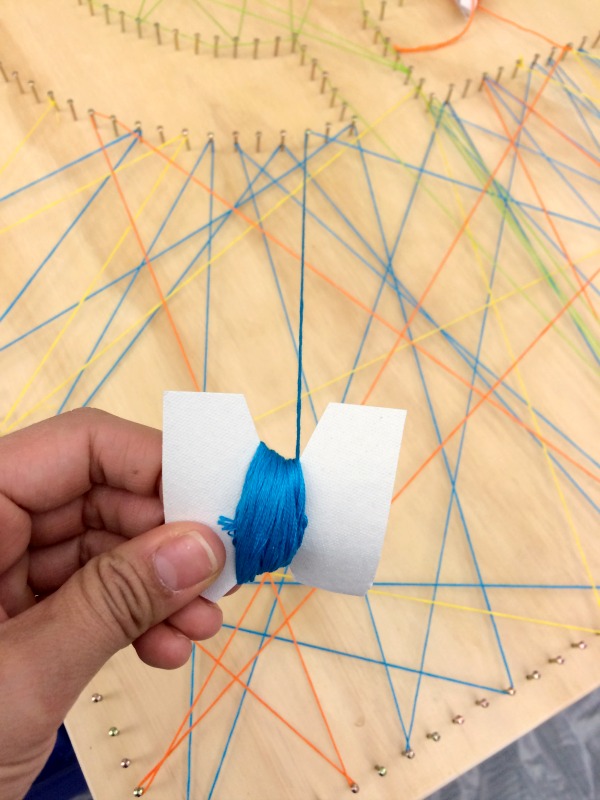
Another last minute detail that made a huge difference was making string organizers out of paper plates. (This could easily be done with cardboard too.) I cut a butterfly shape or v-shaped notches in a paper plate and wrapped an entire strand of embroidery floss around each organizer. I did not want to deal with untangling floss all day. The DIY floss organizers worked perfectly. These little organizers also helped with crowd control. I had 4 of these ready to go and set one up on each side of the board.
Step 5- String
We used embroidery floss, but twine, yarn, thread, any thinner string like material would work. I mean how cute is Spiderman working on string art? (All of the pictures below are from the Zachary Conley Photography.)
It was interesting to observe the different types of “stringers”. From my 8 hours of observation, there were 3 types of stringers:
- Orderly: Some kids preferred to string very orderly, see the red diagonal lines above the “2” in the bottom right corner of the picture?
- Crazy: Some kids (me!) are spider webber’s, and just zig the string in every direction.
- Borders: A few kids liked to loop the string around the border nails to make straight lines.

Are you ready for the finished string art project? Our collaborative string art ended up being color blocked almost in rainbow order! The red starts in the upper right hand corner, and then blends to orange and yellow. And then Green is in the lower right hand corner, and blends to blue, indigo and violet in the upper left hand corner. That was not the plan at all, just a happy little accident! Oh and tomorrow, I actually get to go to Q2’s office and be a part of presenting the art piece to the entire company!
 Have you ever done a collaborative art project or DIY string art? With Kids? Adults? I love how our finished peice turned out! I mean what an awesome idea for a fundraiser, right?!

Comments & Reviews
This looks awesome. I would love to do this with my class at the beginning of the year for our room number. This may be a stupid question but how do they tie off the string so it doesn’t unravel? Thank you.
What an honor to have your art piece so showcased and so much fun to do it with all those kiddos. I love string art and this one is amazing. Thank you for sharing it with Share It One More Time. Cathy
Great way to use up leftover string and yarn!
This looks amazing, I have saved so many photos of the string art as I am dying to try it out myself. this looks great, tank you for sharing and joining our Oh My Heartsie Girl Wordless Wednesday Link Party.. Have a great day, co-host Evija @Fromevijawithlove x
This would be a great summertime activity that will definitely relieve boredom! Amazingly cool.
how fun and exciting to participate!! love how the colors turned out. Not sure what type of stringer I would be but now I have to try to find out 🙂
This looks awesome! Thanks for sharing #bloggersbrag
This would be a really neat family project. Love it because you could even do your last name as the focal or just the first letter. This is really neat.
Carole
It would be really fun as a family project with a short last name or a giant monogram letter!