Note 1: Baby D is still chillin’ in my belly! I did acupuncture yesterday in attempt to naturally induce labor. I’ll keep y’all updated!
Note 2: The Home Depot partnered with bloggers such as me for their Building Better Baths program. As part of this program, I received compensation for my time. They did not tell me what to purchase or what to say about any product mentioned in these posts.
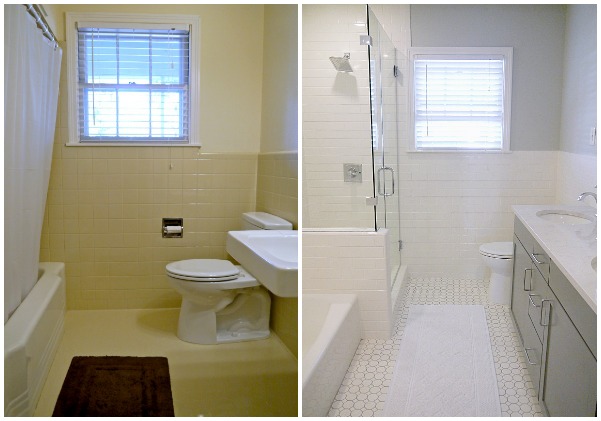
This is hands down the most exciting remodel we’ve ever done! Although, it was also by far the most expensive, ha! We completely gutted the bathroom and started fresh. And when I say “we”, I don’t just mean Andy and I. We had help, folks! We paid people to do lots of things except tile, paint, and install hardware. (And we even had help tiling.) Now, I do have to give myself a gold star for the bathroom pretty factor, Andy and I picked everything out and definitely did it on a budget. Almost everything we bought was in stock at our local Home Depot. (Minus the cabinet, counter, glass shower enclosure, and a few accessories.) I added a source list at the bottom of the post. Let’s get to the good stuff, shall we? Here she is y’all, our new bathroom!
If you’re new here, check out all of the bathroom remodel posts:
- Part 1 (Before pictures and original plan)
- Part 2 (Choosing fixtures)
- Part 3 (Demolition tips)
- Part 4 (Embracing change)
- Part 5 (Tiling tips)
Don’t mind the orange-ish wooden door, we’ll re-paint all of the hallway doors one of these days.
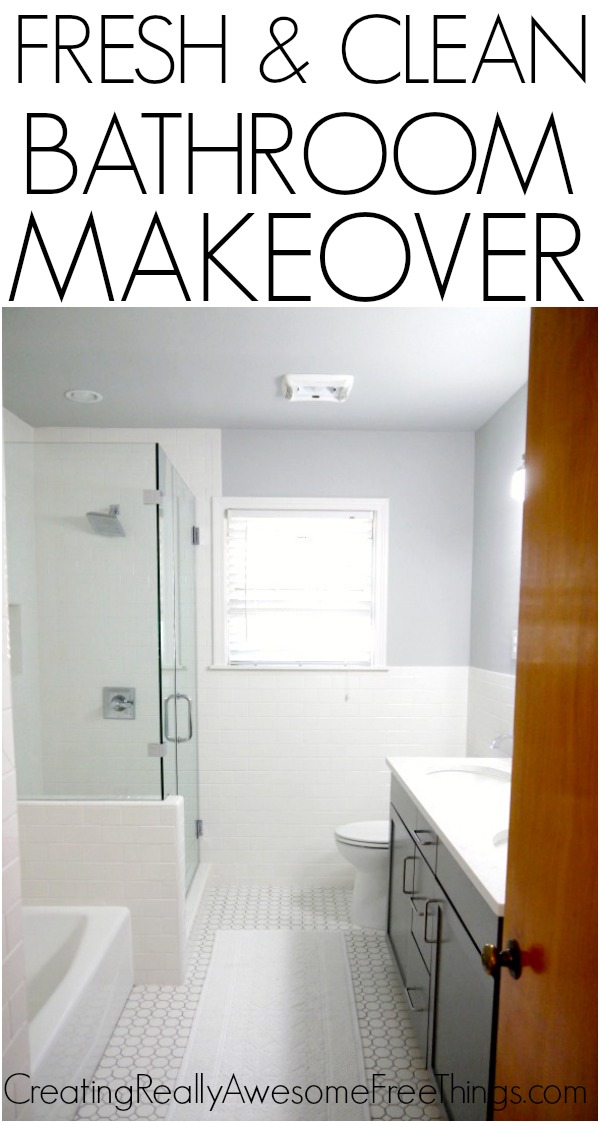
It’s so nice to have a separate shower. I’m really happy we decided to get rid of the vanity and move the master closet wall back 6 inches to make room for this sucker. (More on embracing change/ bathroom drama here.) 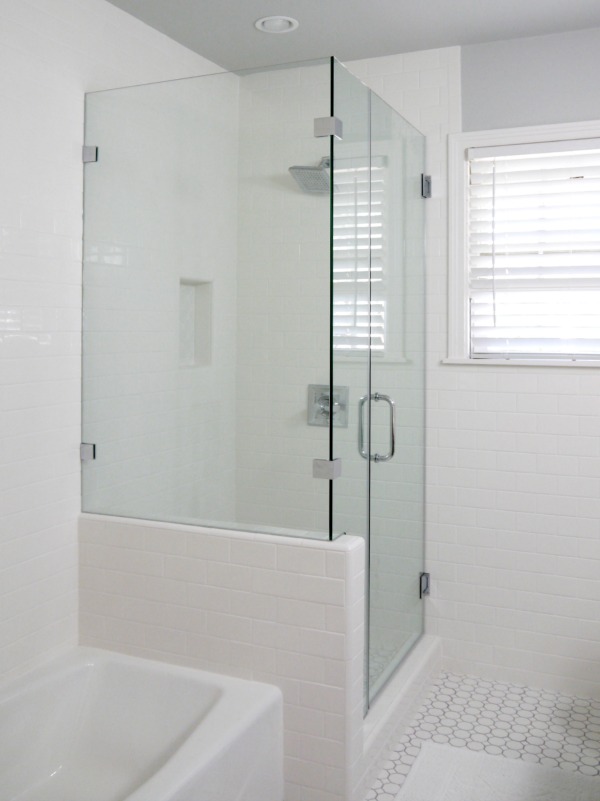
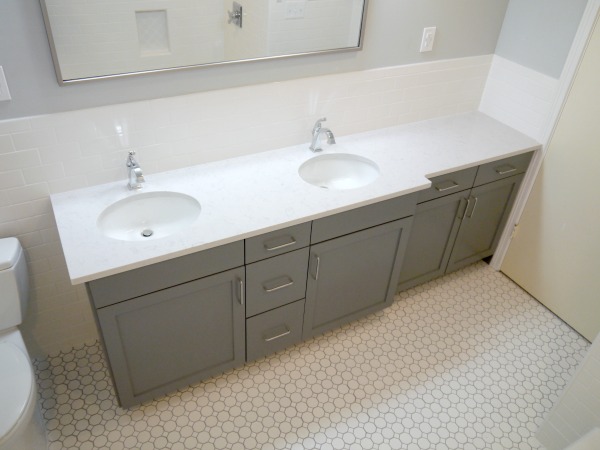
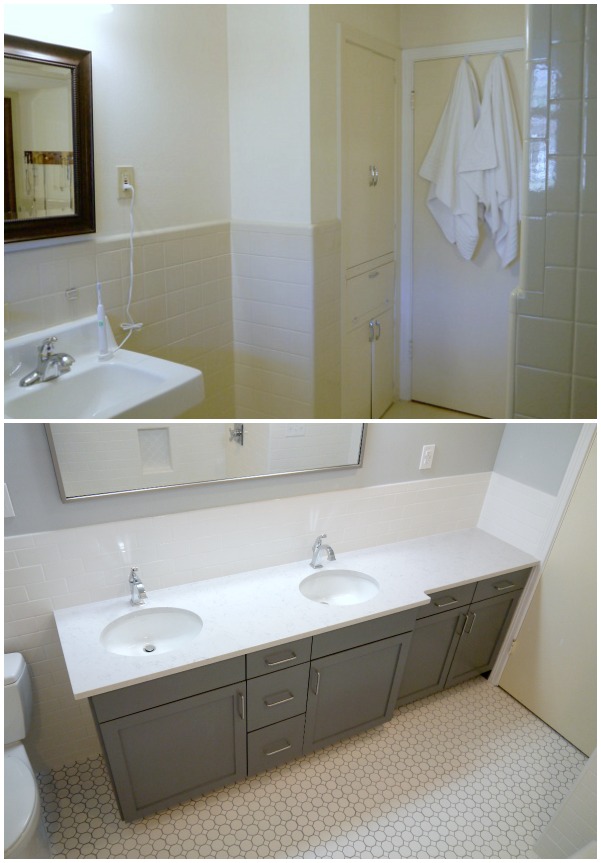
New everything! Ahh! So fray-shhhh and clean. And 2 sinks and counters and drawers. Awww, I love it!

A few fun close ups… Andy is obsessed with the outlets we got, they have night lights built in! I must say, they do come in pretty handy for middle of the night bathroom runs. And we really like our one handle faucets too. I’m all about less to clean around. Which is also why we went with under mount sinks. As pretty as sinks like these are in the pictures, we decided to go with practical.
 So, here is why the cabinet had to be custom built. To fully utilize all of the space, the last few feet of the cabinet had to only be 18 inches deep to make room for the door. If you go back up and look at the very first pic, you can see where the door fits perfectly into the cabinet. Sinks need a minimum of 21 in counter depth. We debated not adding the last part of the counter, but I’m happy we did it! More storage and counter space is always better.
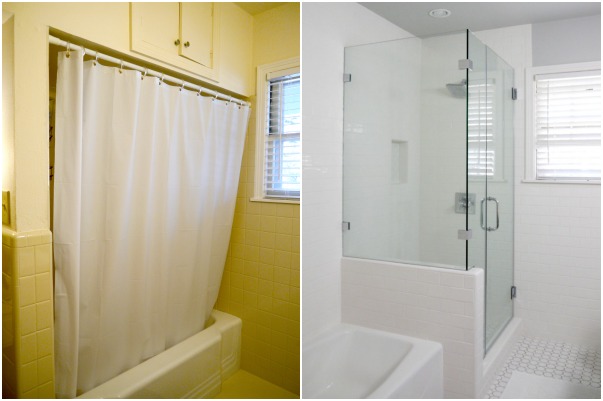
I still need to do a little accessorizing. I like to have a few things on the counter, but at the moment I’m thoroughly enjoying the clean, bright, no clutter look! Maybe a window treatment? Maybe not? But, for now I’m over the moon happy about the transformation! Remember this ridiculous, un-usable overhead storage… tearing that down makes the whole room look so. much. bigger. And brighter! Check out this before and after after:
Here’s another fun side by side. I love how the cabinet hides most of the toilet, and how much more useable storage we have now!
And one last before and after… This one is looking back at the old storage cabinet.
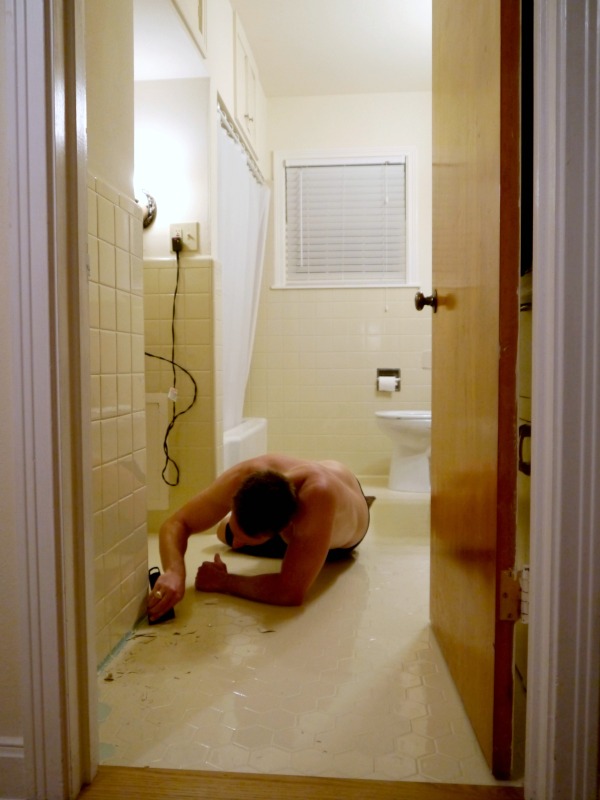
Here’s one more fun pic of Andy when we were seriously considering scraping the beige paint off of all of the tiles, ha!
We kind of love it, but we’re certainly a little bias! There is absolutely nothing we miss from our old bathroom! It was not headache free, but totally worth it in the end!
Source list:
- Sinks: Kohler Caxton
- Sink faucets: Delta Dryden in chrome
- Shower and bathtub fixtures: Delta Dryden fixtures in chrome
- Bathtub: Cast iron Kohler
- Vanity lights: Our our by Hampton Bay in polished nickel (Similar ones here)
- Cabinet: Custom made to fit our awkward space
- Counter top: Lagoon Silestone remnant from a local stone store
- Floor tile: Daltile matte white
- Wall tile: Daltile 3 x 6 in tile
- Floor grout: Delorean grey
- Paint color: Leftover (accidental custom color) paint from living room
- Glass shower surround and hardware: Local glass installation company
- Mirror above cabinet: West Elm Metal landscape mirror
- Bath mats: World Market white large woven mat
- Cabinet handles: Ikea Attest handles
Have you done any big makeovers lately? Have you ever done a bathroom makeover? This really makes up want to re do our other bathroom! (It’s so small it’s almost impossible to take pictures of it, ha!)

Comments & Reviews
your bathroom looks fabulous!! It’s so bright and clean.
The bathroom turned out very nice. I like the colors. you did an amazing job!
Just finished reading your bathroom remodel blog from start to finish! Looks great. Thank you for documenting the process, my husband and I are considering re-doing our main bath. Your blog was eye-opening as to many other details we haven’t even considered. Thanks for posting!! Cheers
Absolutely inspirational! We are getting ready to re-do our master bathroom soon. We really love the freestanding shower and are looking forward to the open clear look of the glass. Hope you’ll come visit me on my facebook page and give me some advise. You are amazing!
Great write ups Thank you.
Looks great!! Way to go on the renovation!
Love it!
Oh wow, it looks awesome! I’m a big white-lover recently so it definitely fits my taste 🙂 And yes I’ve done a major renovation lately…we remodeled the entire apartment and it was also not headache free haha I totally understand your points! I’m so glad it’s over! 🙂 There are a few pictures of how it looks like, but we are still in the process of putting all the details together. Here is a link if you want to have a look http://www.passionshake.blogspot.com/search/label/My%20home
Happy new week!
I just saw a tip that doesn’t work for me, since I don’t have a glass shower, but you’d love it. Spray that shower glass with RAIN-X to keep down the number of drops that dry on the glass after each shower, and keeping it cleaner!
It looks so fantastic. You guys worked so hard, and it’s gorgeous!
Bathroom looks so fabulous, congrats! Love the action shot of Andy scraping,too;)
LOVE IT!!!! it is such an amazing transformation!
Thank you, Colleen!
Congrats!! This looks AMAZING! Thanks for the inspiration and for posting.