Mila is one! She is actually almost 14 months, but mama is a little behind, as per usual. I love how her monthly baby pictures turned out! It was simple, easy, and only required a Sharpie marker, a roll of white paper, and a little patience. Oh and all of the pictures were taken on my iPhone. You don’t need a fancy camera! If you are new here, here’s Mila’s gender reveal party, natural birth story, and Max and Mila’s shared nursery!
How sweet are all of the monthly pictures together?

11 Tips for Taking Monthly Baby Pictures
Psst… there are affiliate links in this post.
1. What you need to take monthly baby pictures
- A roll of white paper
- Sharpie marker
- A phone camera
Make sure that the roll of white paper is wide enough. The width of the paper needs to be at least 30 inches to ensure that baby has enough room to wiggle and there is still white space around her. Here’s a perfect roll of white paper from Amazon. I used a black Sharpie marker to write the months. Oh and I use my iPhone camera, but seriously any phone camera will work!
2. Hand write the months
I always think your handwriting is the best! I promise. It makes it more personal and special. I swear you can make anyones handwriting looks good by thickening up the lines with a Sharpie! If you really hate your handwriting you could consider using a stencil, but that takes longer and who has time for that when caring for tiny humans.
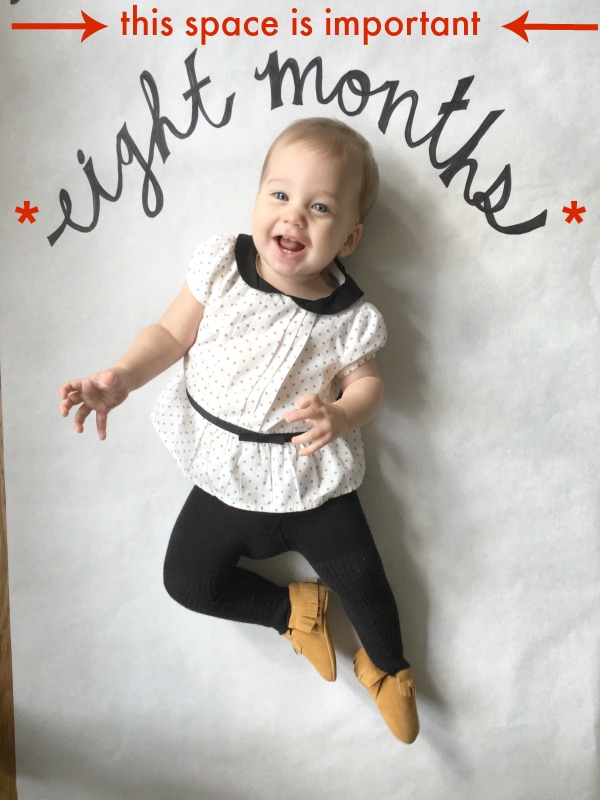
3. Keep at least 4 inches of white space at the top
Keep at least 4 inches of white space above the words and a few inches of white space on all edges. You’ll need this space for wiggle room when editing. Here is an unedited eight month picture. I had to rotate the picture to make sure the wood floor wasn’t showing and the white space made the edit possible.
4. Turn the grid on on your camera
I like to line the top line of the grid up with the top of the paper. You might only have a few seconds to get a good picture, so you gotta be on top of things! To turn on the grid on on your iPhone, go to the Settings app, scroll down to Photos & Camera, and make sure the Grid option is turned on.
5. Burst mode is your friend
Burst mode allows you to take 10 pictures in one second! This is golden in the world of wiggly, unpredictable babies! To use burst mode, hold down the shutter button for half a second or longer, and the iPhone will start taking photos one after another. I try to get at least 3 good burst shots per photo session. I’m not lying when I tell you these monthly photo sessions take about 4 minutes!
6. Pictures after nap time
Or whenever your baby is happiest. Mila is always happiest right when she wakes up from a nap so we always did the monthly picture then. The point it is, plan to take the monthly picture whenever your baby is happiest. Which leads me to my next tip…
7. Keep the shoot to 5 minutes or less
With Mila, I would get the roll of white paper out and do cursive writing while she was asleep. That way when she woke up, I could change her diaper, change her into her picture outfit and do the quick shoot!
8. Don’t be scared of props
As your baby gets older, the monthly photo gets harder! Mila has something in her hands in month 10- onw year. Consider using props that represent the month, like the New Years Eve noise maker for Mila’s 10 month picture. Crayons and board books are always a winner. And the cookie for her one year shoot was realyl fun! To be honest, she hated the cookie, but liked holding it! For Maxwell’s monthly photoshoot I let him hold a toothbrush, blocks, and even a tambourine!
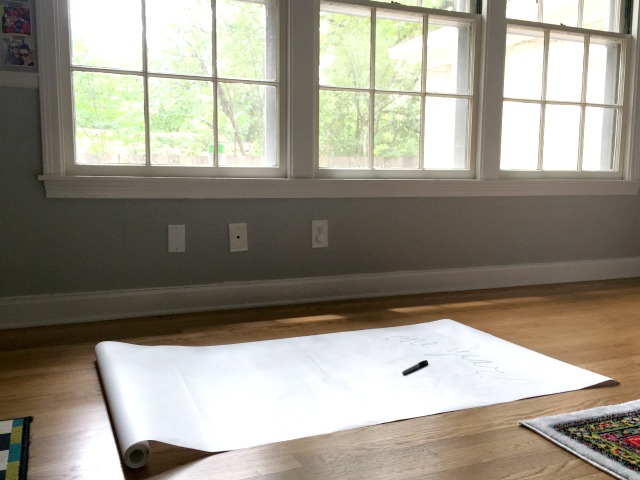
9. Natural light
This is huge! Set up the white paper under the biggest window in your home and also consider what time of day the light is best. I take all of our monthly pictures under a large south facing window. Play with different windows in your house and even try facing the roll of paper in different directions under the same window. If you notice, her shadow is to the right in most of the monthly pictures. Here’s my set up:
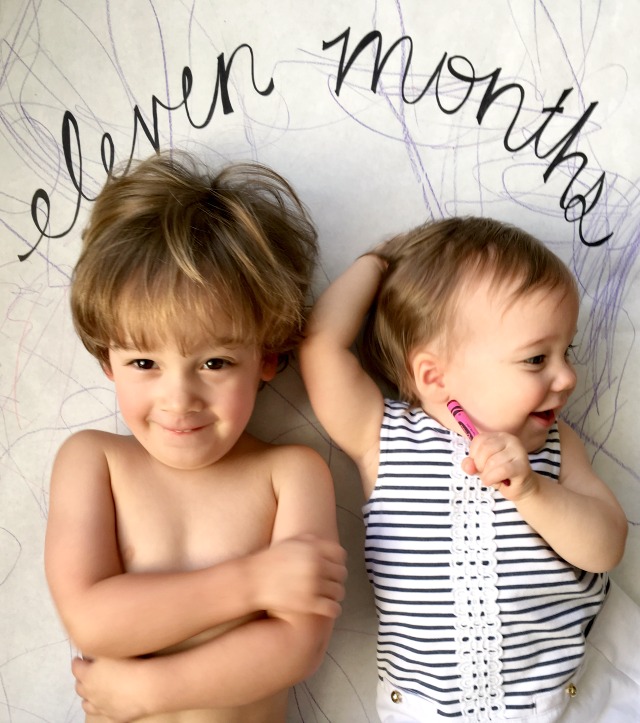
10. Be Flexible
If siblings want to participate, let them! If someone wants to color all over the white roll, who cares! Don’t stress yourself out, just let it happen. Oh and if you’re a few days or weeks late, don’t fret. The 11 month photo shoot started off on a terrible note, but ended up being one of my favorites!
11. Edit the pictures
I always edit a few of my favorites from a monthly photo session. I edit the picture right on my phone with an app called Afterlight. But, you can certainly just use the iPhone’s editing tools too. Typically, you’ll need to rotate the image to make the “eleven months” be in the center and possibly brighten, highlight, or up the contrast to make the picture look its best!
Did you take monthly baby pictures of your little ones? I’d love to hear… Oh and if you are looking for more monthly baby picture ideas, don’s miss:

Comments & Reviews
These are adorable! Such good tips too! For my son’s monthly pictures, I played off his name “Gentry” by adding some gentleman type props to his pictures. I posted them here: http://www.thesentimentalmama.com/monthly-baby-photos-tips-tricks/
Thanks for sharing, he is ADORABLE!!!
Nice idea! Do you think a 2 ft wide paper will work just fine?
I think you can make it work, but the wider the easier 😉